Cultivating Tamarind’s Promise: Your Step-by-Step Guide to Germinating Seeds
There’s a unique joy in growing your own food or nurturing a beautiful plant from a tiny seed. If you’ve ever savored the tangy sweetness of tamarind or admired its graceful foliage, you might be surprised to learn that cultivating this tropical delight in your own garden is entirely possible, starting right from the seed!
Tamarind (Tamarindus indica) is not just a source of delicious fruit used in cuisines worldwide; it can also grow into a lovely ornamental tree, or even a charming bonsai. Imagine harvesting your own pods or simply enjoying its shade and beauty. This guide will walk you through the easy steps to germinate tamarind seeds, setting you on the path to a thriving tamarind plant.
Why Grow Tamarind?
Beyond its culinary uses (think chutneys, drinks, and curries), the tamarind tree is a beautiful addition to any garden. It’s drought-tolerant once established and can provide welcome shade in warmer climates. For those with smaller spaces, it can even be trained as a striking bonsai, as seen in many garden enthusiast collections.
Sourcing and Preparing Your Tamarind Seeds
The first step to successful germination is selecting good quality seeds. You can typically find tamarind pods at Asian or international markets. Choose ripe, firm pods. Once you open them, you’ll find the dark brown seeds encased in a sticky pulp.
To prepare your seeds:
- Extract the Seeds: Carefully remove the seeds from the pulp. You might need to soak the pods in warm water for a short while to soften the pulp and make extraction easier.
- Clean the Seeds: Gently scrub any remaining pulp off the seeds under running water. This prevents mold growth during germination.
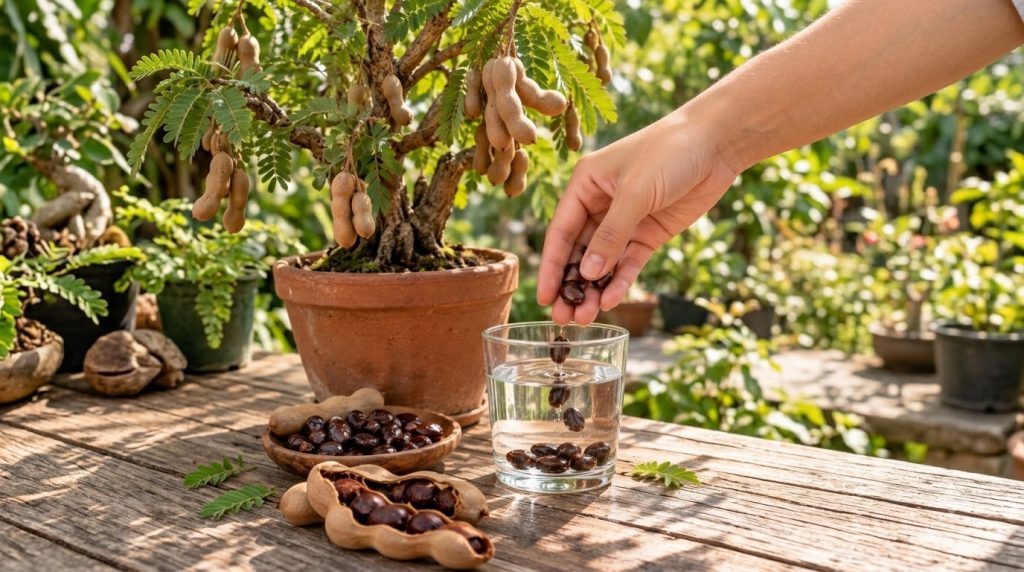
- Check for Viability: A simple test is to place the seeds in a glass of water. Viable seeds will sink to the bottom, while non-viable ones will float. Discard any floaters.
The Germination Process: Step-by-Step
Patience is a virtue in gardening, but with tamarind seeds, you’ll often see results sooner than you think! Here’s how to do it:
1. Scarification and Soaking
Tamarind seeds have a tough outer coat, which can inhibit germination. To help them along, we use a process called scarification.
- Scarification: Gently nick the hard outer shell of each seed with a nail clipper, file, or sandpaper. Be careful not to damage the inner embryo. This helps water penetrate the seed.
- Soaking: After scarification, soak the seeds in warm water for 24-48 hours. This further softens the seed coat and kick-starts the germination process. You’ll notice the seeds swelling slightly.
2. Preparing Your Planting Medium
While the seeds are soaking, prepare your planting pots or trays. Choose a well-draining potting mix. A good blend would be equal parts potting soil, perlite, and sand. Tamarind prefers slightly acidic to neutral soil.
3. Planting the Seeds
After soaking, your seeds are ready for planting!
- Depth: Plant each seed about ½ to 1 inch deep in your prepared potting mix.
- Spacing: If using a tray, space them a few inches apart. If using individual pots, plant one seed per small pot (around 4-6 inches in diameter).
- Watering: Water thoroughly after planting, ensuring the soil is moist but not waterlogged.
4. Providing the Right Environment
Tamarind is a tropical plant, so warmth and humidity are key:
- Temperature: Keep the pots in a warm location, ideally between 70-85°F (21-29°C). A sunny windowsill or a heated propagator works well.
- Moisture: Keep the soil consistently moist. You can cover the pots with plastic wrap or a clear dome to create a mini-greenhouse effect, which helps retain humidity. Just remember to vent it occasionally to prevent mold.
- Light: Provide plenty of indirect sunlight.
Caring for Your Tamarind Seedlings
Germination can occur anywhere from 1 to 4 weeks, sometimes even longer, so don’t lose hope!
- Initial Care: Once seedlings emerge, gradually remove the plastic cover. Ensure they get at least 6-8 hours of bright, indirect light daily.
- Watering: Continue to keep the soil consistently moist.
- Transplanting: When your seedlings have developed a few sets of true leaves and are about 4-6 inches tall, they can be carefully transplanted into larger pots or directly into your garden if you live in a warm climate.
Enjoying Your Growing Tamarind
Growing tamarind from seed is a rewarding experience. With a little care and patience, you’ll soon have a thriving plant that can eventually bear fruit or simply provide beauty to your space. Remember, gardening is a journey, and every seed holds a promise. Happy planting!