Are you tired of cluttered cabinets filled with expensive, harsh cleaning products? Do you dream of a sparkling home without the worry of exposing your family and pets to strong chemicals? You’re not alone! Many homeowners are looking for simpler, greener, and more budget-friendly ways to keep their living spaces pristine.
The good news is that creating your own effective cleaning solutions is easier than you might think. With just a few common household ingredients, you can whip up powerful cleaners that tackle everyday grime, grease, and odors, leaving your home fresh and clean.
This comprehensive guide is designed for anyone eager to embrace a more natural approach to home care, whether you’re a seasoned DIY enthusiast or just beginning your journey into homemade solutions. We’ll walk you through making a versatile DIY all-purpose cleaner that’s perfect for most surfaces in your home, saving you money and giving you peace of mind.
Get ready to transform your cleaning routine, one precise pour at a time, and discover the joy of an easy, eco-friendly cleanup that truly works!
Quick Summary
- Preparation Time: 5 minutes
- Application Time: Varies by task
- Difficulty Level: Easy
- Best Uses: Daily cleaning of kitchen counters, bathroom sinks, tables, and light spills.
- Suitable Surfaces: Sealed countertops (laminate, quartz), stainless steel, ceramic tiles, porcelain, glass, chrome.
- Storage Time: Up to 2 weeks.
Why You’ll Love This DIY Solution
- Easy to make with minimal effort.
- Budget-friendly, using ingredients you likely already have.
- Uses common household ingredients, reducing chemical exposure.
- Beginner-friendly, perfect for those new to DIY cleaning.
- Multipurpose, tackling various cleaning tasks around your home.
- Quick to prepare, saving you time for other activities.
- Eco-friendly, minimizing plastic waste from store-bought bottles.
- Adjustable scent with your favorite essential oils.
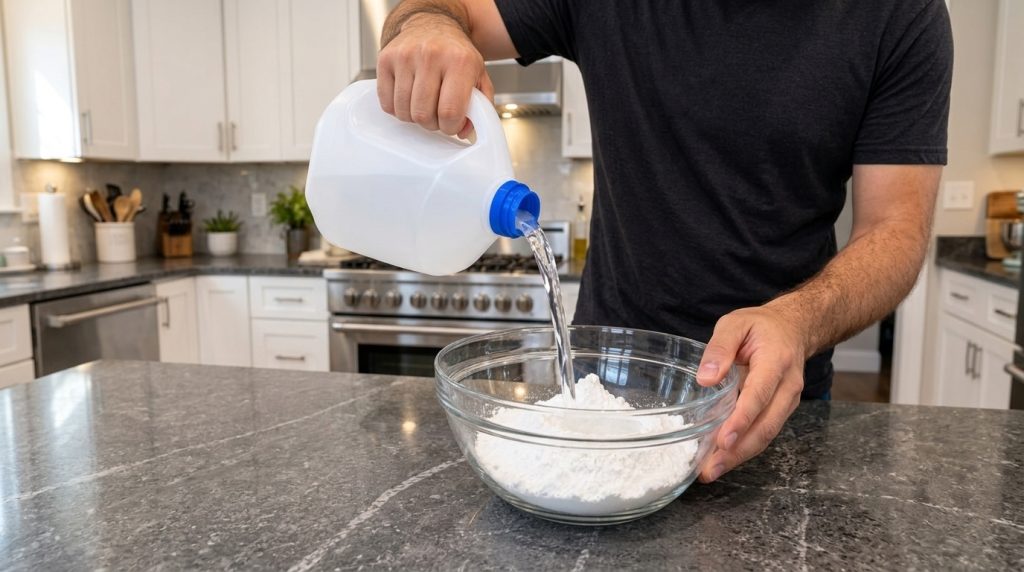
Ingredients / Materials
- 1 cup white vinegar
- 1 cup warm water (distilled or filtered is best to prevent mineral buildup)
- 1 tablespoon baking soda
- 10-15 drops of essential oil (optional, e.g., lemon, tea tree, lavender for scent and added cleaning power)
Equipment Needed
- 16-ounce spray bottle (clean and empty)
- Measuring cups and spoons
- Small mixing bowl
- Funnel (optional, but highly recommended for easy transfer)
- Microfiber cloths or clean rags
- Gloves (optional, for sensitive skin)
Step-by-Step Instructions
Follow these simple steps to create your very own versatile all-purpose cleaner:
- Gather Your Supplies (1 minute): Lay out all your ingredients and equipment on a clean surface. Having everything at hand will make the mixing process smooth and quick.
- Prepare the Water and Baking Soda (1 minute): In your small mixing bowl, dissolve the baking soda in the warm water. Stir gently until the baking soda is mostly dissolved. This step helps ensure a smoother solution without gritty residue.
- Slowly Add Vinegar (1 minute): Slowly pour the white vinegar into the water and baking soda mixture. You’ll notice a fizzing reaction when the vinegar and baking soda combine. This is completely normal and indicates the ingredients are activating. Pouring slowly minimizes excessive bubbling.
- Add Essential Oils (30 seconds): If using, add your chosen essential oils to the mixture. Stir gently to incorporate them. The essential oils will add a pleasant fragrance and can boost the cleaner’s antimicrobial properties.
- Transfer to Spray Bottle (1 minute): Carefully pour the mixture into your clean spray bottle using a funnel. Ensure the cap is securely fastened.
- Shake Well Before Use (15 seconds): Give the bottle a good shake before each use to ensure the ingredients are well mixed. The solution might separate slightly over time, which is natural.
Best Uses
This DIY all-purpose cleaner is incredibly versatile and can be used on a variety of surfaces throughout your home:
- Kitchen Counters: Safely clean and sanitize laminate, quartz, and solid surface countertops. Avoid using on unsealed granite, marble, or porous stone due to the vinegar’s acidity.
- Bathroom Sinks and Faucets: Remove water spots, soap scum, and light grime from porcelain, ceramic, and chrome fixtures.
- Stovetops and Appliance Exteriors: Wipe down glass stovetops (when cool), refrigerator doors, and microwave exteriors for a streak-free shine.
- Glass and Mirrors: For light cleaning, spray and wipe with a clean microfiber cloth for a streak-free finish. For tougher glass grime, you might need a dedicated glass cleaner.
- Floors: Spot clean spills on tile or linoleum floors. Do not use on hardwood, as vinegar can dull the finish over time.
- Tiles and Grout: Refresh ceramic tiles and lightly soiled grout lines. For heavy grout cleaning, a paste might be more effective.
Always perform a patch test on an inconspicuous area before applying the cleaner to an entire surface, especially on new or sensitive materials.
Safety Notes
While this DIY cleaner uses natural ingredients, it’s still important to follow safety precautions:
- Ventilation is Key: Ensure good ventilation in the area you are cleaning, especially in enclosed spaces like bathrooms.
- Test First: Always test the cleaner on a small, hidden area of the surface before full application to ensure no discoloration or damage occurs.
- Keep Out of Reach: Store the cleaner away from children and pets, just like you would with any other cleaning product.
- Avoid Mixing: Never mix this solution with store-bought cleaners, especially those containing bleach or ammonia. Mixing vinegar with bleach creates toxic chlorine gas.
- Eye and Skin Contact: Avoid direct contact with eyes. If contact occurs, rinse thoroughly with water. If you have sensitive skin, wearing gloves is advisable.
Expert Tips
- Boost Cleaning Power: For tougher grease spots, sprinkle a little extra baking soda directly on the area, spray with the solution, let it sit for 5-10 minutes, then scrub and wipe clean.
- Adjust Scent: Experiment with different essential oils like eucalyptus for an invigorating scent, or tea tree oil for enhanced antimicrobial properties. Always ensure essential oils are safe for your household members and pets.
- Warm Water Advantage: Using warm water (not hot) helps dissolve baking soda more effectively and can boost cleaning action on greasy surfaces.
- Label Your Bottles: Clearly label your spray bottle with the contents (e.g., “DIY All-Purpose Cleaner”) and the date it was made.
- Microfiber is Your Friend: Always use a clean microfiber cloth for wiping to get the best streak-free results and to avoid spreading grime.
- Consistency is Key: For a deeper clean on shower walls or stubborn soap scum, you can make a thicker paste by reducing the water and increasing baking soda, then applying it with a sponge.
Storage Instructions
Proper storage is crucial to maintain the effectiveness of your homemade cleaning solution:
- Container: Store your DIY all-purpose cleaner in a clean, opaque spray bottle. Dark glass bottles are ideal for essential oil-infused solutions as they protect the oils from light degradation, but a dark plastic spray bottle works well too.
- Location: Keep the bottle in a cool, dark place, away from direct sunlight or extreme temperatures. A pantry, under the sink, or a utility closet are good options.
- Shelf Life: This solution is best used within two weeks. While vinegar and essential oils are natural preservatives, the water component can eventually lead to bacterial growth over a longer period.
- Signs of Spoilance: If you notice any changes in color, a foul odor, or visible mold growth, it’s time to discard the solution and make a fresh batch. It’s always better to be safe than sorry when it comes to cleaning solutions.
Frequently Asked Questions
Can I use this DIY all-purpose cleaner on all surfaces?
No, it’s best to avoid using this vinegar-based cleaner on unsealed natural stone (like granite, marble, or travertine), cast iron, unsealed grout, and hardwood floors, as the acidity can cause damage, etching, or dulling over time. Always test in an inconspicuous area first.
How long does the homemade cleaner last?
For optimal effectiveness and freshness, it’s recommended to use this DIY all-purpose cleaner within two weeks. The presence of water can encourage bacterial growth over extended periods.
Is this cleaner safe to use around pets and children?
While the ingredients are generally considered safe for household use, it’s always best to keep all cleaning products, homemade or otherwise, out of reach of children and pets. Ensure surfaces are dry before allowing pets or children to come into contact.
Can I omit the essential oils?
Absolutely! The essential oils are primarily for fragrance and offer some minor additional cleaning benefits. If you prefer an unscented cleaner or have sensitivities, you can leave them out without impacting the cleaning power of the vinegar and baking soda.
Why does the solution fizz when I mix the ingredients?
The fizzing reaction occurs when baking soda (a base) mixes with white vinegar (an acid). This chemical reaction produces carbon dioxide gas, which can help lift dirt and grime. It’s a normal and beneficial part of making this cleaner!
Can I use lemon juice instead of vinegar?
While lemon juice is acidic and has cleaning properties, white vinegar is generally preferred for all-purpose cleaners due to its stronger acetic acid content, which is more effective at cutting grease and killing bacteria, and its more neutral color.
Conclusion
There you have it – a simple yet powerful recipe for a DIY all-purpose cleaner that can revolutionize your approach to home cleaning. By harnessing the natural cleaning power of white vinegar and baking soda, you can achieve a sparkling clean home without relying on harsh chemicals or breaking the bank.
Embrace the satisfaction of knowing exactly what goes into your cleaning products and enjoy the fresh, clean scent (or lack thereof, if you prefer!) that comes with natural solutions. Remember to always prioritize safety, test new surfaces, and store your concoction properly. Give this DIY cleaner a try today and experience the precise pour to an easy cleanup!