There’s nothing quite like the feeling of fresh, clean sneakers. But let’s be honest, life happens! Whether it’s a muddy trail, an accidental coffee spill, or just everyday wear and tear, our beloved white sneakers often bear the brunt of our adventures. Before you toss those dingy shoes aside or spend a fortune on specialty cleaners, what if we told you that sparkling clean sneakers are just a few common household ingredients away?
Cleaning dirty sneakers can feel like a daunting task, especially when stubborn dirt and grime seem determined to stay put. Many store-bought cleaners contain harsh chemicals that can be tough on both your shoes and the environment. This guide offers a fantastic alternative: a homemade DIY sneaker cleaner that’s not only incredibly effective but also gentle and budget-friendly.
This comprehensive guide is perfect for anyone looking to restore their favorite white sneakers to their former glory. Whether you’re a sneakerhead, a busy parent, or just someone who loves the crisp look of clean footwear, you’ll find everything you need here. We’ll walk you through a simple, step-by-step process using ingredients you likely already have on hand, ensuring your kicks look fresh and ready for anything.
Get ready to uncover the secrets to tackling even the toughest stains and bringing that brilliant white back. You’ll learn how to mix the perfect solution, apply it safely, and maintain your sneakers so they stay cleaner for longer. Let’s transform those muddy shoes into bright, sparkling wonders again!
Quick Summary
- Preparation Time: 5 minutes
- Application Time: 10-15 minutes per pair
- Difficulty Level: Easy
- Best Uses: Removing dirt, mud, grass stains, and scuff marks from white sneakers.
- Suitable Surfaces: Canvas, mesh, synthetic leather, rubber soles. (Always test a small area first!)
- Storage Time: Not recommended to store the mixed paste; prepare fresh each time.
Why You’ll Love This DIY Solution
- Easy to make: Simple ingredients, straightforward steps.
- Budget-friendly: Uses common household items you probably already own.
- Effective Stain Removal: Tackles tough dirt, mud, and scuff marks.
- Gentle on Shoes: Avoids harsh chemicals that can damage delicate materials.
- Eco-friendly: Reduces the need for commercially produced cleaners.
- Versatile: Works on various white sneaker materials.
- Satisfying Results: Enjoy seeing your shoes transform from dingy to dazzling.
Ingredients / Materials
- 1 tablespoon baking soda
- 1/2 tablespoon hydrogen peroxide (3%)
- 1/2 tablespoon mild dish soap
- Small amount of water (as needed for rinsing)
Equipment Needed
- Small mixing bowl
- Old toothbrush or soft-bristled scrub brush
- Microfiber cloth or clean rag
- Small bowl of clean water for rinsing
- Gloves (optional, for sensitive skin)
Step-by-Step Instructions
-
Step 1: Prepare Your Sneakers (2 minutes)
First, remove the laces and any loose inserts (like insoles, if removable). Knock off any large chunks of mud or dirt from your sneakers using a dry brush or by gently tapping them together. This initial step makes the deep cleaning much easier.
-
Step 2: Mix Your Cleaning Paste (1 minute)
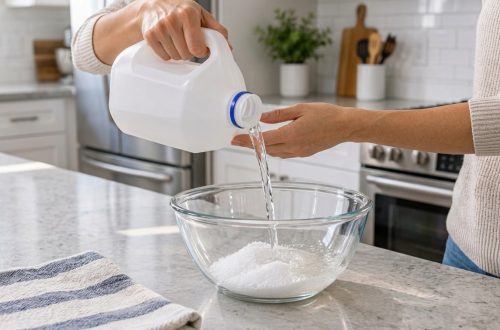
In your small mixing bowl, combine the baking soda, hydrogen peroxide, and mild dish soap. Stir well with the back of a spoon or a small spatula until you achieve a thick, consistent paste. It should be thick enough to cling to the brush without being too runny.
-
Step 3: Apply the Paste (5-7 minutes per shoe)
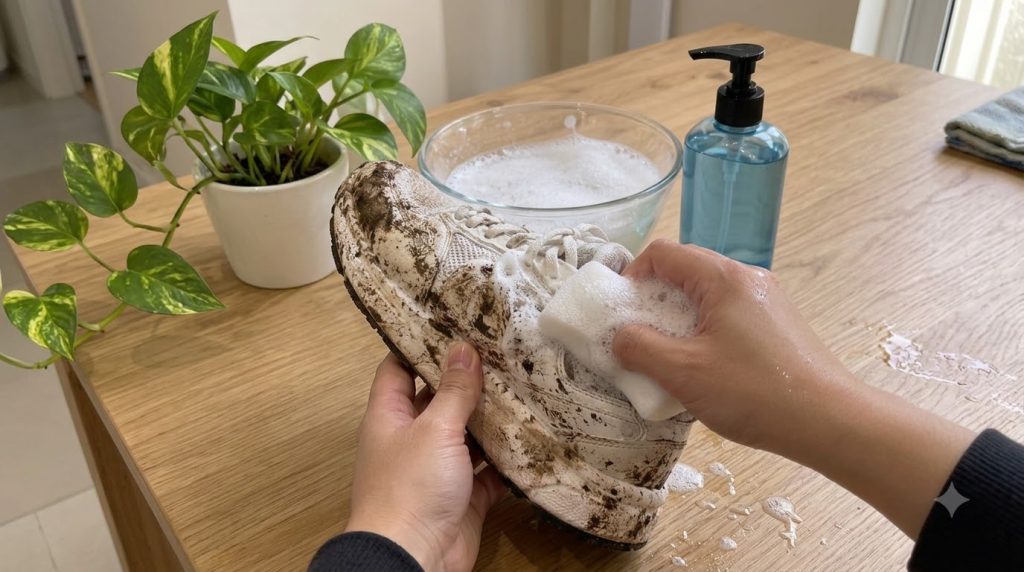
Dip your old toothbrush or scrub brush into the paste, picking up a generous amount. Apply the paste directly to the dirty areas of your sneakers, focusing on stubborn stains, the rubber soles, and any scuff marks. Use small, circular motions to gently scrub the fabric, working the paste into the dirt.
-
Step 4: Let It Sit (5-10 minutes)
Once you’ve thoroughly scrubbed all the dirty areas, allow the paste to sit on the sneakers for about 5 to 10 minutes. This gives the ingredients time to work their magic, breaking down the dirt and lifting stains.
-
Step 5: Rinse and Wipe (3-5 minutes per shoe)
After the paste has sat, dampen your microfiber cloth with clean water. Gently wipe away the paste from your sneakers, rinsing the cloth frequently in your bowl of clean water. Ensure you remove all residue. For any paste lodged in seams or textures, use your toothbrush and a bit of clean water to scrub it out.
-
Step 6: Air Dry (Several hours)
Once you’ve rinsed away all the paste, allow your sneakers to air dry completely. Place them in a well-ventilated area, away from direct sunlight or heat, which can sometimes yellow white fabrics. You can stuff them with paper towels to help absorb moisture and maintain their shape while drying.
-
Step 7: Clean Laces (Optional)
While your shoes dry, you can clean your laces by soaking them in a small bowl of the same cleaning solution for 15-20 minutes, then rinsing thoroughly and air drying.
Best Uses
- White Canvas Sneakers: Excellent for brightening canvas materials.
- Mesh Sneakers: Gently cleans mesh without damage.
- Synthetic Leather Sneakers: Effective on faux leather surfaces, removing scuffs and grime.
- Rubber Soles and Toe Caps: Powerfully cleans rubber elements, restoring their original white.
- Everyday Dirt and Grime: Perfect for routine cleaning to keep your shoes looking fresh.
- Stubborn Stains: Helps lift mud, grass, and light oil stains.
Surface Limitations: Avoid using this solution on delicate materials like genuine leather, suede, or nubuck, as the hydrogen peroxide and baking soda can be too abrasive or cause discoloration. Always perform a spot test on an inconspicuous area first, especially with colored accents on white shoes.
Safety Notes
- Patch Test: Always test the solution on a small, hidden area of your shoe first to ensure no discoloration or damage occurs, especially on colored parts.
- Ventilation: Work in a well-ventilated area to avoid inhaling any fumes, though the ingredients used here are generally mild.
- Eye Protection: Avoid contact with eyes. If contact occurs, rinse thoroughly with water.
- Skin Sensitivity: If you have sensitive skin, consider wearing gloves to prevent irritation from the cleaning agents.
- Keep Away from Children and Pets: Store all ingredients and cleaning solutions out of reach of children and pets.
- Do Not Ingest: This solution is for external cleaning purposes only and should not be ingested.
Expert Tips
- Use a Soft Brush: For delicate materials, opt for a softer brush, like an old toothbrush with extra-soft bristles, to avoid damaging the fabric.
- Don’t Over-Saturate: While cleaning, avoid overly saturating the fabric, especially on shoes with glued soles, as excessive moisture can weaken adhesives.
- Pre-Treat Tough Stains: For very stubborn spots, apply a small dab of the paste and let it sit for a few extra minutes before scrubbing.
- Clean Regularly: A quick clean after each wear can prevent dirt from setting in and make deep cleaning less frequent.
- Protect After Cleaning: Once dry, consider applying a sneaker protector spray to help repel water and stains in the future.
- Hydrogen Peroxide Strength: Only use 3% hydrogen peroxide, which is commonly found in drugstores. Higher concentrations can be too strong.
- Sunlight Boost: For extra brightening power on white shoes, after applying the paste, you can let them sit in direct sunlight for a short period (10-15 minutes) before rinsing. The sun’s UV rays can enhance the whitening effect of hydrogen peroxide.
- Alternative Scrubber: For rubber soles, a magic eraser can be a fantastic tool to remove scuffs and dirt before or after using the paste.
Storage Instructions
This DIY sneaker cleaner is best prepared fresh for each use. The mixture of baking soda and hydrogen peroxide can lose its potency over time, and the paste can dry out, making it less effective. Therefore, it is not recommended to store any leftover paste.
- Best Storage Container: None needed, as it’s a single-use mixture.
- Storage Location: Dispose of any unused paste responsibly after cleaning.
- Signs the solution should be discarded: If you happen to make extra, discard it after a few hours, as the chemical reaction will have diminished, making it ineffective.
Frequently Asked Questions
Can I store this cleaning solution for later use?
It’s best to prepare this paste fresh each time you clean your sneakers. The hydrogen peroxide and baking soda react, and the cleaning power diminishes over time if stored.
How long does it take for my sneakers to dry after cleaning?
Drying time can vary depending on humidity and ventilation, but typically it takes several hours, or even overnight, for sneakers to air dry completely.
Can I use this DIY cleaner on colored sneakers?
We advise caution when using this solution on colored sneakers, especially those with bright or dark dyes, as hydrogen peroxide can sometimes cause slight bleaching or lightening. Always do a patch test first.
Is this solution safe for all types of white sneaker materials?
This solution is generally safe for canvas, mesh, synthetic leather, and rubber. However, it is NOT recommended for genuine leather, suede, or nubuck, as these materials require specialized cleaning methods.
What if the stains are really stubborn?
For very stubborn stains, you might need to repeat the cleaning process, allowing the paste to sit for a longer duration (up to 30 minutes) or gently scrubbing with a bit more pressure.
Can I put my sneakers in the washing machine instead?
While some sneakers can be machine washed, this DIY paste offers a more targeted and often gentler approach, especially for shoes with delicate details or materials that might not hold up well in a machine cycle. Always check your shoe manufacturer’s recommendations.
Is hydrogen peroxide safe for my shoes?
When used in a diluted form (3% solution) and in the small quantities specified, hydrogen peroxide is generally safe for most white sneaker materials. It acts as a mild bleaching agent to brighten and remove stains. Always perform a patch test.
What can I use instead of hydrogen peroxide?
If you don’t have hydrogen peroxide, you can try substituting it with an equal amount of white vinegar. The cleaning paste will still be effective due to the baking soda and dish soap, but the whitening effect might be slightly less pronounced.
How often should I clean my sneakers?
It depends on how frequently you wear them and what activities you engage in. For everyday wear, a light cleaning every few weeks, with a deep clean as needed, is a good routine.
Conclusion
There you have it – your ultimate guide to bringing those white sneakers back to their dazzling best! Cleaning your shoes doesn’t have to be a chore or an expensive endeavor. With just a few simple, common household ingredients, you can effectively tackle dirt, grime, and stains, extending the life and look of your favorite footwear.
Remember to always test the solution on an inconspicuous area first, and prioritize safety by working in a well-ventilated space. Now, go ahead, gather your ingredients, and give this DIY sneaker cleaner a try. You’ll be amazed at the satisfying transformation and the renewed sparkle of your kicks. Happy cleaning!