Looking for a healthy, satisfying snack that’s easy to make and perfect for on-the-go? These Homemade Peanut Butter Banana Energy Balls are your new best friend! Packed with wholesome ingredients like rolled oats, creamy peanut butter, and natural banana sweetness, they offer a delightful chewiness and a burst of flavor in every bite. Whether you need a quick breakfast boost, a midday pick-me-up, or a pre-workout fuel, these no-bake energy bites are incredibly versatile and utterly delicious.
Forget store-bought snacks filled with questionable ingredients. With this simple recipe, you’ll be crafting your own wholesome bites in no time. They are naturally sweet, incredibly customizable, and a fantastic way to keep your energy levels steady throughout the day. Get ready to fall in love with these delightful, nutrient-rich energy balls!
Why You’ll Love This Homemade Energy Balls Recipe
- No-Bake & Easy: No oven required! Just mix, chill, and roll for a super simple snack solution.
- Wholesome Ingredients: Made with natural oats, fruit, and healthy fats, these balls are a nutritious choice.
- Kid-Friendly: A great way to sneak in some healthy ingredients for picky eaters, and fun for kids to help make!
- Perfect for Meal Prep: Make a big batch at the beginning of the week for quick access to healthy snacks.
- Customizable: Easily adapt the flavors and add-ins to suit your taste preferences.
- Satisfying & Energizing: The combination of fiber, protein, and healthy fats helps keep you full and energized.
Ingredients
Here’s what you’ll need to make these delicious homemade energy balls:
- 1 ½ cups (135 g) old-fashioned rolled oats
- ½ cup (120 g) creamy peanut butter (all-natural, no-stir preferred)
- ¼ cup (60 ml) honey or maple syrup
- 1 ripe medium banana, mashed (about ½ cup or 120 g)
- 2 tbsp (28 g) chia seeds
- 1 tsp vanilla extract
- ¼ tsp salt
- ½ cup (75 g) mini chocolate chips or chopped nuts (optional)
Ingredient Notes
- Old-Fashioned Rolled Oats: These provide the best texture and structure. Avoid instant oats, as they can make the balls too mushy.
- Peanut Butter: Use creamy, natural peanut butter for the best results. If using a very thick, stir-before-use natural peanut butter, you might need to slightly warm it to make it easier to mix. Other nut butters like almond or cashew butter work well too.
- Honey or Maple Syrup: Both are excellent natural sweeteners. Maple syrup is a great vegan option. Adjust the amount to your sweetness preference.
- Mashed Banana: Adds natural sweetness, moisture, and a lovely fruity flavor. Make sure it’s ripe for maximum sweetness and easy mashing.
- Chia Seeds: A fantastic source of fiber and omega-3s, they also help bind the ingredients together.
- Optional Add-ins: Mini chocolate chips add a touch of indulgence. Chopped nuts (like walnuts or pecans) enhance texture and provide healthy fats.
Equipment You’ll Need
- Large mixing bowl
- Spoon or rubber spatula
- Measuring cups and spoons
- Fork (for mashing banana)
- Baking sheet
- Parchment paper
How to Make Homemade Peanut Butter Banana Energy Balls
Follow these simple steps to create your own batch of delicious energy bites:
-
Prepare the Wet Ingredients
In a large mixing bowl, combine the creamy peanut butter, honey (or maple syrup), mashed ripe banana, and vanilla extract. Use a spoon or rubber spatula to mix thoroughly until the ingredients are well combined and smooth. Ensure there are no large lumps of banana remaining.
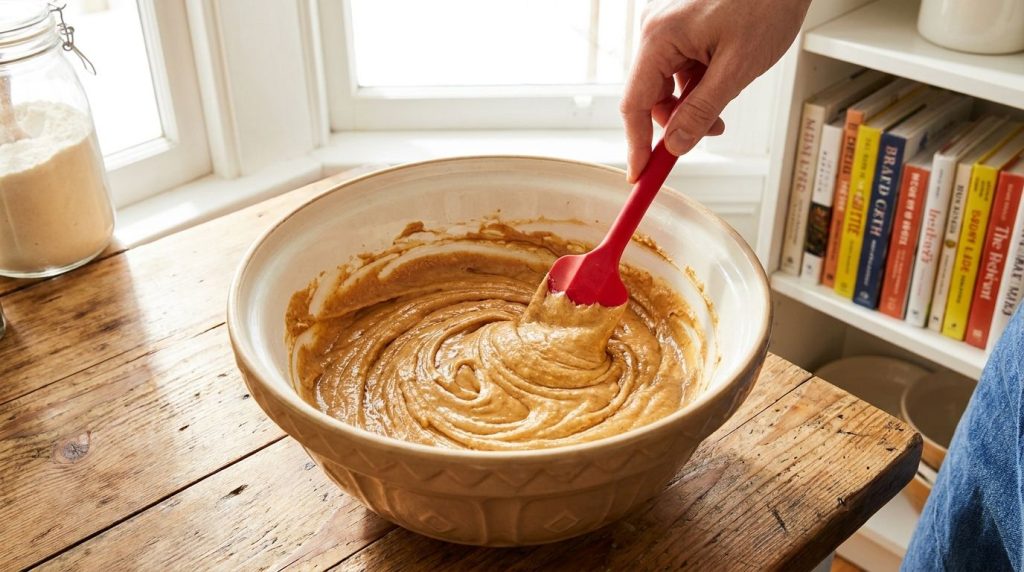
A large mixing bowl containing a creamy mixture of peanut butter honey mashed banana and vanilla extract being stirred w -
Add Dry Ingredients
To the wet mixture, add the rolled oats, chia seeds, and salt. Mix well, ensuring all the dry ingredients are fully incorporated into the wet mixture. You might need to use a bit of elbow grease to get everything evenly distributed. The mixture should be thick and slightly sticky.
-
Stir in Optional Add-ins
If you’re using mini chocolate chips or chopped nuts, gently fold them into the dough until they are evenly dispersed. This step adds extra flavor and texture to your energy balls.
-
Chill the Dough
Cover the mixing bowl with plastic wrap and refrigerate the dough for at least 30 minutes. Chilling is crucial as it helps the mixture firm up, making it much easier to roll into balls and preventing them from being too sticky.
-
Roll into Balls
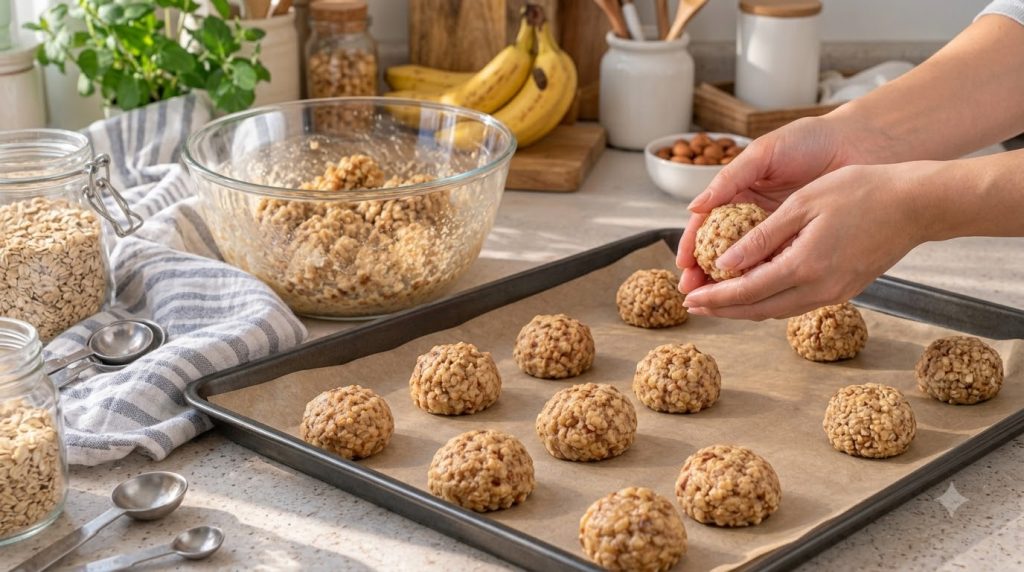
Line a baking sheet with parchment paper. Once the dough is chilled, scoop out about 1 tablespoon of the mixture for each ball. Roll the portion between your palms to form smooth, round balls. Repeat until all the dough is used. Aim for uniform size for even portioning.
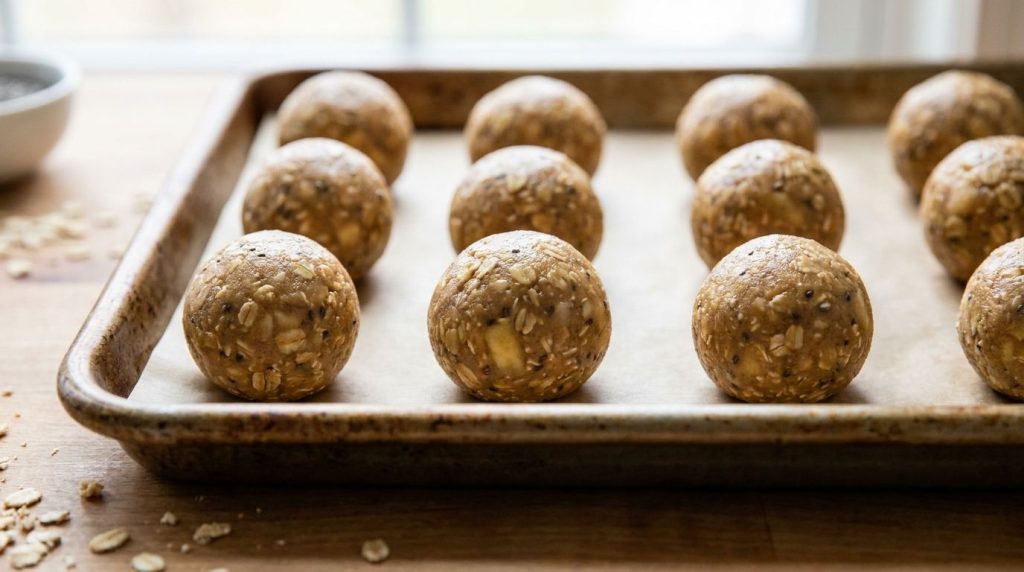
Close-up of several finished homemade peanut butter banana energy balls arranged neatly on a baking sheet lined with par -
Final Chill & Serve
Once all the balls are rolled, you can give them another quick chill in the refrigerator for about 10-15 minutes to help them set completely. Then, they are ready to serve and enjoy!
Pro Tips for the Best Results
- Use Ripe Bananas: Overripe bananas (with brown spots) are sweeter and easier to mash, providing better flavor and moisture.
- Chill the Dough Thoroughly: Don’t skip the chilling step! It makes a huge difference in handling the dough and getting perfectly shaped, less sticky balls.
- Lightly Wet Your Hands: If the dough is still a bit sticky after chilling, lightly dampen your hands with water before rolling to prevent sticking.
- Portion Evenly: Use a small cookie scoop or measuring spoon (like a tablespoon) to ensure all your energy balls are roughly the same size.
- Experiment with Add-ins: Don’t be afraid to try different ingredients like dried cranberries, shredded coconut, or a pinch of cinnamon for varied flavors.
- Press Firmly When Rolling: Apply gentle but firm pressure when rolling the balls to ensure they hold together well.
Common Mistakes to Avoid
- Using Instant Oats: Instant oats absorb liquid too quickly and can result in a mushy texture. Stick to old-fashioned rolled oats.
- Not Chilling the Dough: Trying to roll warm, soft dough is a recipe for a sticky mess. Always chill for at least 30 minutes.
- Too Dry/Wet Dough: If your dough is too dry, add a tiny bit more peanut butter or honey. If it’s too wet, add a tablespoon or two more rolled oats until it reaches a manageable consistency.
- Over-Mixing After Adding Dry Ingredients: While you want everything combined, don’t overwork the dough once oats are in, as it can affect texture.
- Using Runny Peanut Butter: If your natural peanut butter is very oily and runny, try to drain off some of the excess oil or mix it thoroughly before adding to the recipe.
Variations & Substitutions
These energy balls are incredibly adaptable! Here are some ideas to customize them:
- Nut Butter Swaps: Replace peanut butter with almond butter, cashew butter, or sunflower seed butter (for nut-free options).
- Sweetener Alternatives: Agave nectar or brown rice syrup can be used instead of honey or maple syrup.
- Add Protein: Incorporate 1-2 scoops of your favorite protein powder (vanilla or unflavored work best) to boost the protein content. You might need to add a splash more liquid if the dough becomes too dry.
- Spice It Up: A pinch of cinnamon, nutmeg, or pumpkin pie spice can add a lovely warmth and depth of flavor.
- Dried Fruits: Mix in finely chopped dried cranberries, apricots, or raisins for extra chewiness and sweetness.
- Seeds Galore: Beyond chia, consider adding flax seeds, hemp seeds, or sesame seeds for added nutrition and texture.
- Coconut Craze: Roll the finished balls in shredded coconut for an extra layer of flavor and a pretty finish.
Serving Suggestions
These homemade energy balls are perfect for a variety of occasions:
- Quick Breakfast: Grab a couple with your morning coffee or smoothie for a balanced start to your day.
- Midday Snack: A great way to beat the afternoon slump and avoid unhealthy cravings.
- Pre- or Post-Workout Fuel: The carbs and protein provide sustained energy and aid in muscle recovery.
- Lunchbox Treat: A wholesome addition to school or work lunchboxes.
- Dessert Alternative: A healthier option when you’re craving something sweet after a meal.
Pair them with a glass of milk (dairy or plant-based), a cup of tea, or a fresh fruit smoothie for a complete snack.
Storage & Reheating
- Refrigerator: Store leftover energy balls in an airtight container in the refrigerator for up to 1 week.
- Freezer: For longer storage, arrange the energy balls in a single layer on a parchment-lined baking sheet and freeze until solid. Once frozen, transfer them to a freezer-safe bag or container, separating layers with parchment paper to prevent sticking. They can be stored in the freezer for up to 3 months.
- Reheating: No reheating is needed! Simply remove them from the refrigerator or freezer. If frozen, let them thaw at room temperature for 10-15 minutes, or in the fridge overnight, before enjoying.
FAQ
Can I make these energy balls vegan?
Yes, absolutely! Simply use maple syrup instead of honey for the sweetener. All other ingredients are typically vegan.
How long do homemade energy balls last?
When stored in an airtight container in the refrigerator, they typically last for up to one week. They can also be frozen for up to 3 months.
Can I use quick oats instead of old-fashioned rolled oats?
While technically possible, quick oats tend to absorb more liquid and can result in a softer, mushier texture. For the best chew and structure, old-fashioned rolled oats are highly recommended.
Why are my energy balls too sticky or too dry?
The consistency can vary slightly depending on the type of peanut butter, ripeness of the banana, and even humidity. If too sticky, add a tablespoon or two more oats. If too dry and crumbly, add a teaspoon more peanut butter or a splash of water/milk until it’s workable.
Can I add protein powder to this recipe?
Yes, you can! Start by adding 1-2 scoops of your favorite vanilla or unflavored protein powder with the dry ingredients. You might need to add a little extra liquid (like a tablespoon of milk or water) to maintain the right consistency, as protein powder can absorb moisture.
Are these energy balls gluten-free?
Yes, if you use certified gluten-free rolled oats. Ensure all other ingredients are also certified gluten-free if cross-contamination is a concern.
What’s the best way to mash the banana?
For best results, use a fork to mash a ripe banana in a separate bowl until it’s mostly smooth with a few small lumps. This ensures even distribution in the energy ball mixture.
Can I make these nut-free?
Yes, substitute the peanut butter with a seed butter like sunflower seed butter (e.g., SunButter) to make them completely nut-free.
Enjoy these delightful, easy-to-make energy balls, perfect for keeping your cravings at bay and your energy levels soaring!
Recipe Card
Recipe Name: Homemade Peanut Butter Banana Energy Balls
Short Description: Easy, no-bake energy bites packed with wholesome oats, creamy peanut butter, and natural banana sweetness for a healthy, satisfying snack.
Prep Time: 15 minutes
Cook Time: 0 minutes
Total Time: 45 minutes (includes chilling)
Servings: 12-15 balls
Course: Snack, Breakfast
Cuisine: American
Cooking Method: No-bake
Ingredients:
- 1 ½ cups (135 g) old-fashioned rolled oats
- ½ cup (120 g) creamy peanut butter (all-natural, no-stir preferred)
- ¼ cup (60 ml) honey or maple syrup
- 1 ripe medium banana, mashed (about ½ cup or 120 g)
- 2 tbsp (28 g) chia seeds
- 1 tsp vanilla extract
- ¼ tsp salt
- ½ cup (75 g) mini chocolate chips or chopped nuts (optional)
Instructions:
- In a large mixing bowl, combine the peanut butter, honey (or maple syrup), mashed banana, and vanilla extract. Mix thoroughly until smooth.
- Add the rolled oats, chia seeds, and salt to the wet mixture. Mix well until all dry ingredients are fully incorporated and the mixture is thick.
- If using, gently fold in the mini chocolate chips or chopped nuts until evenly distributed.
- Cover the bowl with plastic wrap and refrigerate for at least 30 minutes to allow the dough to firm up.
- Line a baking sheet with parchment paper. Scoop out about 1 tablespoon of the chilled dough and roll it between your palms to form smooth, round balls.
- Place the rolled energy balls on the prepared baking sheet. Once all balls are formed, you can chill them again for 10-15 minutes if desired, to help them set.
- Serve immediately or store for later.
Notes:
For best results, ensure your banana is very ripe. Adjust sweetness to taste by adding a little more honey or maple syrup if desired. If the dough is too sticky, wet your hands slightly before rolling. If too dry, add a tiny bit more peanut butter.
Storage:
Store in an airtight container in the refrigerator for up to 1 week, or freeze for up to 3 months.
Nutrition:
Nutrition information is an estimate and may vary depending on the ingredients and brands used.