Mashing ripe bananas by hand creates the perfect base for so many delicious treats or a healthy snack! This simple skill is a fundamental step in countless recipes, from moist banana bread to creamy smoothies and even homemade baby food. Mastering the art of mashing ensures you get the ideal texture and sweetness every time, transforming humble ripe fruit into a versatile ingredient.
Whether you’re a seasoned baker or just starting to explore healthier snack options, knowing how to properly mash a banana is invaluable. It’s quick, requires minimal equipment, and unlocks a world of culinary possibilities. Let’s dive into the best way to achieve perfectly mashed bananas, ready for your next healthy creation!
Why You’ll Love This Simple Banana Prep
- Easy Preparation: All you need are ripe bananas and a fork or masher.
- Versatile Base: Perfect for baking, smoothies, pancakes, and healthy snacks.
- Natural Sweetness: Ripe bananas provide natural sugars, reducing the need for added sweeteners.
- Healthy Ingredient: A great way to incorporate fruit into your diet.
- Quick & Convenient: Takes only minutes to prepare.
- Reduces Waste: A fantastic use for overripe bananas that might otherwise be discarded.
Ingredients You’ll Need
- 2-3 large ripe bananas (about 1 cup or 200-240g mashed)
Ingredient Notes
Ripe Bananas: The key to perfectly mashed bananas is ripeness. Look for bananas with plenty of brown spots on their peel. The more brown spots, the sweeter and softer the banana will be, making it easier to mash and providing a richer flavor for your recipes. Avoid green or firm yellow bananas, as they will be harder to mash and less sweet.
Equipment You’ll Need
- Large bowl
- Fork or potato masher
How to Mash Bananas for Perfect Results
Preparing perfectly mashed bananas is a straightforward process, but a few tips can make all the difference in achieving your desired texture.
- Choose Your Bananas: Select bananas that are very ripe, indicated by an abundance of brown spots on the peel. They should feel soft to the touch.
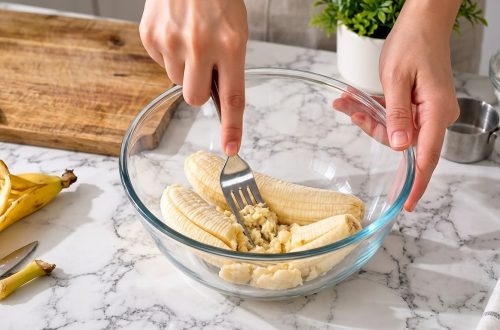
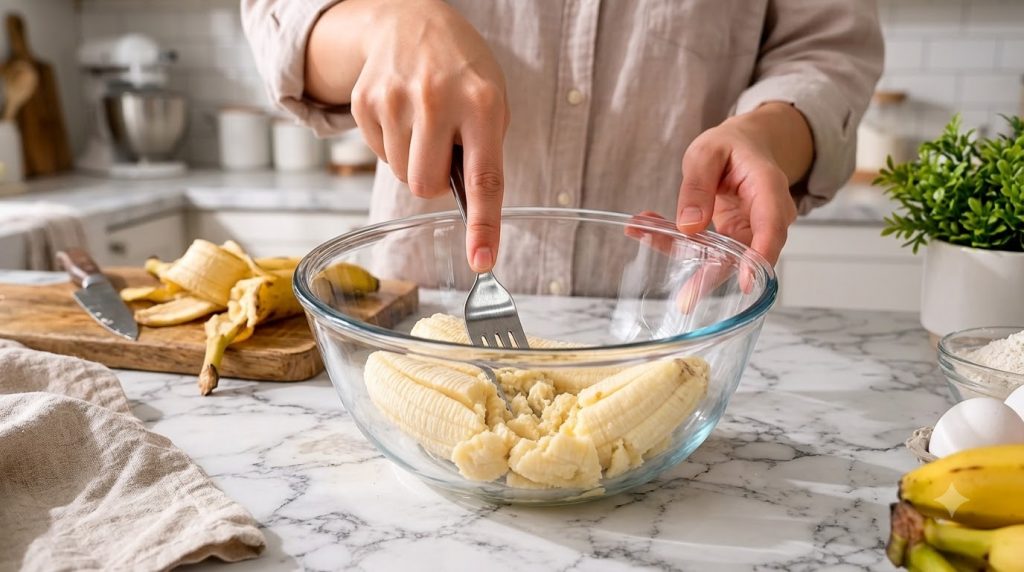
- Peel the Bananas: Remove the peels from the ripe bananas. You can break them into a few smaller pieces directly into your mixing bowl to make mashing easier.
- Start Mashing: Using a sturdy fork, begin pressing down on the banana pieces. If you’re mashing a larger quantity, a potato masher can be very efficient.
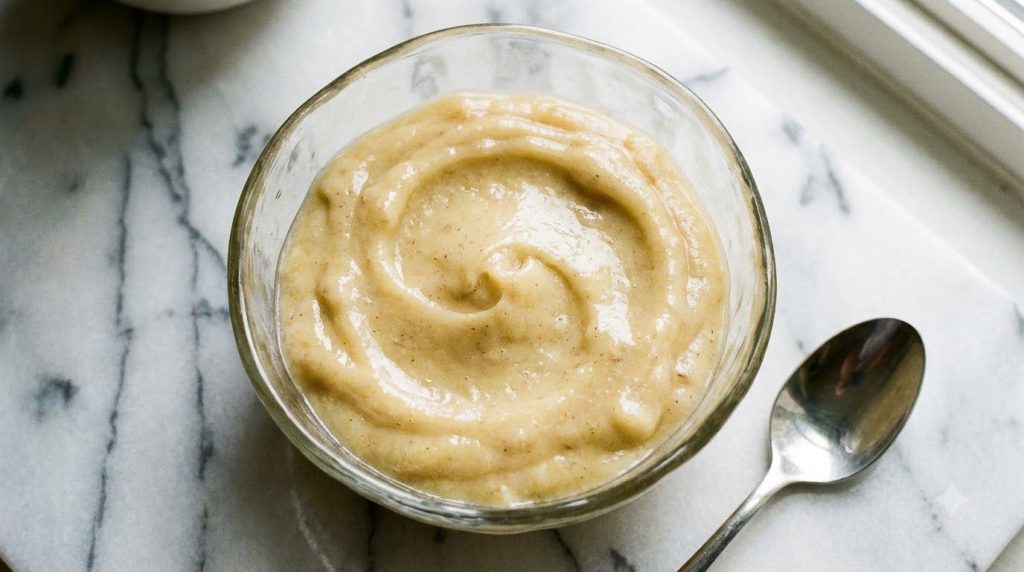
- Achieve Desired Consistency: Continue mashing until the bananas reach your desired texture. For chunky banana bread, mash just until there are small lumps remaining. For smooth baby food or a creamy smoothie base, mash until the mixture is completely smooth with no visible chunks.
- Scrape the Bowl: Periodically scrape down the sides of the bowl with a spatula to ensure all banana pieces are mashed evenly.
- Use Immediately or Store: Your mashed bananas are now ready to be incorporated into your recipe or stored for later use.
Pro Tips for the Best Results
- Embrace Brown Spots: Don’t shy away from very brown, spotty bananas. These are the sweetest and easiest to mash, perfect for baking where their natural sugars enhance flavor.
- Control the Texture: Use a fork for more control over chunky vs. smooth texture. For a very smooth consistency, a potato masher works wonders, or even a food processor for large batches.
- Prevent Browning (If Storing): To keep mashed bananas from browning – if not using immediately – mix in a teaspoon of lemon juice or a pinch of citric acid. This helps slow down oxidation.
- Warm Bananas for Smoothness: If your bananas are slightly firm, microwaving them for 30-60 seconds can soften them significantly, making them easier to mash to a creamy consistency.
- Don’t Over-Process for Baking: When making banana bread or muffins, a slightly lumpy texture adds moisture and structure. Avoid turning them into a complete liquid in a blender unless specified by the recipe.
- Freeze Overripe Bananas: If you have more ripe bananas than you can mash and use, peel them, mash them, and freeze them in pre-portioned amounts in freezer bags or ice cube trays.
Common Mistakes to Avoid
- Using Underripe Bananas: This is the most common mistake. Underripe bananas are harder to mash, less sweet, and have a starchy flavor that can negatively impact your final dish.
- Mashing Directly on a Cutting Board: Always mash bananas in a bowl to contain the mess and ensure all the fruit is properly mashed.
- Over-Mashing for Certain Recipes: While some recipes benefit from very smooth bananas, others (like banana bread) are better with a slightly chunky texture. Know what your recipe calls for!
Variations & Substitutions
While mashed bananas are a pretty singular ingredient, you can vary the ‘mashing’ itself:
- Fork Mashing: Best for a slightly chunky texture.
- Potato Masher: Great for larger quantities and achieving a smoother consistency with minimal effort.
- Food Processor/Blender: For extremely smooth puree, often used for baby food or very smooth smoothies. Be careful not to over-process, as it can make them too liquidy for some baking recipes.
Serving Suggestions
Mashed bananas are incredibly versatile! Here are some popular ways to use them:
- Baking: The star ingredient in banana bread, muffins, pancakes, and cookies.
- Smoothies: Adds natural sweetness and creaminess to any fruit smoothie.
- Oatmeal & Yogurt: Stir into your morning oatmeal or yogurt for a boost of flavor and texture.
- Baby Food: A perfect first food for infants, often mixed with a bit of breast milk or formula.
- Healthy Toast Topping: Spread on toast, perhaps with a sprinkle of cinnamon or a drizzle of honey.
- Nice Cream: Blend frozen mashed bananas for a simple, healthy ice cream alternative.
Storage & Reheating
Refrigerator Storage: Store mashed bananas in an airtight container in the refrigerator for up to 2-3 days. They will naturally start to brown due to oxidation, but this does not mean they are spoiled. To minimize browning, press plastic wrap directly onto the surface of the mashed bananas before sealing the container.
Freezer Suitability: Mashed bananas freeze wonderfully! Place them in freezer-safe bags, removing as much air as possible, or in an airtight container. Freeze in pre-portioned amounts (e.g., 1/2 cup or 1 cup) for easy use in future recipes. They can be stored in the freezer for up to 3 months. Thaw overnight in the refrigerator or quickly in the microwave on a low setting.
Reheating: Mashed bananas generally don’t require “reheating” as they are often used at room temperature or chilled in recipes. If frozen, thaw and use as needed.
FAQ
How ripe should bananas be for mashing?
The riper the better! Look for bananas with significant brown spots and a soft texture. This ensures maximum sweetness and easy mashing.
Can I use a food processor or blender to mash bananas?
Yes, especially for large batches or if you desire a very smooth puree. However, for recipes like banana bread, a slightly chunky texture achieved with a fork or potato masher is often preferred.
How do I prevent mashed bananas from turning brown?
Mix in a small amount of an acidic ingredient like lemon juice or lime juice (about 1 teaspoon per cup of mashed bananas). Storing them in an airtight container with plastic wrap pressed directly onto the surface also helps.
How long do mashed bananas last in the refrigerator?
Mashed bananas will last for about 2-3 days in an airtight container in the refrigerator. They will darken, but still be good to use.
Can I mash frozen bananas?
It’s best to peel and mash bananas before freezing. If you have whole frozen bananas, let them thaw completely before mashing, as they will become very soft.
What’s the difference between using a fork and a potato masher?
A fork gives you more control for a slightly chunkier mash, while a potato masher is faster for larger quantities and generally results in a smoother consistency.
What are the best uses for very ripe, mashed bananas?
Very ripe mashed bananas are ideal for baking (banana bread, muffins), smoothies, pancakes, and homemade baby food due to their enhanced sweetness and soft texture.
Mashed Bananas Basic Prep
Short Description: Learn the simple technique for mashing ripe bananas to perfection, creating a versatile base for baking, smoothies, and healthy snacks.
Prep Time: 5 minutes
Cook Time: 0 minutes
Total Time: 5 minutes
Servings: Varies (typically 1/2 cup to 1 cup per recipe)
Course: Basic Prep
Cuisine: American
Cooking Method: Mashing
Ingredients:
- 2-3 large ripe bananas (about 1 cup or 200-240g mashed)
Instructions:
- Choose bananas that are very ripe, with brown spots on the peel, indicating maximum sweetness and softness.
- Peel the bananas and place them into a sturdy mixing bowl.
- Using a fork or potato masher, begin pressing down firmly on the banana pieces.
- Continue mashing until the bananas reach your desired consistency – chunky for some baked goods or smooth for purees and smoothies.
- Scrape down the sides of the bowl to ensure all banana is evenly mashed.
- Use your perfectly mashed bananas immediately in your recipe or prepare for storage.
Notes:
For a smoother mash, you can briefly microwave slightly firm bananas for 30 seconds before mashing. To prevent browning if storing, mix in 1 teaspoon of lemon juice per cup of mashed bananas.
Storage:
Store mashed bananas in an airtight container in the refrigerator for 2-3 days, or freeze in pre-portioned amounts for up to 3 months. Thaw in the refrigerator before use.
Nutrition:
Nutrition information is an estimate and may vary depending on the ingredients and brands used.