Most people consider rose propagation a delicate, complex process requiring special tools and environments. They often overlook a surprisingly simple method, one that old gardeners have quietly used for generations: the potato trick. This technique, far from a modern gardening fad, leverages a humble potato to give your rose cuttings the best start, offering a natural boost for root development.
If you’ve ever struggled to get rose cuttings to take root, or simply want an economical way to expand your rose garden, this “secret” method might be exactly what you need. It reduces the stress on your cuttings and provides a self-contained, nutrient-rich environment for growth.
What is the Potato Rose Method?
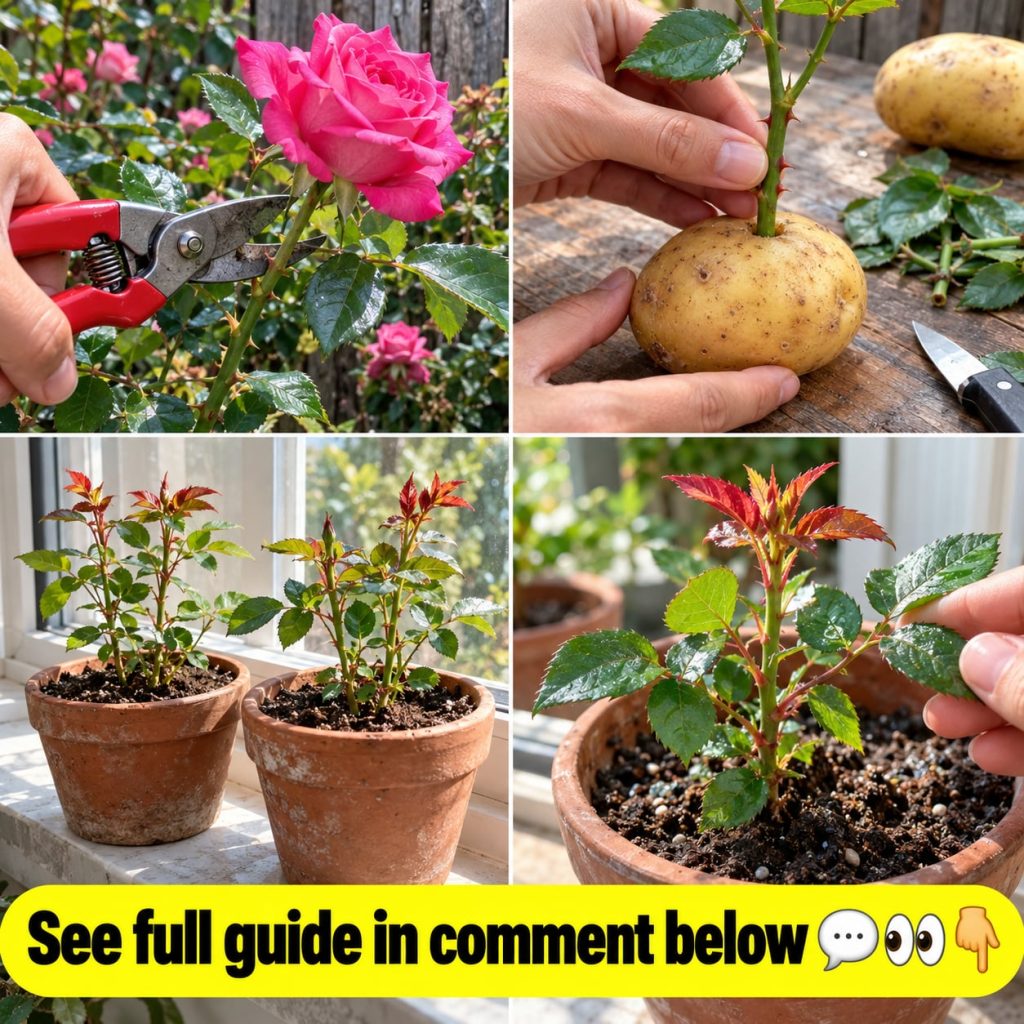
At its core, the potato rose method uses a raw potato as a natural rooting medium for rose cuttings. The potato serves multiple crucial functions: it provides a consistent moisture supply, shields the delicate cut end of the stem from fungal infections in the soil, and offers essential nutrients like carbohydrates as the cutting establishes itself. This unique combination helps the rose cutting focus its energy on developing strong roots, bypassing some of the common hurdles of direct soil propagation.
Ingredients for Your Potato Rose Project
- Rose Cuttings: Healthy, fresh stems from your desired rose bush.
- Potatoes: Medium-sized, firm, and organic if possible (to avoid residual pesticides).
- Potting Soil: A well-draining, nutrient-rich mix.
- Planting Container or Garden Bed: Where your new roses will grow.
- Rooting Hormone (Optional): A powdered or gel rooting hormone can further encourage root growth.
- Drill or Skewer: For making a hole in the potato.
- Sharp Pruners or Knife: For clean cuts on the rose stems.
- Water: For regular watering.
Approximate Measurements & Selection
- Rose Stem Length: Aim for cuttings 6-8 inches (15-20 cm) long.
- Potato Size: Medium-sized potatoes work best, large enough to support the stem but not excessively so.
- Hole Diameter: The hole in the potato should be just slightly smaller than the rose stem, ensuring a snug fit.
- Rooting Hormone: If using, apply a thin layer to the bottom 1 inch of the rose stem.
Quick Tip: Choose disease-free, current year’s growth for your rose cuttings. Stems that have recently flowered and are just starting to harden are ideal. Avoid very soft, new growth or old, woody stems.
The Potato Rose Formula & Step-by-Step Method
This simple formula focuses on preparation and careful planting to give your rose cuttings the best chance at success.
Step-by-Step Method:
- Prepare Your Rose Cuttings: Using sharp, clean pruners, take 6-8 inch cuttings from a healthy rose bush. Make a diagonal cut just below a “node” (where a leaf or branch grows) at the bottom. Remove all leaves except for the top two sets. Carefully remove any thorns from the bottom 3-4 inches of the stem to avoid injury during handling.
- Prepare the Potato: Select a firm, healthy potato. Remove any “eyes” or sprouts to prevent the potato itself from growing. Using a drill bit slightly smaller than your rose stem, or a clean skewer, bore a hole approximately 2-3 inches deep through the center of the potato.
- Apply Rooting Hormone (Optional): Dip the diagonal cut end of your rose stem into rooting hormone powder or gel, if using. Ensure a thin, even coat.
- Insert the Stem into the Potato: Gently push the treated end of the rose stem into the prepared hole in the potato. The fit should be snug, but avoid forcing it, which could damage the stem.
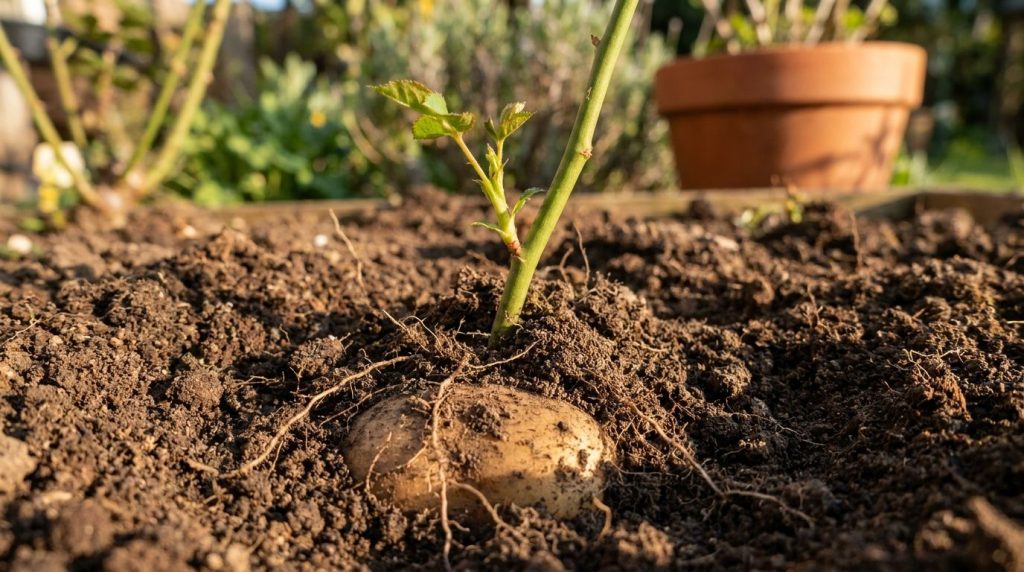
- Prepare the Planting Site: Fill a deep pot or prepare a spot in your garden bed with well-draining potting soil. Dig a hole deep enough to completely cover the potato, with about 2-3 inches of the rose stem remaining above the soil line.
- Plant the Potato and Stem: Carefully place the potato with the inserted rose stem into the prepared hole. Backfill with soil, gently firming it around the stem and over the potato.
- Water Thoroughly: Water your newly planted rose cutting immediately and thoroughly.
How to Use & How Often to Use
Once planted, your potato-supported rose cutting needs consistent care:
- Watering: Keep the soil consistently moist, but not waterlogged. The potato helps retain moisture, so check the soil moisture levels before watering. Overwatering is a common mistake that can lead to rot.
- Location: Place the pot or plant the cutting in a location that receives partial shade initially, especially during the hottest part of the day. As it shows signs of new growth, gradually introduce it to more sunlight.
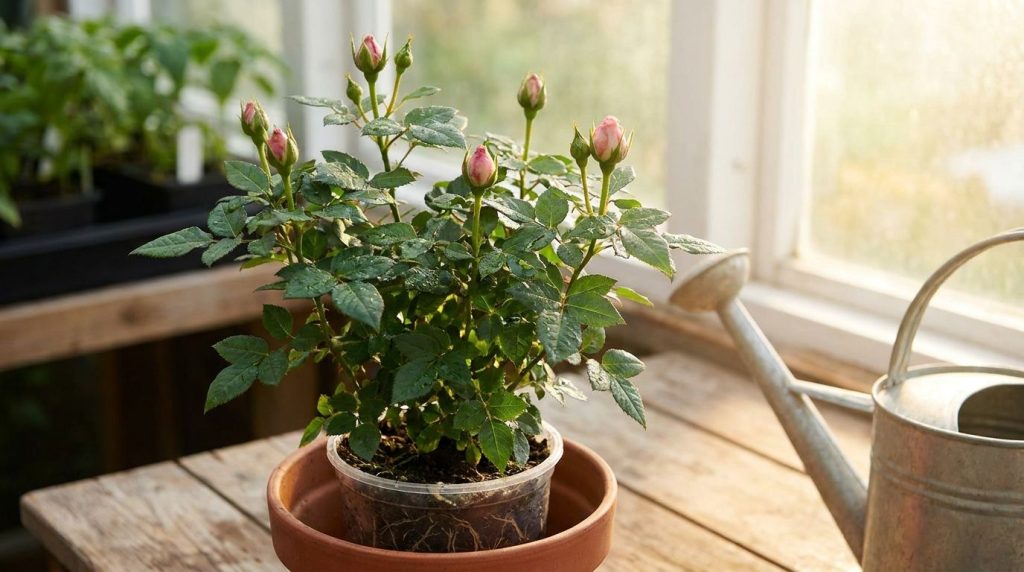
- Monitoring: Check for new leaf growth, which indicates successful rooting. This can take several weeks to a few months. Be patient!
How to Choose Ingredients & Prepare
The success of this method largely depends on the quality of your “ingredients”:
- Rose Stems: Look for stems that are about pencil-thickness, healthy, and free from pests or diseases. A good indicator is a stem that ‘snaps’ when bent, rather than just bending or being too woody.
- Potatoes: Opt for firm, unsprouted potatoes. Any variety works, but avoid potatoes that are soft, green, or showing signs of decay.
Best Stems for Propagation
| Stem Characteristic | Description |
|---|---|
| Pencil-Thick | Stems that are neither too thin (fragile) nor too thick (woody). |
| Recent Bloom | Taken from a stem that has recently finished flowering. |
| Semi-Hardwood | Not too green and flexible, nor too old and rigid. |
| Healthy & Disease-Free | No spots, discolorations, or signs of pests. |
Storage
Once your rose cutting is planted with its potato, it doesn’t require special “storage” beyond a protected growing environment. If planting in a pot, ensure it’s in a location where it won’t be exposed to extreme cold or heat. For garden beds, consider a cloche or temporary mini-greenhouse if you live in a region with unpredictable weather. The potato will naturally decompose over time, providing continuous nourishment as the roots develop.
Practical Tips for Success
- Humidity is Key: Rose cuttings thrive in high humidity. Covering the potted cutting with a clear plastic bag (supported by stakes so it doesn’t touch the leaves) can create a mini-greenhouse effect. Remember to vent it occasionally to prevent fungal issues.
- Patience, Patience, Patience: Rooting can take anywhere from a few weeks to a couple of months. Don’t be discouraged if you don’t see immediate results. Resist the urge to pull the stem to check for roots.
- Soil Temperature: Warm soil encourages root growth. A soil thermometer can help ensure temperatures are consistently between 65-75°F (18-24°C).
Common Mistakes to Avoid
Even with a simple method, a few missteps can hinder success:
- Using Unhealthy Cuttings: Starting with diseased or weak stems drastically reduces your chances. Always select vibrant, strong material.
- Overwatering: While moisture is good, soggy soil leads to rot. The potato helps, but good drainage is still essential.
- Planting Too Deep or Too Shallow: Ensure the potato is fully buried and enough of the stem is above ground.
- Skipping Eye Removal: If you don’t remove the potato’s eyes, the potato itself might sprout, competing with the rose cutting for energy.
- Lack of Air Circulation: If using a plastic bag for humidity, ensure you ventilate it daily to prevent mold and mildew.
Cautions & Who Should Avoid It
This method is generally safe and easy for most gardeners. However, always exercise caution when using sharp tools like pruners or knives. If you have severe allergies to specific plant materials or soil components, wear appropriate gloves. There are no specific “who should avoid it” groups for this gardening technique, other than those who might struggle with basic gardening tasks or have mobility issues.
Read more: Mastering Indoor Herb Gardening: A Beginner’s Guide
Quick Summary
- Best Preparation: The Potato Rose Method provides moisture and nutrients directly to the cutting.
- Best Use-Case: Propagating new rose bushes from existing plants.
- When to Use: Ideal in spring or early summer when roses are actively growing but not in full bloom.
- Storage: Keep planted cuttings in a sheltered, consistent environment.
- What to Avoid: Unhealthy cuttings, overwatering, direct harsh sunlight initially, and neglecting potato “eye” removal.
FAQ
- Can I use any type of potato? Yes, any common potato variety (e.g., Russet, Red, Yukon Gold) will work, as long as it’s firm and healthy.
- Do I need rooting hormone for this method? While optional, rooting hormone can significantly increase your success rate, especially for less vigorous rose varieties.
- How long does it take for roots to form? It can vary widely, from 3 weeks to 3 months. Patience and consistent care are crucial.
- When should I transplant the new rose? Wait until the plant has developed a strong root system and robust new growth. This usually means a few months after initial planting, or when you see multiple sets of healthy leaves and stems.
- Can I do this indoors? Yes, propagating indoors in pots is an excellent way to control environmental factors like temperature and humidity.
- What part of the rose stem is best for cuttings? Semi-hardwood cuttings (stems that are mature but still somewhat flexible) are generally most successful.
- Can I reuse the potato if a cutting fails? No, the potato begins to decompose and will not be effective for a second cutting.
- When should I avoid taking cuttings? Avoid taking cuttings during very hot, dry weather or when the rose bush is under stress (e.g., drought, pest infestation).
Continue with: DIY Organic Pest Control for Your Garden
Conclusion
The potato rose method is a delightful and practical “secret” from the past that makes rose propagation accessible to more gardeners. By providing a nurturing, stable environment, a simple potato can transform a small cutting into a thriving rose bush. It’s a testament to the ingenuity of traditional gardening and a rewarding project for anyone looking to expand their garden with beautiful roses.
See the full guide: Growing Fragrant Roses: A Comprehensive Guide