Most people assume their beautiful geraniums are annuals, destined to wither with the first touch of frost. What if you could not only save these beloved plants but also multiply them for free, creating dozens of new, vibrant blooms every year? The secret lies in a simple technique called propagation, and mastering it before winter arrives can transform your garden. Don’t let your stunning geraniums disappear with the cold when you can easily learn to preserve and expand your collection.
What is Geranium Propagation?
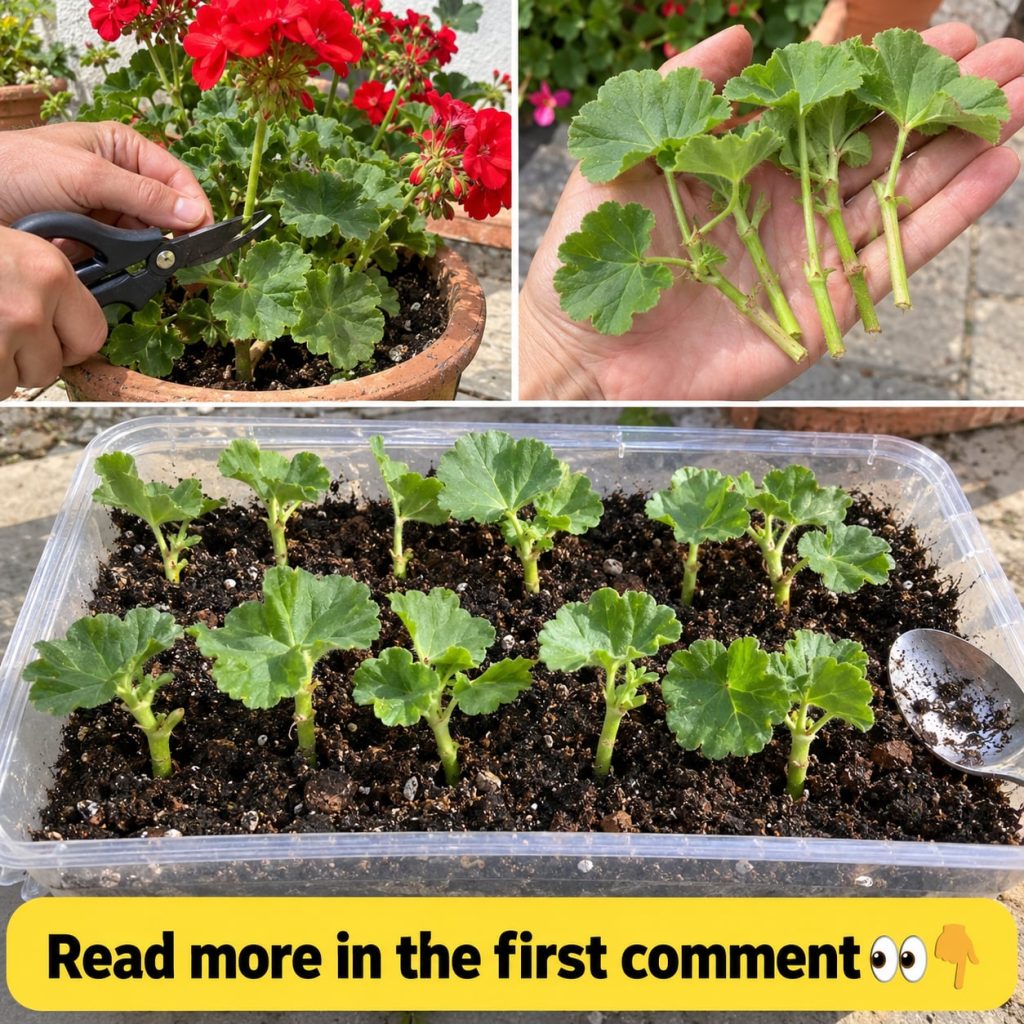
Geranium propagation, specifically using stem cuttings, is the process of creating new plants from a portion of an existing one. It’s a highly effective and economical way to ensure your favorite varieties return year after year. Instead of buying new plants each spring, you can easily grow them from cuttings taken in the late summer or early fall. This method ensures genetic identicalness to the parent plant, meaning you’ll get the same beautiful flowers and foliage you already love.
Ingredients You’ll Need
The beauty of propagating geraniums is how little you need to get started. Most items are readily available around your home or at any garden center.
- Healthy Geranium Plant: Choose a vigorous, disease-free parent plant.
- Sharp, Clean Pruners or Knife: Essential for making clean cuts that heal quickly and prevent disease.
- Small Pots or Seed Trays: Individual pots (3-4 inches) are ideal for cuttings.
- Sterile Potting Mix: A light, well-draining mix, often labeled for seed starting or succulents, works best. Avoid heavy garden soil.
- Water: For hydrating the soil and misting.
- Rooting Hormone (Optional): A powder or gel that can speed up root development, though many geraniums root well without it.
Approximate Measurements & Timing
Success often hinges on precise actions and good timing. For geranium cuttings, aim for:
- Cutting Length: 4-6 inches (10-15 cm) long.
- Leaf Removal: Remove all but the top 2-3 leaves.
- Propagation Window: Late summer to early fall, about 6-8 weeks before the first hard frost. This gives the cuttings enough time to establish roots indoors before spring planting.
Your Geranium Propagation Formula / Recipe
This simple formula will guide you through turning one plant into many.
- Prepare Your Tools: Sterilize your pruners or knife with rubbing alcohol to prevent disease transfer.
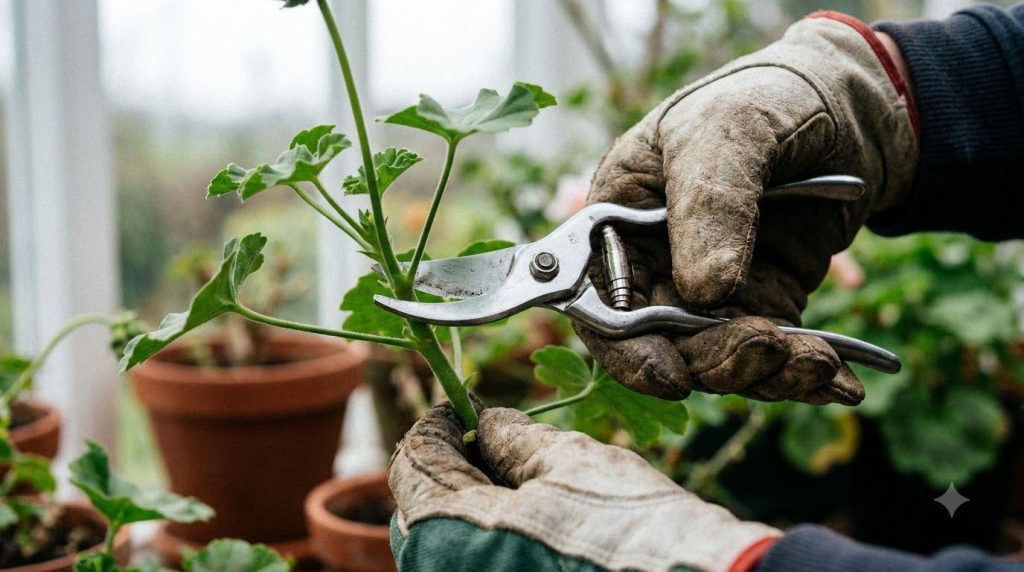
- Select & Take Cuttings: Choose non-flowering stems from the parent plant. Make a clean cut just below a leaf node (the bump where a leaf or branch emerges).
- Prepare Cuttings: Remove lower leaves and any flower buds. Optionally, dip the cut end into rooting hormone.
- Plant Cuttings: Create a small hole in your pre-moistened potting mix and gently insert the cutting, ensuring at least one node is buried.
- Water & Provide Care: Water lightly and place in a bright spot away from direct sun. Maintain consistent moisture and humidity.
Step-by-Step Method for Propagating Geraniums
Follow these detailed steps to ensure high success rates for your new geraniums:
-
Gather and Sterilize:
Start by gathering all your materials: healthy geranium plant, sharp pruners or a knife, small pots, sterile potting mix, and rooting hormone if using. Clean your cutting tools thoroughly with rubbing alcohol or a bleach solution (1 part bleach to 9 parts water) to prevent the spread of diseases from one plant to another.
-
Choose and Take Cuttings:
Identify strong, healthy stems on your parent geranium that are not currently flowering. Look for stems that are 4-6 inches long and have at least 3-4 leaf nodes. Make a clean, diagonal cut just below a leaf node. Diagonal cuts provide a larger surface area for root development. Aim for plump, green stems, avoiding woody or soft, new growth.
-
Prepare Your Cuttings:
Once you have your cuttings, immediately remove all leaves from the bottom 2-3 inches of the stem. Also, pinch off any flower buds or existing flowers. This directs the plant’s energy toward root production rather than maintaining foliage or blooms. Allow the cuttings to air dry for an hour or two; some gardeners prefer to let them “callus” over for a few hours or overnight to prevent rot, though this is less critical for geraniums than for succulents.
-
Apply Rooting Hormone (Optional but Recommended):
If you’re using rooting hormone, gently dip the cut end of each prepared stem into the powder or gel. Tap off any excess. This step can significantly increase your rooting success, especially for less vigorous varieties.
-
Plant Your Cuttings:
Fill your small pots or trays with sterile, well-draining potting mix. Pre-moisten the mix so it’s damp but not waterlogged. Use a pencil or a stick to make a small hole in the center of the potting mix. Carefully insert each cutting into a hole, ensuring that at least one, and preferably two, leaf nodes are buried in the soil. Gently firm the soil around the base of each cutting to ensure good contact.
-
Initial Watering and Placement:
After planting, water your cuttings lightly to settle the soil. Avoid overwatering, which can lead to rot. Place the pots in a bright location that receives indirect sunlight. A north-facing window or a spot several feet from a sunny window is often ideal. Consistent temperatures (around 65-75°F / 18-24°C) are also beneficial for root development. Avoid placing them in direct, harsh sun, which can scorch the tender cuttings.
Quick Tip: Labeling Your Cuttings
If you’re propagating multiple geranium varieties, make sure to label each pot immediately after planting with the plant’s name and the date. This will help you track progress and identify your plants later, especially once they’ve rooted and started growing.
How to Use Your New Geraniums
Once your cuttings have rooted (usually within 3-4 weeks), they are ready to be treated like young plants. Continue to grow them indoors in a sunny window through the winter. As spring approaches and the danger of frost has passed, you can gradually acclimate them to outdoor conditions before planting them in your garden beds or containers.
How Often to Use This Method
To ensure a continuous supply of healthy, vibrant geraniums, plan to propagate annually. The optimal time is late summer or early fall, allowing the cuttings to establish roots indoors over winter. This also lets you select the best parent plants from your current season’s display.
How to Choose Ingredients & Healthy Parent Plants
The success of your propagation hinges on the quality of your materials. Always select a parent geranium that is robust, shows no signs of disease or pests, and has a strong growth habit. For potting mix, look for light, airy formulations with good drainage – a mix specifically for succulents or seed starting is usually perfect. Avoid heavy garden soil as it retains too much moisture and can lead to rot.
Storage for Geranium Cuttings and Parent Plants
Proper overwintering is key, whether for rooted cuttings or dormant parent plants.
| Item | Preparation | Storage Conditions | Lifespan / Notes |
|---|---|---|---|
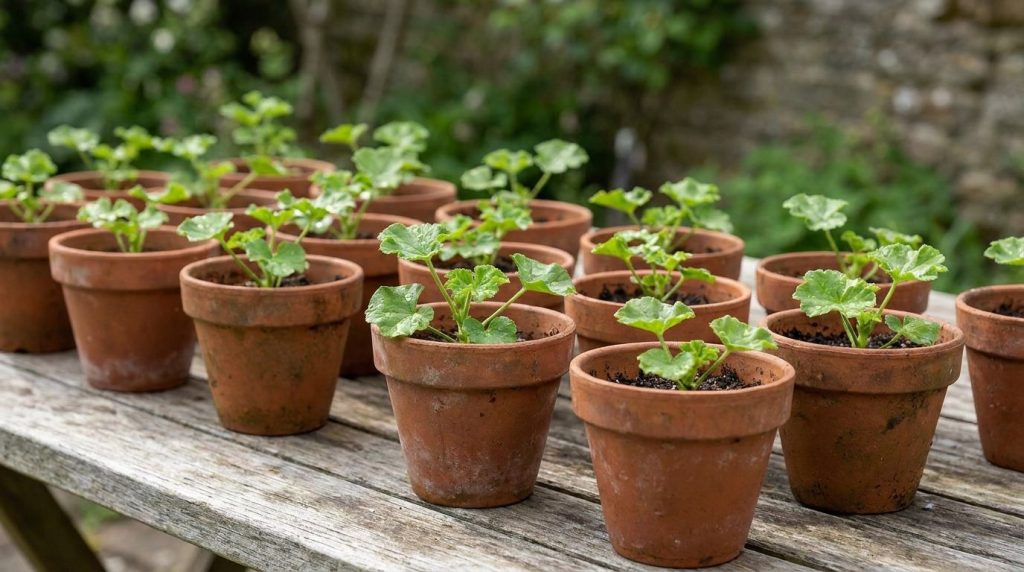
| Rooted Cuttings | Grow in small pots. | Bright, indirect light, consistent temps (60-70°F/15-21°C), slightly damp soil. | Indefinitely indoors; ready for outdoor planting in spring. |
| Dormant Parent Plants | Trim back, reduce watering. | Cool, dark, dry place (basement, garage) at 45-50°F (7-10°C). | Can be revived in spring for another growing season. |
Practical Tips for Geranium Propagation Success
- Humidity Help: For extra humidity, you can cover your pots with a clear plastic dome or bag (propped up to allow some airflow) until roots form.
- The Tug Test: After 3-4 weeks, gently tug on a cutting. If you feel resistance, it means roots have formed.
- Hardening Off: Before moving rooted cuttings outdoors in spring, gradually expose them to increasing periods of outdoor conditions over 7-10 days to prevent shock.
- Bottom Heat: A seedling heat mat can provide gentle bottom heat, which encourages faster rooting, especially in cooler environments.
Here’s the part most people skip…
Many gardeners skip the step of sterilizing their tools. While it seems minor, using uncleaned pruners can introduce fungal diseases or bacteria into your fresh cuts, leading to rot and failed propagation. Always take a moment to disinfect your tools.
Common Mistakes to Avoid
Steer clear of these common pitfalls to maximize your success:
- Using Diseased or Weak Plants: Cuttings from unhealthy plants will likely fail or produce weak new plants.
- Dull Tools: A ragged cut damages plant tissue and makes it harder for the cutting to root.
- Overwatering: Too much moisture is the number one killer of new cuttings, leading to rot.
- Incorrect Stem Type: Avoid very woody stems or extremely soft, new growth.
- Planting Too Deeply or Shallowly: Ensure at least one node is buried, but don’t bury too much stem.
- Direct Sunlight: New cuttings need bright, indirect light, not harsh, direct sun.
Cautions & Who Should Avoid It
Geranium propagation is generally safe and straightforward for anyone. The primary caution is always to handle sharp tools carefully. While geraniums are not typically toxic to humans upon touch, some varieties can cause mild skin irritation for sensitive individuals. Always wash your hands after handling plant material.
You may also like: Read more about improving your garden soil health.
Quick Summary: Geranium Propagation at a Glance
- Best Preparation: Stem cuttings taken from healthy, non-flowering stems.
- Best Use-Case: Creating new plants for free, preserving favorite varieties, and ensuring continuous blooms.
- Storage: Rooted cuttings grow indoors over winter; dormant parent plants can be stored cool and dark.
- When to Use: Late summer to early fall, 6-8 weeks before the first hard frost.
- What to Avoid: Dull tools, diseased parent plants, overwatering, direct sun on new cuttings.
Frequently Asked Questions (FAQ)
- Can I use fresh or dried geranium stems?
- You must use fresh, actively growing stems for propagation. Dried stems will not root.
- How long does it take for geranium cuttings to root?
- Typically, geranium cuttings will show roots within 3-4 weeks, though some may take longer depending on conditions.
- Can I root geranium cuttings in water?
- Yes, geraniums can root in water, but many gardeners find soil rooting produces stronger plants. If using water, change the water every few days.
- How often should I water new geranium cuttings?
- Water when the top inch of soil feels dry. It’s crucial to keep the soil consistently moist but never soggy.
- What part of the geranium is best for cuttings?
- Healthy, non-flowering stem tips that are 4-6 inches long are best, cut just below a leaf node.
- When should I avoid propagating geraniums?
- Avoid propagating during the plant’s dormant period or when it is under stress, such as during extreme heat or cold, or if it’s heavily flowering.
- Do I need a greenhouse for successful propagation?
- No, a bright indoor spot with indirect light and consistent temperatures is perfectly adequate for home propagation.
- Can I reuse the potting mix?
- It’s best to use fresh, sterile potting mix for cuttings to prevent disease.
Related remedy: Explore our guide on growing vibrant container gardens for small spaces.
Conclusion
Propagating geraniums isn’t just about saving money; it’s about connecting with your plants and ensuring a continuous legacy of beauty in your garden. By following these simple, practical steps before the first frost, you can transform a single beloved geranium into dozens of new, thriving plants. This sustainable approach will fill your home and garden with color and joy, proving that some of the best things in gardening truly are free. Start your propagation journey today and witness the magic of multiplication firsthand!
Continue with: Our full guide on winter plant care to protect all your greenery.