Ever noticed how much grime can build up on your light switches? It’s one of those spots we often forget, lurking in plain sight, yet accumulating layers of dirt, dust, and even germs from daily touches. While they might seem like minor details, clean light switches can significantly brighten up a room and contribute to a healthier home environment. The difference a good clean makes is truly satisfying!
We’re all familiar with the usual suspects in home cleaning – floors, countertops, bathrooms. But some areas, like light switches, often get overlooked. Despite their constant use, they rarely make it onto our regular cleaning checklists. This oversight allows a surprisingly thick layer of grime to build up over time, turning a simple white switch into something rather unappealing.
Why Do Light Switches Get So Grimy?
The answer is simple: frequent contact. Every time you turn lights on or off, your fingers transfer oils, dirt, and microscopic particles onto the switch plate. Over days, weeks, and months, these layers accumulate, creating that stubborn, dark film that can be quite resistant to a casual wipe. High-traffic areas, in particular, will show this grime much faster.
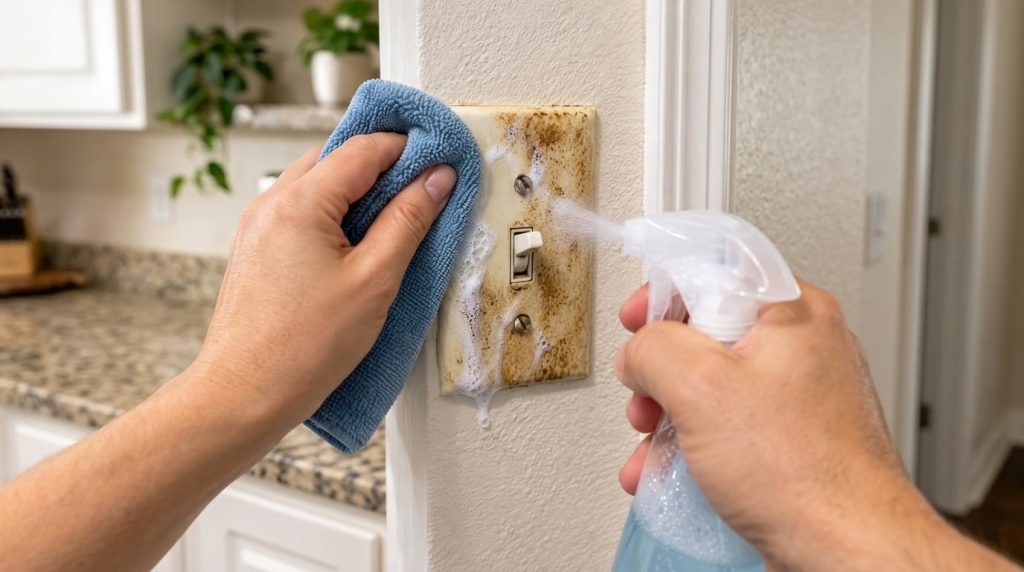
The Satisfying Transformation: From Grimy to Gleaming
There’s immense satisfaction in tackling an overlooked spot and seeing it transform. Imagine a light switch, once dull and sticky, now gleaming and bright. This isn’t just about aesthetics; it’s about reclaiming a small piece of your home from the clutches of everyday dirt. The process is straightforward, and the results are immediately noticeable, providing a mini-victory in your home cleaning routine.
Your DIY Guide to Sparkling Switches
Ready to tackle those hidden grimy spots? Here’s a simple, effective DIY method to get your light switches sparkling:
-
Gather Your Supplies:
- A mild all-purpose cleaner or a solution of warm water and a few drops of dish soap.
- Two clean microfiber cloths (one for cleaning, one for drying).
- A small brush (like an old toothbrush) for crevices (optional).
- Gloves for protection (optional but recommended).
-
Safety First: Turn Off the Power!
Before you begin, always turn off the power to the light switch at your circuit breaker. This is crucial for your safety. Flip the switch to the ‘off’ position to ensure the area is de-energized.
-
Initial Wipe-Down:
Lightly dampen one microfiber cloth with your cleaning solution (avoid spraying directly onto the switch to prevent liquid from seeping into electrical components). Gently wipe down the entire surface of the switch plate, focusing on removing the loose dirt and dust.
-
Tackle the Grime:
For stubborn grime, spray your cleaning solution onto the microfiber cloth, not the switch itself. Allow the solution to sit on the cloth for a moment, then press and gently scrub the grimy areas. For tight spots around the switch toggle or screw heads, use a small brush dipped in the cleaning solution.
-
Rinse and Dry:
Dampen a second clean microfiber cloth with plain water (again, do not spray the switch directly) and wipe away any remaining cleaning solution. Follow up immediately with a dry cloth to ensure no moisture is left behind.
-
Restore Power:
Once the switch plate is completely dry, you can safely restore power at your circuit breaker.
The result? A noticeably cleaner and brighter light switch that you’ll feel good about touching. This simple DIY task takes just a few minutes per switch but makes a big impact on the overall cleanliness of your home.
Beyond Light Switches: What Other Spots Are You Overlooking?
Cleaning light switches is just the beginning. This DIY approach can inspire you to look for other often-forgotten areas that could use a little attention:
- Door handles and doorknobs.
- Baseboards.
- Window sills.
- Remote controls.
- Phone screens and cases.
Regularly cleaning these high-touch surfaces not only keeps your home looking tidy but also helps to reduce the spread of germs. Taking the time for these small, satisfying cleaning tasks can make a significant difference in maintaining a fresh and healthy living space. What’s the most overlooked spot you’ve cleaned recently?