Tired of fishing out tiny shell fragments from your perfect omelet or dealing with a messy countertop every time you crack an egg? Many home cooks struggle with achieving a clean break, leading to frustration and wasted ingredients. But what if there was a simple, precise method that could make egg cracking a breeze?
This DIY egg-cracking hack, using a common kitchen tool, is designed to give you more control, minimize mess, and ensure a clean separation of yolk and white. It’s a surprisingly effective technique that might just change the way you prepare eggs forever, making your cooking prep cleaner and more efficient.
What You’ll Need
- 1 fresh egg
- 1 small pair of clean kitchen scissors (e.g., herb scissors or small utility shears)
- 1 bowl for collecting the egg
Why This DIY Can Be Useful
Traditional egg cracking methods often rely on hitting the egg against a hard surface, which can lead to unpredictable breaks, shattered shells, and pieces falling into your food. This scissor method offers a level of precision that minimizes these common issues. By carefully cutting the shell, you gain more control over where and how the egg opens, reducing the chance of shell fragments contaminating your dish.
How to Make It
- Gather Your Tools: Ensure your small kitchen scissors are thoroughly clean and dry before you begin.
- Prepare Your Workspace: Place your empty bowl on a stable surface where you plan to collect your egg.
How to Use It
- Hold the Egg Securely: Hold the egg gently but firmly in one hand, preferably over the bowl you’re using.
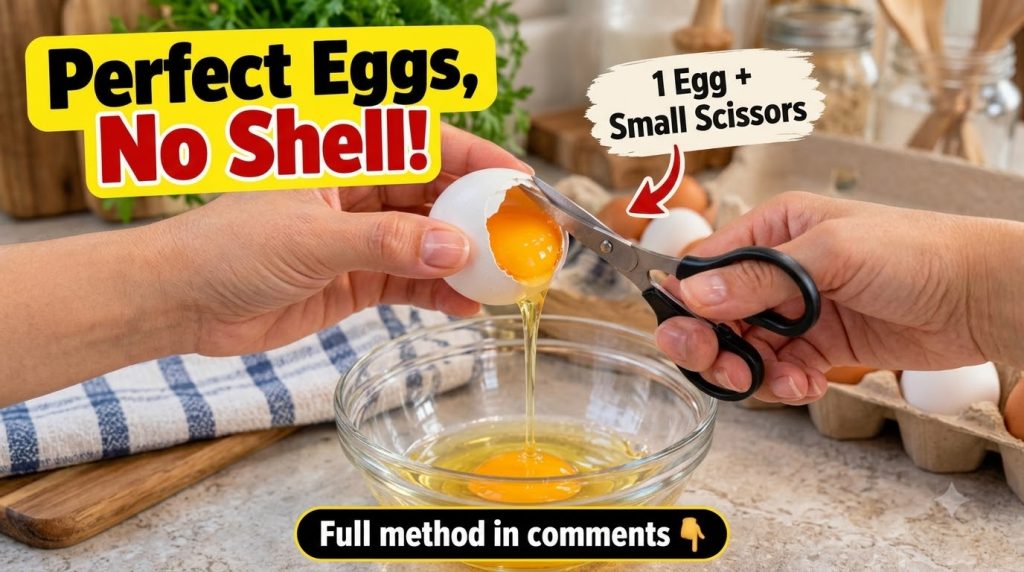
- Make the Initial Cut: With the tip of your clean scissors, carefully snip the very top, narrow end of the eggshell. Make a small, precise cut, just enough to pierce the shell.
- Widen the Opening: Continue to carefully snip around the top circumference of the egg, gradually widening the opening. You’ll essentially be cutting off the top ‘cap’ of the eggshell. Aim for an opening large enough to pour the contents out smoothly.
- Pour Out the Egg: Once you have a clean, circular opening, gently tilt the egg to pour the yolk and white into your bowl. The clean cut allows the egg to flow out without resistance from jagged shell edges.
- Separate (if needed): If you need to separate the yolk from the white, the clean opening can make this easier to manage, using the two shell halves if desired, or carefully scooping the yolk.
What to Expect
You can expect a significantly cleaner and more controlled egg-cracking experience. Shell fragments are far less likely to fall into your bowl, and the egg’s contents should pour out smoothly. This method often results in perfectly intact yolks, especially useful for recipes where presentation matters.
Helpful Tips
- Cleanliness is Key: Always use clean scissors that have been washed thoroughly.
- Small Snips: Start with very small snips and gradually work your way around to avoid accidentally breaking the yolk or creating a jagged edge.
- Fresh Eggs: Fresher eggs tend to have stronger membranes, making them slightly easier to handle with this method.
- Practice Makes Perfect: Like any new technique, it might take a couple of tries to get the hang of it. Don’t worry if your first few attempts aren’t flawless.
Important Notes / Safety
- Always use kitchen-specific scissors that are kept clean and are not used for other household tasks to maintain hygiene.
- Be gentle when cutting and handling the egg to prevent accidental breakage or injury from the scissor tips.
- Dispose of eggshells properly and wash your hands and tools thoroughly after use to prevent bacterial contamination.