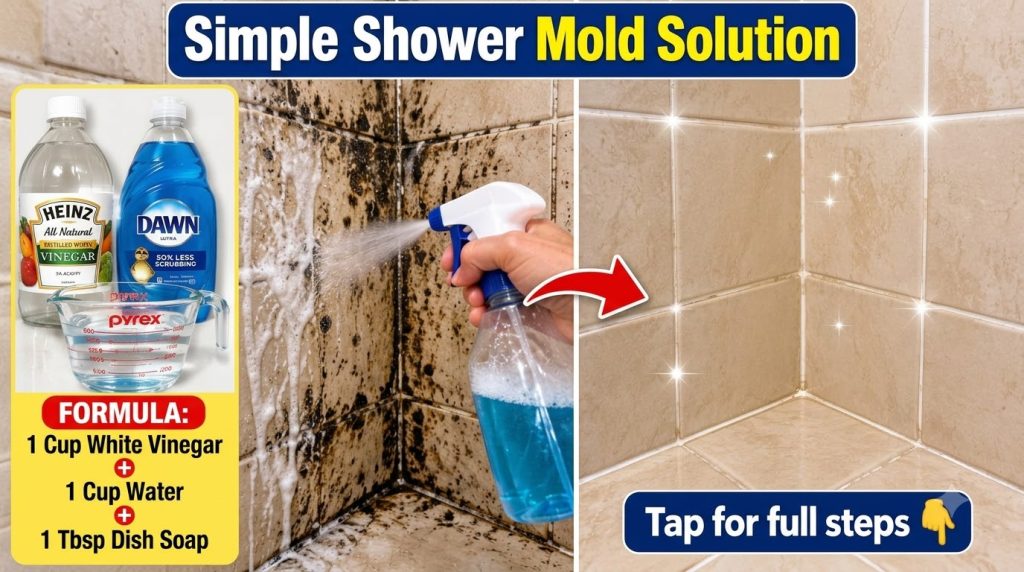
Is your shower or bathroom corner looking less than sparkling? Stubborn grime, soap scum, and mildew can accumulate quickly, turning once pristine tiles and grout into an unsightly mess. Before you reach for harsh chemicals, consider a simple, homemade foaming cleaner. This DIY solution can help you break down that tough buildup effectively, making your deep cleaning efforts more manageable and leaving your bathroom looking fresh.
What You’ll Need
Gather these basic household items to create your foaming cleaner:
- 1 cup warm water
- 1/2 cup white vinegar
- 1/4 cup liquid dish soap
- Empty spray bottle
- Scrubbing brush or old toothbrush
- Clean cloth or sponge for wiping
Why This DIY Can Be Useful
This simple combination of ingredients offers a multi-pronged attack on bathroom grime:
- White Vinegar: An excellent natural cleaner, vinegar’s acetic acid helps to dissolve mineral deposits, soap scum, and mildew, making it effective against common bathroom buildup.
- Liquid Dish Soap: Acts as a degreaser, cutting through greasy residues and helping the mixture adhere to vertical surfaces. It also creates the satisfying foam that helps lift dirt.
- Warm Water: Helps to blend the ingredients and can slightly enhance the cleaning power of the other components.
How to Make It
Preparing your foaming cleaner is quick and easy:
- Carefully pour the warm water into your empty spray bottle.
- Add the white vinegar to the bottle.
- Finally, add the liquid dish soap.
- Secure the spray bottle lid tightly.
- Gently shake the bottle to mix the ingredients. Avoid vigorous shaking, as this can create too much foam inside the bottle, making it harder to spray.
How to Use It
Follow these steps for an effective clean:
- Prepare the Area: Ensure the shower or bathroom area is dry before application for best results.
- Spray Generously: Aim the spray bottle directly at the grimy areas, such as shower corners, grout lines, and tile surfaces. Apply a generous layer, ensuring the foam coats the buildup.
- Let it Work: Allow the solution to sit on the surfaces for at least 15-30 minutes. For extremely stubborn grime, you can let it sit for up to an hour.
- Scrub: Using a scrubbing brush or an old toothbrush for grout lines, vigorously scrub the treated areas. You should see the grime starting to loosen and lift.
- Rinse Thoroughly: Rinse the entire area with warm water, ensuring all cleaner residue and dislodged grime are washed away.
- Wipe Dry: For a streak-free finish, wipe the surfaces dry with a clean cloth or sponge.
What to Expect
You can expect a significant improvement in the cleanliness of your shower and tiled surfaces. Grout lines should appear brighter, and soap scum and mildew should be considerably reduced. For very old or deeply embedded stains, you might need to repeat the application and scrubbing process to achieve the desired results. Patience and a little elbow grease are key!
Helpful Tips
- Regular Maintenance: Use this cleaner weekly or bi-weekly to prevent heavy buildup and make future cleaning much easier.
- Ventilation is Key: Always ensure good ventilation by opening a window or turning on an exhaust fan when cleaning, especially with vinegar, to dissipate fumes.
- Spot Test: If you have delicate or unusual tile materials, always test the cleaner on an inconspicuous spot first to ensure no discoloration or damage occurs.
Important Notes / Safety
- Ventilation: Always work in a well-ventilated area to avoid inhaling strong vinegar fumes.
- Patch Test: Before widespread use, especially on colored grout or porous stone, test the solution on a small, hidden area to check for any adverse reactions or discoloration. While generally safe, vinegar can affect certain materials over time.
- Avoid Mixing with Bleach: Never mix this cleaner with bleach or bleach-based products, as this can create dangerous chlorine gas.
- Storage: Store the cleaner in a labeled spray bottle out of reach of children and pets. While natural, it’s not intended for consumption.