Banish Burnt-On Grime: The Ultimate Baking Soda and Toothpaste Pan Cleaning Hack
Are you tired of scrubbing stubborn, burnt-on food from your frying pans, only to be left with unsightly stains and a sore arm? We’ve all been there! Burnt food can cling to cookware like a barnacle to a ship, making cleaning a dreaded chore. But what if we told you there’s a simple, natural, and surprisingly effective hack using two common household items that can make your pans shine like new again?
Get ready to discover the power of baking soda combined with toothpaste – a dynamic duo that will revolutionize your kitchen cleaning routine and restore your cookware to its former glory. Say goodbye to harsh chemicals and hello to sparkling clean pans with minimal effort!
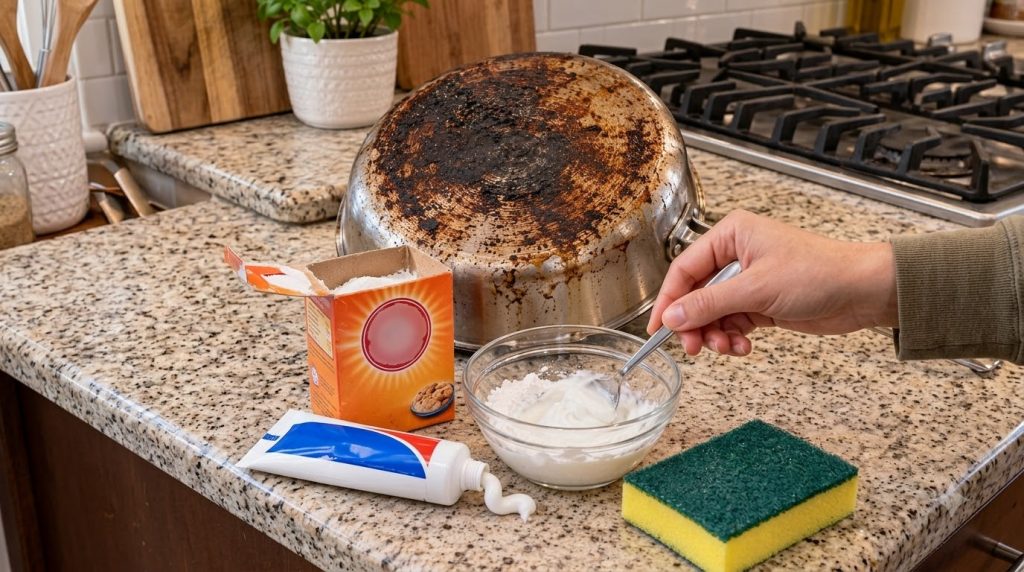
The Secret Ingredient Duo: Baking Soda & Toothpaste
This cleaning hack might sound unconventional, but the combination of baking soda and toothpaste creates a potent, yet gentle, abrasive and cleaning paste. Baking soda is a natural alkali and a mild abrasive, known for its ability to cut through grease and neutralize odors. Toothpaste, especially the plain white varieties (avoid gel or colored ones, which can stain), contains mild abrasives (like hydrated silica or calcium carbonate) and detergents similar to those found in dish soap. Together, they form a formidable team against burnt-on residue.
What You’ll Need (Ingredients & Tools)
Ingredients:
- 2 tablespoons baking soda
- 1 tablespoon white, non-gel toothpaste
- 1-2 tablespoons water (adjust as needed to form a paste)
Tools:
- Small mixing bowl
- Spoon or old toothbrush for mixing
- Non-abrasive sponge or soft scrubbing brush (ensure it won’t scratch your pan’s surface)
- Your burnt frying pan
- Warm water for rinsing
Step-by-Step Guide to a Sparkling Pan
Follow these simple steps to transform your tarnished pan:
- Prepare Your Pan: First, ensure your pan is completely cool and empty. Remove any loose food debris by scraping it off gently with a wooden or plastic spatula.
- Mix the Cleaning Paste: In your small mixing bowl, combine the two tablespoons of baking soda with one tablespoon of white toothpaste. Add water gradually, a teaspoon at a time, mixing until you achieve a thick, spreadable paste. It should have the consistency of a thick frosting, not too runny.
- Apply the Paste: Liberally apply the paste directly onto the burnt-on areas of your pan. Make sure the entire affected surface is covered with a thick layer.
- Let it Sit: For best results, allow the paste to sit on the burnt areas for at least 30 minutes. For truly stubborn grime, you can even leave it for an hour or two, or even overnight. This gives the ingredients time to work their magic, breaking down the tough residue.
- Scrub Gently: After the waiting period, take your non-abrasive sponge or brush and start scrubbing the burnt areas. You should notice the grime starting to lift away with relative ease. Apply gentle pressure and work in circular motions.
- Rinse Thoroughly: Once you’ve scrubbed away the burnt residue, rinse the pan thoroughly under warm running water. Inspect your pan. If any stubborn spots remain, you can repeat the process.
- Dry and Admire: Dry your pan completely with a clean towel. You’ll be amazed at how much cleaner and shinier your pan looks!
Why This Hack Works Wonders
The science behind this hack is quite fascinating. Baking soda’s alkaline properties help to soften and loosen burnt food particles, making them easier to remove. Its fine granular texture provides a gentle abrasive action without scratching most pan surfaces. Toothpaste, on the other hand, contributes additional mild abrasives to mechanically lift stains, along with mild detergents that help emulsify grease and dirt. The combination creates a powerful chemical and physical cleaning action that tackles even the most challenging burnt-on messes.
Important Tips & Precautions
- Test First: Always test this paste on an inconspicuous area of your pan, especially if it’s a specialty pan, to ensure it doesn’t cause any discoloration or damage.
- Avoid Abrasive Tools: Stick to non-abrasive sponges or brushes to prevent scratching the pan’s surface, particularly on stainless steel or cast iron.
- Rinse Well: Ensure you rinse all the paste off your pan thoroughly before cooking in it again.
- Not for Non-Stick: While generally safe for many pan types, exercise caution or avoid this method entirely on delicate non-stick coatings, as even mild abrasives could potentially damage the surface. Always refer to your pan manufacturer’s cleaning instructions.
- Regular Toothpaste: Remember to use plain white toothpaste, not gel, striped, or colored varieties, which may contain dyes that could stain.
With this simple yet effective baking soda and toothpaste hack, you can reclaim your burnt pans and make them sparkle like new. It’s an eco-friendly, budget-friendly, and highly satisfying way to keep your kitchenware in top shape. Give it a try and share your gleaming results!