Easy 2-Ingredient Milk Candies: Delicious No-Bake Pastillas Recipe
Looking for a simple, sweet treat that requires minimal effort and ingredients? These Easy 2-Ingredient Milk Candies, often known as ‘Pastillas de Leche’ in Filipino cuisine, are your answer! Made with just powdered milk and sweetened condensed milk, they come together in a flash to create a creamy, melt-in-your-mouth delight that’s utterly irresistible.
Perfect for satisfying a sweet craving, sharing with friends and family, or even gifting, these no-bake candies are a testament to how incredible simple ingredients can be. Their rich, milky flavor and smooth texture make them a comforting classic everyone will adore. Get ready to discover your new favorite homemade candy!

Why You’ll Love This Recipe
- Incredibly Easy: With only two core ingredients and no baking required, this recipe is perfect for beginners and seasoned cooks alike.
- Quick to Make: From start to finish, you can have a batch of these candies ready in under an hour, including chilling time.
- Crowd-Pleasing Sweetness: The rich, milky flavor and smooth texture are universally loved, making them a hit at any gathering.
- Customizable: Easily adapt the flavors with extracts, zest, or coatings to suit your preference.
- Budget-Friendly: Uses common, inexpensive pantry staples.
- No Special Equipment: You likely have everything you need in your kitchen already.
Ingredients
- 2 cups (240 g) powdered milk (full cream recommended)
- 1 can (14 oz / 397 g) sweetened condensed milk
- Optional: 1/4 cup (50 g) granulated sugar, for coating
- Optional: 1 teaspoon (5 ml) melted butter or neutral oil, for greasing hands
Ingredient Notes
- Powdered Milk: Full cream powdered milk will give you the richest, creamiest texture and flavor. While skim milk powder can work, the result might be slightly less decadent.
- Sweetened Condensed Milk: This is the binding agent and the primary source of sweetness. Do not substitute with evaporated milk or regular milk, as they will not yield the correct consistency.
- Granulated Sugar (Optional): Rolling the candies in sugar adds a lovely sparkly finish and an extra layer of sweetness and texture. You can also use caster sugar for a finer coating.
Equipment You’ll Need
- Large mixing bowl
- Spatula or sturdy spoon
- Measuring cups
- Measuring spoons
- Baking sheet or plate
- Parchment paper or wax paper
How to Make Easy 2-Ingredient Milk Candies
-
Combine the Ingredients
In a large mixing bowl, add the powdered milk. Gradually pour in the sweetened condensed milk, starting with about half the can. Use a sturdy spatula or spoon to mix the ingredients together. As you mix, the mixture will start to come together, forming a thick dough.
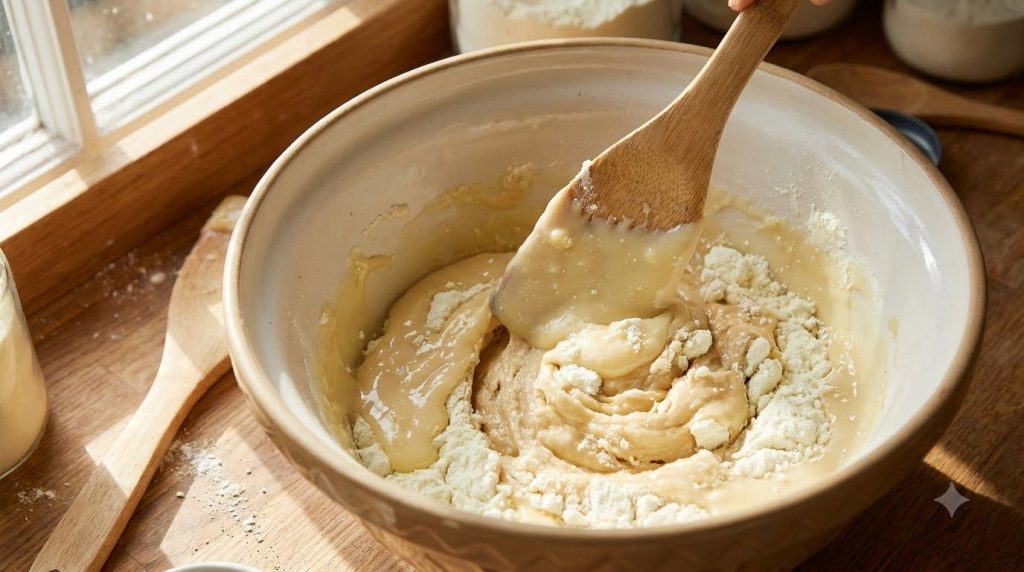
A large mixing bowl containing powdered milk and sweetened condensed milk being mixed together with a spatula forming a -
Form the Dough
Continue adding the remaining condensed milk gradually, mixing until a cohesive, slightly sticky dough forms. The dough should be firm enough to handle but still pliable. If the mixture is too dry and crumbly, add a tiny bit more condensed milk (about 1 teaspoon at a time). If it’s too sticky, add a little more powdered milk (also 1 teaspoon at a time) until you reach the desired consistency.
-
Shape the Candies
Lightly grease your hands with a tiny bit of melted butter or neutral oil to prevent sticking. Pinch off small portions of the dough, about 1/2 tablespoon each. Roll each portion between your palms to form small balls, or roll them into small logs, about 1-inch long. Aim for consistent sizes for even appearance.
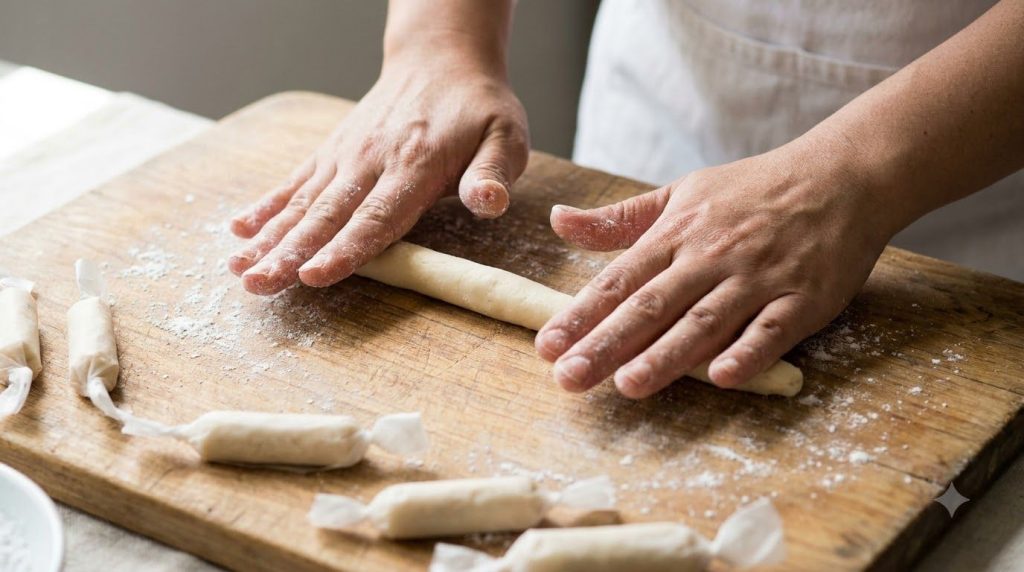
Hands rolling a portion of milk candy dough into a small log shape demonstrating the shaping process for pastillas -
Coat (Optional)
If desired, place the granulated sugar in a shallow plate. Roll each shaped candy in the sugar until fully coated. Gently shake off any excess sugar.
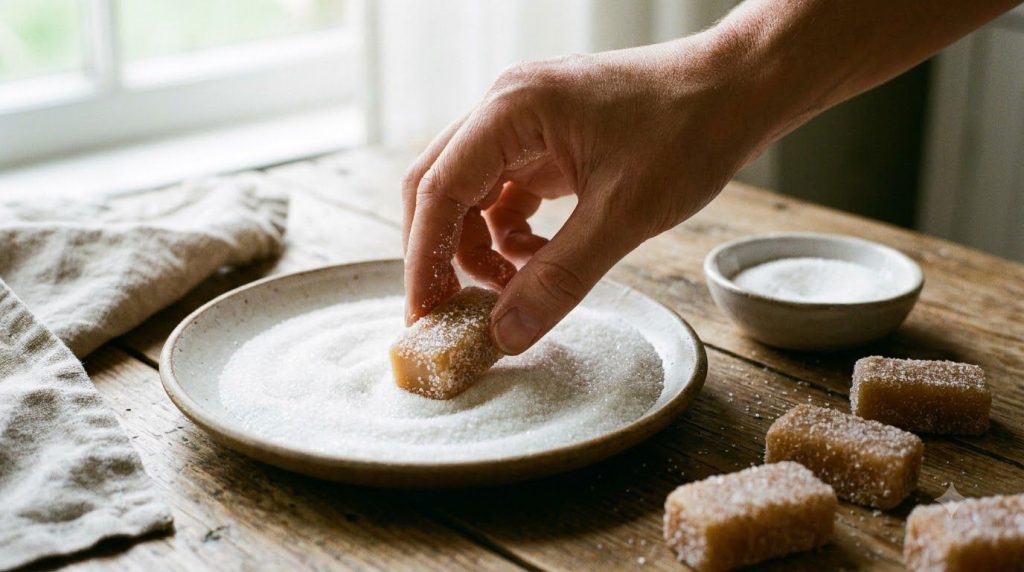
A close-up of a milk candy being rolled in a shallow plate of granulated sugar with several other sugar-coated candies n -
Chill and Serve
Place the finished candies on a baking sheet or plate lined with parchment paper. Chill in the refrigerator for at least 30-60 minutes to allow them to firm up. Once firm, your easy 2-ingredient milk candies are ready to enjoy!
Pro Tips for the Best Results
- Use Full Cream Powdered Milk: This significantly enhances the richness and creaminess of the candies.
- Grease Your Hands: A tiny bit of butter or oil on your hands will make rolling the candies much easier and less messy.
- Adjust Consistency Gradually: When adding condensed milk or extra powdered milk, do so in small increments (1 teaspoon at a time) to avoid making the dough too wet or too dry.
- Chill Thoroughly: Chilling is crucial. It firms up the candies, making them easier to handle, preventing them from melting too quickly, and improving their texture.
- Even Shapes: Try to make your candies uniform in size for consistent presentation and eating experience.
- Don’t Overwork the Dough: Mix just until combined and a workable dough forms. Overmixing can sometimes make the candies a bit tougher.
Common Mistakes to Avoid
- Adding Too Much Liquid at Once: Pouring in all the condensed milk at once can make the dough too sticky and difficult to manage. Add it gradually!
- Not Greasing Hands: Skipping this step will result in a very sticky mess and frustration when shaping.
- Insufficient Chilling: Trying to eat or store the candies before they’ve adequately chilled will result in soft, potentially messy treats.
- Uneven Mixing: Ensure all the powdered milk is fully incorporated to avoid powdery bits in your final candy.
Variations & Substitutions
- Flavor Extracts: Add 1/2 teaspoon of vanilla extract, almond extract, or even a few drops of pandan or ube flavoring (for a Filipino twist) to the condensed milk before mixing.
- Citrus Zest: A teaspoon of finely grated lemon or orange zest can add a lovely bright note.
- Chocolate Version: Mix 1-2 tablespoons of unsweetened cocoa powder into the powdered milk for a chocolatey treat.
- Coconut Coating: Instead of granulated sugar, roll the candies in finely shredded desiccated coconut for a tropical flavor.
- Chopped Nuts: Finely chopped toasted nuts (like pecans or almonds) can be mixed into the dough for added texture.
Serving Suggestions
These easy 2-ingredient milk candies are perfect as a standalone sweet treat after a meal, with a cup of coffee or tea, or as a delightful snack throughout the day. They make charming additions to dessert platters for parties or holidays. For a special touch, wrap individual candies in colorful cellophane or wax paper for homemade gifts.
Storage & Reheating
- Refrigerator Storage: Store the milk candies in an airtight container in the refrigerator for up to 1-2 weeks. Layer them with parchment paper if stacking to prevent sticking.
- Freezer Suitability: While they can be frozen for longer storage (up to 1 month), the texture might become slightly crumbly upon thawing. Thaw in the refrigerator before serving.
- Reheating: These are best served chilled or at room temperature. No reheating is necessary.
FAQ
Can I make these milk candies ahead of time?
Absolutely! These candies are perfect for making ahead. Store them in an airtight container in the refrigerator for up to two weeks.
What kind of powdered milk should I use?
Full cream powdered milk is highly recommended for the best flavor and creamy texture. Skim milk powder can work but might yield a slightly less rich result.
My dough is too sticky. What should I do?
If your dough is too sticky to handle, add a teaspoon of powdered milk at a time, mixing well after each addition, until it reaches a pliable consistency.
My dough is too dry and crumbly. How can I fix it?
If the dough is too dry, add a teaspoon of sweetened condensed milk at a time, mixing thoroughly, until a cohesive dough forms.
Can I skip the chilling step?
While you can eat them immediately, chilling is recommended. It helps the candies firm up, making them less sticky, easier to handle, and improving their overall texture and mouthfeel.
Can I use other types of milk?
No, sweetened condensed milk is essential for this recipe as it provides both the sweetness and the necessary binding properties. Regular milk or evaporated milk will not work.
Are these milk candies gluten-free?
Yes, as long as your powdered milk and condensed milk are gluten-free (which most are), these candies are naturally gluten-free.
What is Pastillas de Leche?
Pastillas de Leche, often shortened to Pastillas, is a traditional Filipino milk candy, typically made from carabao’s milk (water buffalo milk) and sugar. This recipe is a simpler, quicker version using powdered milk and condensed milk, making it accessible to everyone.
Recipe Card
Recipe Name: Easy 2-Ingredient Milk Candies
Short Description: Delightful, no-bake milk candies (Pastillas) made with just powdered milk and sweetened condensed milk. Creamy, sweet, and incredibly easy to make.
Prep Time: 15 minutes
Cook Time: 0 minutes
Total Time: 45-75 minutes (includes 30-60 min chilling)
Servings: 24-30 small candies
Course: Dessert, Snack
Cuisine: American, Filipino (inspired)
Cooking Method: No-bake, Mixing
Ingredients:
– 2 cups (240 g) powdered milk (full cream recommended)
– 1 can (14 oz / 397 g) sweetened condensed milk
– Optional: 1/4 cup (50 g) granulated sugar, for coating
– Optional: 1 teaspoon (5 ml) melted butter or neutral oil, for greasing hands
Instructions:
1. In a large mixing bowl, add the powdered milk. Gradually pour in about half of the sweetened condensed milk. Use a sturdy spatula or spoon to mix the ingredients together until a thick mixture forms.
2. Continue adding the remaining condensed milk gradually, mixing until a cohesive, slightly sticky dough forms. The dough should be firm enough to handle. If too dry, add more condensed milk by the teaspoon; if too sticky, add more powdered milk by the teaspoon.
3. Lightly grease your hands with melted butter or neutral oil. Pinch off small portions of the dough (about 1/2 tablespoon each). Roll each portion between your palms to form small balls or logs, about 1-inch long.
4. If desired, place the granulated sugar in a shallow plate and roll each shaped candy in the sugar until fully coated.
5. Place the finished candies on a baking sheet or plate lined with parchment paper. Chill in the refrigerator for at least 30-60 minutes to allow them to firm up before serving.
Notes:
– For the best creamy texture, use full cream powdered milk.
– Greasing your hands makes shaping much easier.
– Adjust the amount of condensed milk or powdered milk slightly to achieve the perfect dough consistency.
Storage:
Store in an airtight container in the refrigerator for up to 1-2 weeks. Can be frozen for up to 1 month, but texture may change slightly.
Nutrition:
Nutrition information is an estimate and may vary depending on the ingredients and brands used.