Sweet Potato Pizza Crust: The Best Healthy & Gluten-Free Recipe
Are you ready to transform your pizza night into a healthier, equally delicious, and incredibly satisfying experience? Look no further than this amazing sweet potato pizza crust recipe! Forget about heavy, doughy crusts that leave you feeling sluggish. This innovative crust is a game-changer, offering a vibrant, flavorful, and nutrient-packed base for all your favorite pizza toppings.
This recipe is perfect for anyone looking to incorporate more vegetables into their diet, those with gluten sensitivities, or simply families seeking a lighter yet hearty meal. It’s surprisingly easy to make, even for beginner cooks, and the result is a naturally sweet, slightly chewy crust that holds up beautifully to a generous spread of sauce and cheese. Plus, it’s a fantastic way to get kids excited about trying something new and healthy!
In this comprehensive guide, you’ll learn everything you need to know to create a perfect sweet potato pizza crust from scratch. We’ll cover simple ingredients, step-by-step instructions, expert tips for success, and even creative variations to keep your pizza nights exciting. Get ready to impress your family and friends with a pizza that’s as wholesome as it is delicious!
Recipe Summary
- Prep Time: 20 minutes
- Cook Time: 25-30 minutes
- Total Time: 45-50 minutes
- Servings: 1 (10-12 inch pizza)
- Difficulty Level: Easy
- Course: Main Dish
- Cuisine: American
- Diet Type: Gluten-Free, Vegetarian, Whole Foods
Why You’ll Love This Recipe
- Healthy & Nutritious: Packed with vitamins, minerals, and fiber from sweet potatoes.
- Gluten-Free: A fantastic alternative for those avoiding gluten or looking for grain-free options.
- Delicious Flavor: Naturally sweet with a savory twist that complements any topping.
- Easy to Make: Simple steps that even novice cooks can follow with confidence.
- Versatile: A blank canvas for all your favorite pizza sauces and toppings.
- Kid-Approved: A fun and healthy way to sneak veggies into your children’s diet.
- Guilt-Free Pizza Night: Enjoy pizza without the usual heaviness or carb overload.

Ingredients
- 1 large sweet potato (about 1.5-2 cups mashed), peeled and diced
- ½ cup almond flour (or oat flour for a non-nut alternative)
- ¼ cup tapioca flour (or arrowroot starch for structure)
- 1 large egg (or a ‘flax egg’ for vegan version: 1 tbsp ground flaxseed + 3 tbsp water, let sit 5 mins)
- ½ teaspoon dried oregano (for classic pizza flavor)
- ¼ teaspoon garlic powder (enhances savory notes)
- ¼ teaspoon sea salt (to balance the sweetness)
- Pinch of black pepper (for a subtle kick)
- 1-2 tablespoons olive oil (for brushing the crust and preventing sticking)
Equipment Needed
- Large pot for boiling
- Potato masher or fork
- Large mixing bowl
- Parchment paper
- Baking sheet
- Measuring cups and spoons
- Spatula or spoon for spreading
Step-by-Step Instructions
Step 1: Prepare the Sweet Potato
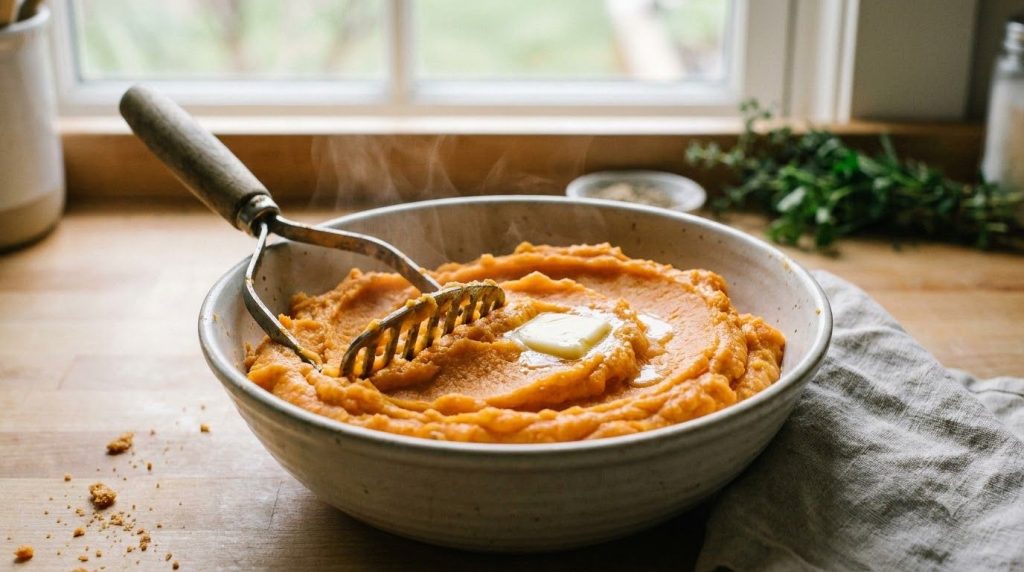
Start by peeling your large sweet potato and dicing it into 1-inch cubes. Place the diced sweet potato in a large pot and cover with water. Bring the water to a boil over medium-high heat, then reduce heat and simmer for 15-20 minutes, or until the sweet potato is very tender when pierced with a fork. Drain the sweet potato thoroughly and return it to the pot or a large mixing bowl. Mash the sweet potato until completely smooth, ensuring there are no lumps. This smooth consistency is crucial for a pliable crust.
Step 2: Mix the Crust Ingredients
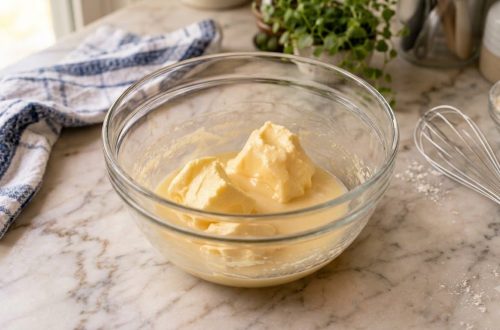
Allow the mashed sweet potato to cool for a few minutes. While still warm but not hot, add the almond flour, tapioca flour, egg (or flax egg), dried oregano, garlic powder, sea salt, and black pepper to the bowl with the mashed sweet potato. Using a spatula or your hands, mix all the ingredients together until a uniform, thick dough forms. The dough should be sticky but manageable. If it feels too wet, add a tiny bit more almond flour; if too dry, a tiny splash of water.
Step 3: Shape the Crust
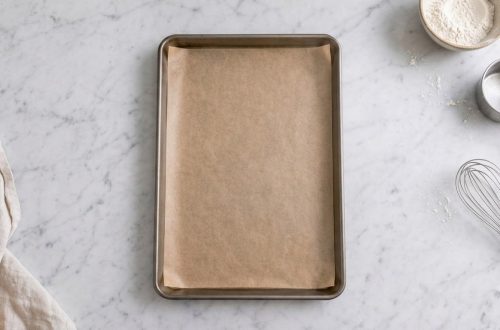
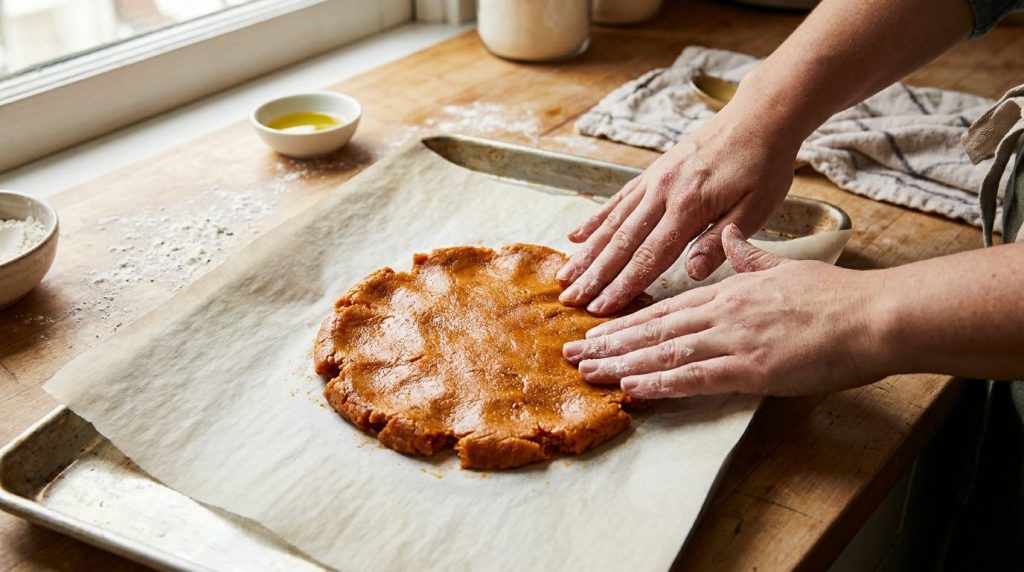
Preheat your oven to 400°F (200°C). Line a baking sheet with parchment paper. Lightly brush the parchment paper with olive oil – this helps prevent sticking and promotes a crispy crust. Transfer the sweet potato dough to the center of the parchment paper. Using your hands or the back of a spoon, spread the dough evenly into a round shape, about 10-12 inches in diameter and ¼-inch thick. You can create a slightly thicker edge for a ‘crust’ if you like. Ensure the crust is evenly thick for uniform baking.
Step 4: Bake the Crust
Carefully transfer the baking sheet with the shaped crust to the preheated oven. Bake for 20-25 minutes, or until the crust is golden brown and firm to the touch. The baking time can vary depending on your oven and the thickness of your crust, so keep an eye on it. This pre-bake step is essential for ensuring a sturdy, non-soggy base for your toppings.
Step 5: Add Toppings and Finish Baking
Once the crust is pre-baked, remove it from the oven. Add your favorite pizza sauce, cheese, and toppings. Be mindful not to overload the crust, as it is more delicate than a traditional dough. Return the pizza to the oven and bake for another 5-10 minutes, or until the cheese is melted and bubbly and the toppings are heated through. For an extra crispy crust, you can carefully slide the parchment paper off the baking sheet and onto the oven rack for the last few minutes of baking.

Step 6: Cool, Slice, and Serve
Remove the finished pizza from the oven and let it cool for 5 minutes before slicing. This brief cooling period helps the crust set and makes it easier to slice without crumbling. Slice with a sharp knife or pizza cutter and serve immediately. Enjoy your healthy, homemade sweet potato pizza!
Nutrition Highlights
This sweet potato pizza crust is a nutritional powerhouse. It’s an excellent source of dietary fiber, which aids digestion and promotes satiety. Sweet potatoes are rich in beta-carotene (a precursor to Vitamin A), Vitamin C, and B vitamins, offering antioxidant benefits and supporting immune health. The almond flour contributes healthy fats and protein, while the egg provides additional protein and binding properties. Overall, this crust offers a much more nutrient-dense option compared to traditional refined flour crusts, helping you feel nourished and energized.
Ingredient Benefits
- Sweet Potato: Provides natural sweetness, vibrant color, and a wealth of vitamins (A, C, B6) and minerals (potassium, manganese). It’s also high in fiber, contributing to a feeling of fullness and digestive health.
- Almond Flour: A gluten-free alternative that adds a delicate texture, healthy fats, and protein. It helps create a tender yet firm crust.
- Tapioca Flour: Acts as a binder, giving the crust elasticity and a slightly chewy texture. It also helps achieve a crisp exterior.
- Egg: Binds the ingredients together, adding structure and a subtle richness to the crust. It also contributes a bit of protein.
- Oregano & Garlic Powder: These herbs and spices infuse the crust with classic savory pizza flavors, complementing the natural sweetness of the potato.
- Olive Oil: Used for brushing, it helps the crust achieve a beautiful golden color and a wonderfully crispy texture, while adding healthy monounsaturated fats.
Expert Tips
- Don’t Over-Mash: While you want a smooth mash, avoid over-mixing the sweet potato, which can make it gluey.
- Cool the Sweet Potato: Ensure the mashed sweet potato has cooled slightly before mixing in the egg and flours. If it’s too hot, it can ‘cook’ the egg prematurely.
- Even Thickness is Key: Spread the dough as evenly as possible to ensure uniform baking. Thicker spots will be softer, thinner spots crispier.
- Parchment Paper is a Must: Sweet potato dough is sticky. Parchment paper (and a little oil) prevents sticking and makes transferring easy.
- Pre-Bake Thoroughly: Don’t skip or shorten the pre-baking time. A well-baked crust before toppings is crucial for structural integrity and crispiness.
- Avoid Over-Topping: Since this crust is more delicate than traditional dough, don’t load it with too many heavy or watery toppings, which could make it soggy.
- Crispy Edge Trick: For extra crispy edges, brush a tiny bit of olive oil around the perimeter of the crust before pre-baking.
- Batch Prep: You can mash a larger batch of sweet potatoes and store the extra in the fridge for a few days to quickly whip up another crust.
Recipe Variations
- Vegan Sweet Potato Crust: Simply replace the egg with a ‘flax egg’ (1 tbsp ground flaxseed + 3 tbsp water, let sit 5 minutes to thicken) to make this recipe completely plant-based.
- Spicy Kick: Add a pinch of red pepper flakes to the dough mixture for a subtle heat.
- Herbaceous Twist: Incorporate other dried herbs like basil or thyme along with the oregano for a different aromatic profile.
- Nut-Free: If you have nut allergies, substitute the almond flour with an equal amount of oat flour (ensure it’s certified gluten-free if needed) or sunflower seed flour.
- Cheesy Crust: Mix 1-2 tablespoons of nutritional yeast into the dough for a savory, cheesy flavor boost without dairy.
- Thicker Crust: If you prefer a thicker, breadier crust, simply spread the dough into a smaller diameter (e.g., 8-9 inches) and increase the pre-bake time slightly until firm.
Storage Instructions
- Refrigerator Storage (Unbaked Crust): The prepared sweet potato dough can be stored in an airtight container in the refrigerator for up to 2-3 days. You might need to let it come to room temperature slightly before spreading.
- Refrigerator Storage (Baked Crust): A pre-baked crust (without toppings) can be stored in an airtight container for up to 3 days. Reheat in the oven at 375°F (190°C) for 5-7 minutes before adding toppings.
- Refrigerator Storage (Assembled Pizza): Leftover pizza with toppings can be stored in an airtight container or wrapped tightly in foil in the refrigerator for 2-3 days. Reheat in a preheated oven or toaster oven for best results.
- Freezer Storage (Pre-baked Crust): Once the crust is pre-baked and completely cooled, you can wrap it tightly in plastic wrap, then aluminum foil, and freeze for up to 1 month. When ready to use, thaw in the refrigerator overnight or bake directly from frozen at 400°F (200°C) for an extra 10-15 minutes before adding toppings.
- Best Storage Containers: Use flat, airtight containers for assembled pizza slices or freezer-safe bags for pre-baked crusts.
Frequently Asked Questions
Can I make this sweet potato pizza crust ahead of time?
Yes, absolutely! You can prepare the dough up to 2-3 days in advance and store it in the fridge, or pre-bake the crust and store it in the fridge for up to 3 days, or even freeze it for up to a month. This makes meal prep a breeze!
Why is my sweet potato crust soggy?
Sogginess usually occurs if the sweet potato wasn’t drained thoroughly, the crust wasn’t pre-baked long enough, or too many watery toppings were used. Ensure the sweet potato is very dry after mashing and pre-bake until truly golden and firm.
Can I use different flours for the crust?
Almond and tapioca flours provide the best texture, but you can experiment with other gluten-free flours. Oat flour or sunflower seed flour can substitute almond flour, and arrowroot starch can replace tapioca flour. Be aware that changes may affect the texture slightly.
How do I make sure the crust is crispy?
Key tips for crispiness include: thoroughly draining the sweet potato, spreading the crust to an even ¼-inch thickness, pre-baking until golden brown and firm, and not overloading with toppings. Brushing with olive oil before baking also helps!
What are the best toppings for sweet potato pizza?
The natural sweetness of the crust pairs well with savory toppings. Think roasted vegetables like bell peppers and onions, spinach, mushrooms, goat cheese, feta, or a lean protein like grilled chicken. A simple marinara sauce works wonderfully.
Is this recipe suitable for kids?
Absolutely! Kids often love pizza, and this crust is a fantastic way to introduce a healthy vegetable in a fun, familiar format. Let them help with spreading the dough or choosing their favorite healthy toppings.
Can I make mini sweet potato pizzas?
Yes! Instead of one large crust, divide the dough into smaller portions and shape them into individual mini pizzas. Adjust baking time as needed for smaller sizes (likely less time).
Conclusion
Revolutionize your next pizza night with this incredibly delicious and healthy sweet potato pizza crust! It’s a wonderful gluten-free, nutrient-packed alternative that proves eating well doesn’t mean sacrificing flavor or fun. With its natural sweetness and sturdy texture, it’s the perfect base for all your creative topping combinations. So, gather your ingredients, follow these simple steps, and get ready to enjoy a guilt-free pizza experience that your whole family will absolutely love. Happy cooking!