Tackle Tough Pan Stains with This Simple DIY Baking Soda & Toothpaste Hack
Stubborn burnt-on stains on your pans can be one of the most frustrating challenges in the kitchen. No matter how much you scrub, those dark, encrusted marks often seem impossible to remove. But before you banish that pan to the back of the cupboard or consider replacing it, there’s a surprisingly simple, budget-friendly solution lurking in your pantry and bathroom: baking soda and toothpaste!
This ingenious home hack combines the power of two everyday items to create a potent cleaning paste that can bring even the most grimy cookware back to life. Forget expensive specialty cleaners; with just a few common household staples, you can restore your pans to their former glory.
The Problem: Burnt-On Pan Stains
Whether it’s an accidental scorch, a cooking mishap, or simply years of accumulated grime, burnt food and oil residue can bond strongly to the surface of your pots and pans. These stains aren’t just unsightly; they can also affect cooking performance and even leach unwanted flavors into your food. Traditional scrubbing often falls short, leaving you with aching arms and still-stained cookware.
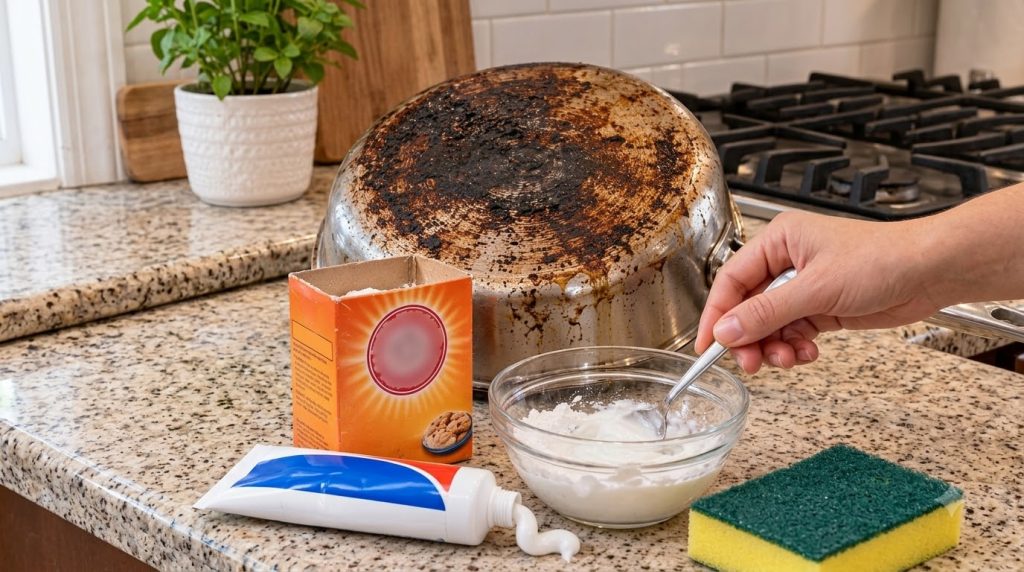
The Solution: Baking Soda & Toothpaste Paste
This dynamic duo forms an effective paste that tackles tough stains through a combination of abrasive action and chemical cleaning. It’s safe for most types of cookware, though it’s always wise to patch test first, especially on non-stick surfaces.
What You’ll Need:
- Baking Soda: Approximately 1/2 cup
- Toothpaste (basic white paste, not gel): A generous squeeze (about 1-2 tablespoons)
- Water: A few drops, as needed, to form a paste
- Abrasive Sponge or Scrubber: (e.g., non-scratch scrubbing pad, steel wool for very tough stainless steel)
- Glass Bowl or Small Container: For mixing
- Spoon or Stirring Utensil
- Gloves (optional but recommended for sensitive skin)
Step-by-Step Guide: Restore Your Burnt Pans
Follow these simple steps to bring your burnt pans back to their sparkling best:
-
Prepare the Pan
First, ensure your pan is completely cool and dry. Scrape off any loose food particles with a spatula or wooden spoon. For deeply caked-on residue, you might want to briefly soak the pan in hot, soapy water to loosen some of the surface gunk.
-
Mix the Cleaning Paste
In your glass bowl, combine the baking soda and a generous amount of white toothpaste. Start adding water a few drops at a time, mixing continuously with your spoon until you achieve a thick, spreadable paste. The consistency should be similar to a thick frosting – not too runny, not too crumbly.
-
Apply the Paste Liberally
Apply the paste directly to the burnt and stained areas of your pan. Don’t be shy; ensure the entire stained surface is covered with a thick layer of the mixture. For particularly stubborn spots, you can apply an extra dollop.
-
Let it Sit
This is where the magic happens! Allow the paste to sit on the stains for at least 30 minutes. For extremely tough, set-in burns, you might need to leave it on for several hours, or even overnight. The longer it sits, the more time the ingredients have to break down the grime.
-
Scrub Away the Stains
Once the sitting time is up, grab your abrasive sponge or scrubber. Dampen the sponge slightly if the paste has dried out too much. Begin scrubbing the stained areas with firm, circular motions. You should notice the grime starting to lift and dissolve. For very stubborn patches on stainless steel, a bit of elbow grease and steel wool can be incredibly effective.
-
Rinse and Inspect
Rinse the pan thoroughly under warm running water, scrubbing away any remaining paste and loosened residue. Inspect your pan. If some stains remain, you can repeat the process or focus the paste application on the most resistant areas.
-
Final Clean
Once you’re satisfied with the results, wash your pan as you normally would with dish soap and water. Dry it completely to prevent water spots.
Why This Works: The Science Behind the Clean
- Baking Soda: This household hero is a mild abrasive that physically helps to scrub away caked-on food without damaging the pan’s surface (for most materials). More importantly, it’s an alkaline substance. This alkalinity helps to break down acidic food residues and saponify (turn into soap) fats and oils, making them easier to wipe away. It also acts as a natural deodorizer.
- Toothpaste: Most white toothpastes contain mild abrasives like silica, which add extra scrubbing power. They also typically include detergents and surfactants – the same cleaning agents found in many dish soaps – which help to lift and emulsify grease. Some toothpastes also contain mild bleaching agents (like hydrogen peroxide), which can help lighten discoloration.
Important Tips & Precautions:
- Test First: Always test this paste on an inconspicuous area of your pan, especially if it’s non-stick or has a special coating, to ensure it doesn’t cause discoloration or damage.
- Avoid Gels: Stick to plain white toothpaste paste, not gel varieties, as the abrasive and cleaning agents are more concentrated in the paste formulations.
- Gloves: While the ingredients are generally safe, prolonged contact with baking soda can be drying to sensitive skin. Wearing gloves is a good idea.
- Ventilation: Ensure good ventilation in your kitchen, especially if you’re sensitive to strong smells, though this mixture is quite mild.
- Patience is Key: For truly tough stains, don’t rush the sitting time. Letting the paste work its magic for longer will yield better results.
With this simple yet powerful baking soda and toothpaste hack, you no longer have to live with unsightly burnt-on stains on your favorite pans. Give it a try, and enjoy the satisfaction of seeing your cookware gleam once more!