Easy Blender Banana Oat Cake
Looking for a healthy and delicious way to use up those ripe bananas? This Easy Blender Banana Oat Cake is your answer! Imagine a moist, naturally sweet cake with a lovely texture, all prepared with minimal fuss and only one blender. It’s perfect for a wholesome breakfast, a satisfying snack, or a guilt-free light dessert.
This recipe transforms simple pantry staples into a delightful treat that the whole family will love. It’s incredibly versatile and can be customized with your favorite additions like chocolate chips or nuts. Plus, the convenience of blending everything together means less cleanup and more time to enjoy your delicious creation.
Why You’ll Love This Recipe
- Effortless Preparation: Seriously, everything goes into one blender! No multiple bowls, no complicated steps.
- Wholesome Ingredients: Made with oats and ripe bananas, it’s a naturally healthier alternative to traditional cakes.
- Naturally Sweet: Ripe bananas provide most of the sweetness, reducing the need for added sugars.
- Versatile for Any Time: Enjoy it for breakfast with your coffee, as an afternoon snack, or a light dessert after dinner.
- Delicious Texture: It’s wonderfully moist and tender with a satisfying density from the oats.
- Customizable: Easily add chocolate chips, nuts, or spices to suit your taste.
Ingredients
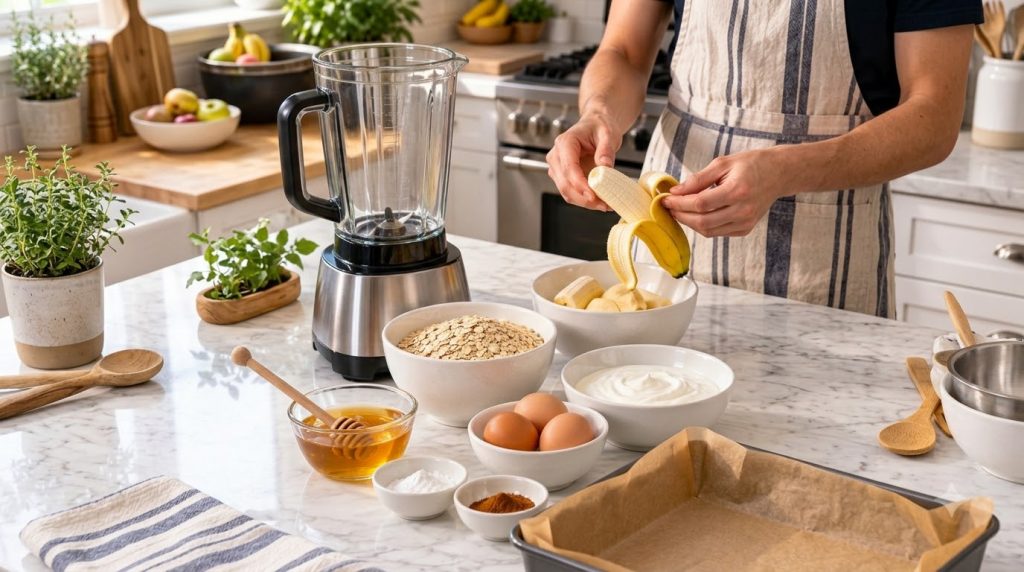
Here’s what you’ll need to make this simple and satisfying blender banana oat cake:
- 2-3 medium ripe bananas (about 1 cup or 250g mashed)
- 2 large eggs
- ½ cup (120 ml) milk (any kind: dairy, almond, oat)
- ¼ cup (60 ml) neutral oil (such as vegetable or canola) or melted unsalted butter
- ¼ cup (60 ml) maple syrup or honey (optional, adjust to taste based on banana ripeness)
- 1 teaspoon vanilla extract
- 2 cups (180 g) rolled oats (old-fashioned oats)
- 1 teaspoon baking powder
- ½ teaspoon baking soda
- ¼ teaspoon salt
- ½ cup (85 g) chocolate chips or chopped nuts (optional add-in)
Ingredient Notes
- Ripe Bananas: The riper your bananas are (think brown spots!), the sweeter and more flavorful your cake will be. They also blend more easily.
- Rolled Oats: Use old-fashioned rolled oats for the best texture and structure. Quick oats can be used in a pinch, but the texture might be slightly different. Steel-cut oats are not recommended for this recipe.
- Milk: Any milk will work well here! Feel free to use dairy milk or a plant-based alternative like almond, soy, or oat milk.
- Sweetener: This is optional. If your bananas are very ripe, you might not need any added sweetener. Taste the batter before baking and adjust if necessary.
Equipment You’ll Need
- High-speed blender
- 8×8 inch (20×20 cm) baking pan
- Parchment paper (optional, for easy removal)
- Spatula or spoon
- Measuring cups and spoons
How to Make Easy Blender Banana Oat Cake
Follow these simple steps to create your delicious and healthy banana oat cake:
- Prepare Your Pan & Preheat Oven: Preheat your oven to 350°F (175°C). Lightly grease an 8×8 inch (20×20 cm) baking pan with cooking spray or butter. For easier removal, you can line the bottom with parchment paper, leaving an overhang on two sides.
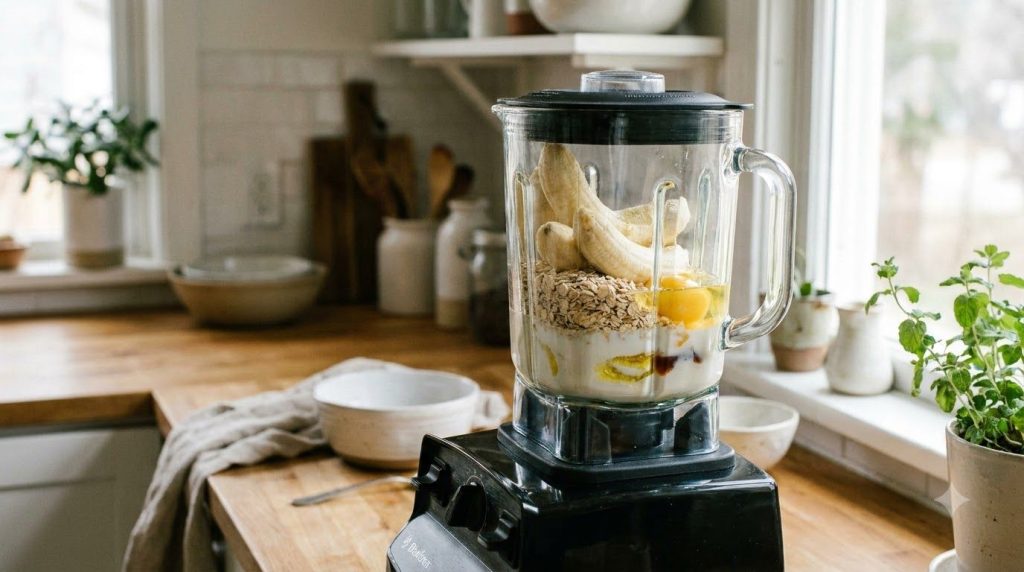
- Combine Wet Ingredients & Oats: Peel your ripe bananas and break them into a few pieces directly into your high-speed blender. Add the eggs, milk, oil or melted butter, maple syrup (if using), and vanilla extract. Finally, add the rolled oats.
- Blend Until Smooth: Secure the lid and blend on high speed until the mixture is completely smooth and creamy. There should be no visible oat pieces. This might take 1-2 minutes, depending on your blender. Scrape down the sides if necessary.
- Add Leavening Agents: Add the baking powder, baking soda, and salt to the blender. Pulse a few times, just until combined. Be careful not to overmix at this stage.
- Fold in Optional Add-ins: If you’re adding chocolate chips or nuts, pour the batter into a separate mixing bowl and gently fold them in with a spatula. This prevents the blender from breaking them up too much.
- Pour & Bake: Pour the batter evenly into your prepared baking pan.
- Bake Until Golden: Bake for 25-30 minutes, or until a toothpick inserted into the center comes out clean. The top should be lightly golden brown.
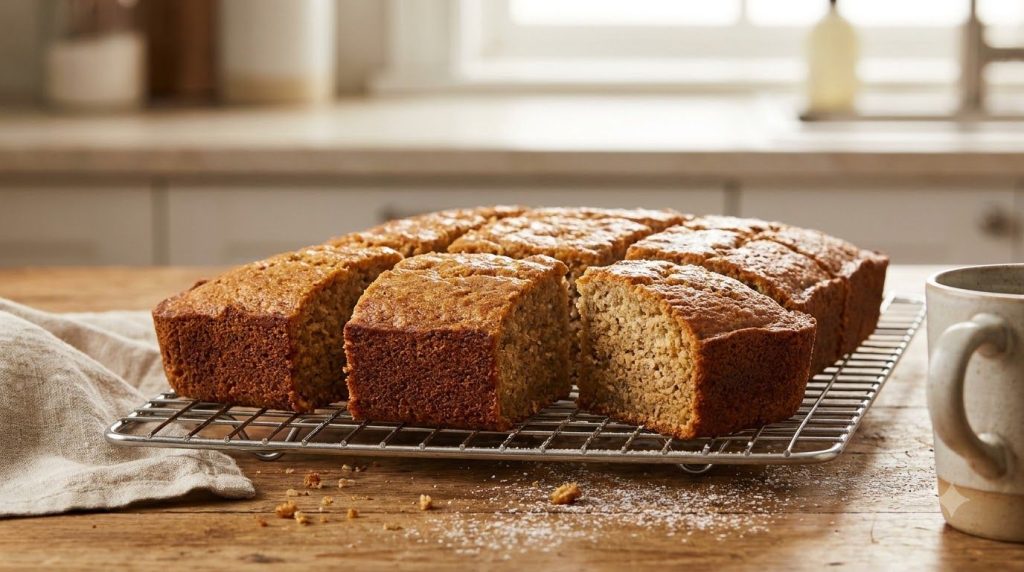
- Cool & Serve: Let the cake cool in the pan on a wire rack for at least 15-20 minutes before slicing and serving. This allows it to set properly and makes for cleaner cuts.
Pro Tips for the Best Results
- Use Very Ripe Bananas: This is crucial for natural sweetness and moisture. The browner, the better!
- Don’t Overmix Dry Ingredients: Once the baking powder and soda are added, only blend briefly. Overmixing can lead to a tougher cake.
- Scrape Down the Blender: Ensure all ingredients are fully incorporated by pausing and scraping down the sides of the blender with a spatula as needed during blending.
- Test for Doneness: The toothpick test is your best friend. If it comes out with wet batter, bake for a few more minutes.
- Cool Completely: Resist the urge to slice immediately! Cooling allows the cake to firm up, making it easier to cut and improving the texture.
- Enhance Flavor: A pinch of cinnamon or nutmeg can really complement the banana flavor.
Common Mistakes to Avoid
- Under-ripe Bananas: Using green or yellow bananas will result in a less sweet and less flavorful cake.
- Overmixing the Batter: After adding the baking powder and soda, excessive blending can activate the gluten in the oats too much, leading to a denser, chewier cake.
- Not Greasing the Pan: While parchment paper helps, always ensure your pan is adequately greased to prevent sticking.
- Cutting While Hot: This cake is delicate when warm. Wait for it to cool down to prevent crumbling.
Variations & Substitutions
- Gluten-Free: Ensure you use certified gluten-free rolled oats. The rest of the ingredients are naturally gluten-free.
- Dairy-Free: Simply use your favorite plant-based milk (almond, soy, oat milk) and a plant-based oil instead of butter.
- Vegan: Substitute eggs with 2 flax eggs (2 tablespoons ground flaxseed + 6 tablespoons water, let sit for 5 minutes). Ensure your milk is plant-based and use oil instead of butter. You might also want to add a bit more banana for extra binding.
- Sweetener Alternatives: Agave nectar or brown sugar can be used in place of maple syrup or honey.
- Spice It Up: Add 1 teaspoon of ground cinnamon or a ½ teaspoon of nutmeg for warm, inviting flavors.
- Optional Add-ins: Get creative! Besides chocolate chips and nuts, consider shredded coconut, dried cranberries, or a swirl of peanut butter.
Serving Suggestions
This Easy Blender Banana Oat Cake is delightful on its own, but here are a few ideas to elevate your experience:
- Breakfast: Serve a slice with your morning coffee or tea.
- Toppings: A dollop of Greek yogurt, a drizzle of extra maple syrup, a sprinkle of fresh berries, or a dusting of powdered sugar are all fantastic additions.
- Snack: It’s a perfect grab-and-go snack for busy days.
- Dessert: Warm a slice slightly and serve with a scoop of vanilla ice cream for a simple yet satisfying dessert.
Storage & Reheating
Proper storage ensures your banana oat cake stays fresh and delicious:
- Room Temperature: Store leftover cake in an airtight container at room temperature for up to 2-3 days.
- Refrigerator: For longer storage, keep it in an airtight container in the refrigerator for up to 5 days.
- Freezer: This cake freezes beautifully! Wrap individual slices tightly in plastic wrap, then place them in a freezer-safe bag or container. It will last for up to 2-3 months. Thaw overnight in the refrigerator or gently reheat from frozen.
- Reheating: For best results, reheat individual slices in the microwave for 15-30 seconds or in a toaster oven at 300°F (150°C) for a few minutes until warmed through.
FAQ
Can I make this banana oat cake gluten-free?
Yes, absolutely! Just make sure to use certified gluten-free rolled oats, as regular oats can sometimes be processed in facilities that also handle wheat.
Can I make this recipe vegan?
Yes, you can. Substitute the eggs with flax eggs (1 tablespoon ground flaxseed + 3 tablespoons water per egg), use a plant-based milk, and ensure you’re using oil instead of butter. Increase the banana slightly for extra binding if needed.
How long does this banana oat cake last?
The cake will stay fresh at room temperature for 2-3 days in an airtight container, or up to 5 days in the refrigerator.
Can I use quick oats instead of rolled oats?
While rolled oats are recommended for the best texture, quick oats can be used. The cake might have a slightly softer, less chewy texture.
Why did my banana oat cake turn out dry?
A dry cake can result from overbaking or not having enough moisture. Ensure you’re using very ripe bananas and check for doneness with a toothpick so you don’t bake it for too long.
Can I add protein powder to this recipe?
Adding protein powder can sometimes affect the texture and moisture of baked goods. If you choose to add it, start with 1-2 tablespoons and you may need to add a splash more milk to maintain the desired batter consistency.
How do I know when the cake is done baking?
The cake is done when the top is golden brown and a toothpick inserted into the center comes out clean, with no wet batter attached.
This Easy Blender Banana Oat Cake is a testament to how simple and delicious healthy eating can be. Enjoy creating and savoring this delightful treat!
Recipe Card
Recipe Name: Easy Blender Banana Oat Cake
Short Description: A healthy, moist, and naturally sweet banana oat cake made entirely in one blender, perfect for breakfast, snacks, or a light dessert.
Prep Time: 10 minutes
Cook Time: 25-30 minutes
Total Time: 35-40 minutes
Servings: 9 servings
Course: Breakfast, Snack, Dessert
Cuisine: American
Cooking Method: Baking
Ingredients:
- 2-3 medium ripe bananas (about 1 cup or 250g mashed)
- 2 large eggs
- ½ cup (120 ml) milk (any kind: dairy, almond, oat)
- ¼ cup (60 ml) neutral oil (such as vegetable or canola) or melted unsalted butter
- ¼ cup (60 ml) maple syrup or honey (optional)
- 1 teaspoon vanilla extract
- 2 cups (180 g) rolled oats (old-fashioned oats)
- 1 teaspoon baking powder
- ½ teaspoon baking soda
- ¼ teaspoon salt
- ½ cup (85 g) chocolate chips or chopped nuts (optional add-in)
Instructions:
- Preheat your oven to 350°F (175°C). Lightly grease an 8×8 inch (20×20 cm) baking pan. Line the bottom with parchment paper for easy removal if desired.
- Add the peeled bananas, eggs, milk, oil/melted butter, maple syrup (if using), vanilla extract, and rolled oats into a high-speed blender.
- Blend on high speed until the mixture is completely smooth and creamy, about 1-2 minutes. Scrape down the sides as needed.
- Add the baking powder, baking soda, and salt to the blender. Pulse a few times, just until combined. Do not overmix.
- If using chocolate chips or nuts, pour the batter into a separate bowl and gently fold them in with a spatula.
- Pour the batter evenly into your prepared baking pan.
- Bake for 25-30 minutes, or until a toothpick inserted into the center comes out clean and the top is lightly golden brown.
- Let the cake cool in the pan on a wire rack for at least 15-20 minutes before slicing and serving.
Notes:
Use very ripe bananas for the best sweetness and flavor. Avoid overmixing the batter once the dry leavening agents are added. For clean slices, allow the cake to cool sufficiently before cutting.
Storage:
Store in an airtight container at room temperature for 2-3 days, or in the refrigerator for up to 5 days. For longer storage, freeze individual slices for up to 2-3 months.
Nutrition:
Nutrition information is an estimate and may vary depending on the ingredients and brands used.
