Chili oil is a true culinary superpower, a vibrant, aromatic condiment that can transform any dish from good to extraordinary. Far more complex than just “spicy,” a well-made homemade chili oil offers layers of toasted chili flavor, a gentle warmth, and often a delightful crunch from infused aromatics. Forget store-bought versions; making your own chili oil at home is surprisingly simple, incredibly rewarding, and allows for endless customization. This guide will walk you through the essential steps to create a versatile, flavorful chili oil that will quickly become your new favorite kitchen staple. Get ready to unlock bold flavors and elevate everything from noodles and dumplings to eggs and roasted vegetables!
Why You’ll Love This Recipe
- Deep, Complex Flavor: Unlike simple hot sauce, homemade chili oil boasts a rich, savory depth from toasted chilies and infused aromatics.
- Surprisingly Easy: With just a few basic ingredients and straightforward steps, you can create gourmet-quality chili oil in your own kitchen.
- Highly Customizable: This recipe is a fantastic base for experimentation! Adjust the spice level, add different spices, nuts, or seeds to create your signature blend.
- Versatile Condiment: Drizzle it over noodles, eggs, roasted vegetables, dumplings, or even pizza for an instant flavor boost.
- Pantry Staple: Once made, it keeps well, making it a convenient and delicious addition to your culinary arsenal.
- Impressive Gift Idea: Bottle your homemade chili oil in decorative jars for a thoughtful and unique present for food-loving friends and family.
Ingredients
- 2 cups (480 ml) neutral oil (such as canola, grapeseed, or sunflower oil)
- 1 cup (90 g) dried red chili flakes (a mix of fine and coarse is ideal, e.g., Sichuan chili flakes or Korean gochugaru)
- 1/4 cup (60 g) finely minced garlic
- 2 tbsp (30 g) finely grated fresh ginger
- 1 tbsp (15 ml) toasted sesame oil (optional, for flavor boost)
- 1 tbsp (15 g) Sichuan peppercorns (optional, for numbing sensation)
- 2 star anise pods (optional)
- 1 small cinnamon stick (optional)
- 1 bay leaf (optional)
- 1/2 tsp salt (or to taste)
- 1/2 tsp sugar (or to taste, helps balance flavor)
Ingredient Notes
- Neutral Oil: Choose a high-smoke point, neutral-flavored oil like canola, grapeseed, sunflower, or soybean oil. Avoid olive oil as its flavor can be too strong and its smoke point lower.
- Dried Red Chili Flakes: The type of chili flakes significantly impacts flavor and heat.
- Sichuan Chili Flakes: Often a blend of different chilies, offering a fragrant, complex heat. Look for a mix of fine powder and coarser flakes for best texture and infusion.
- Korean Gochugaru: Milder and fruitier, creating a beautiful vibrant red oil. Great for a less intense heat.
- Crushed Red Pepper Flakes (from Italian markets): More common, but often just pure heat. You can use these, but consider blending with a milder, more fragrant flake for complexity.
- Aromatics: Fresh garlic and ginger are crucial for a deep, savory base. Make sure they are finely minced to release their flavors effectively.
- Sichuan Peppercorns: If you enjoy the unique “ma la” numbing sensation, these are a must. Lightly toast them before adding to the oil to enhance their aroma.
- Star Anise, Cinnamon Stick, Bay Leaf: These whole spices add layers of fragrant, earthy notes to the oil.
- Sesame Oil: Added at the end, a touch of toasted sesame oil provides a nutty, finishing aroma.
Equipment You’ll Need
- Heavy-bottomed saucepan or pot
- Heat-proof bowl (preferably ceramic or stainless steel)
- Fine-mesh sieve or strainer
- Spatula or spoon
- Thermometer (optional, but recommended for precise oil temperature)
- Airtight glass jar for storage
How to Make Homemade Chili Oil
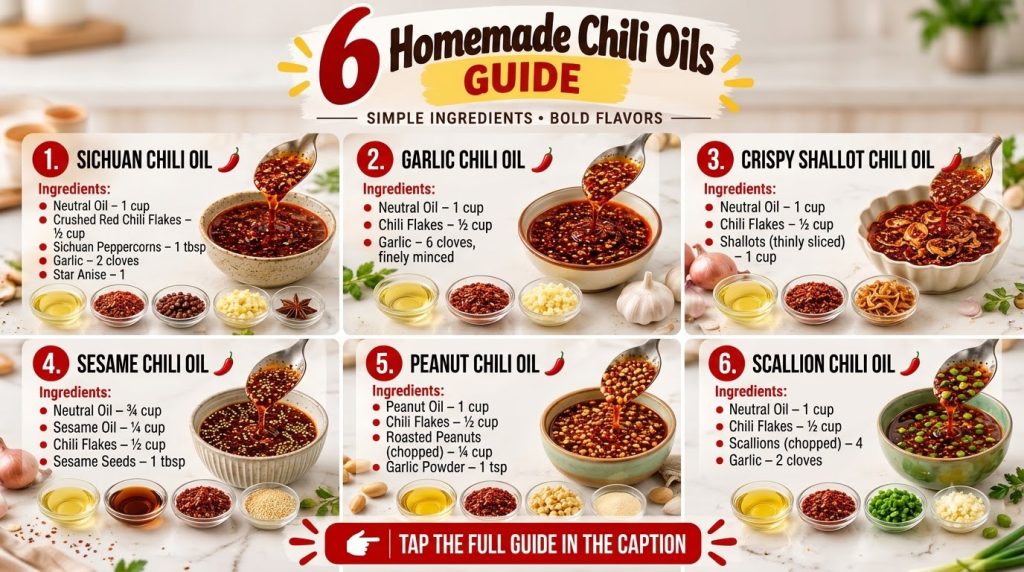
- Prepare Your Chili Flakes: In a large, heat-proof bowl, combine the dried red chili flakes, salt, and sugar. If using Sichuan peppercorns, lightly toast them in a dry pan for 1-2 minutes until fragrant, then crush them slightly (a mortar and pestle or spice grinder works well) and add them to the chili flakes. Set aside.
- Infuse the Oil with Aromatics: Pour the neutral oil into a heavy-bottomed saucepan. Add the minced garlic, grated ginger, star anise, cinnamon stick, and bay leaf (if using). Heat the oil over medium-low heat.
- Gently Cook Aromatics: Slowly bring the oil temperature up to about 250-280°F (120-140°C). Maintain this temperature, allowing the aromatics to gently sizzle and release their flavors. This should take about 15-20 minutes. The garlic and ginger should turn light golden brown, not dark or burnt.
- Strain the Aromatics: Carefully remove the saucepan from the heat. Using a fine-mesh sieve, strain the hot oil directly over the prepared chili flakes in the heat-proof bowl. Discard the cooked aromatics (or save the crispy bits to sprinkle on dishes!).
- Listen for the Sizzle: As the hot oil hits the chili flakes, you should hear a satisfying sizzle. Stir the mixture well with a spoon to ensure all the chili flakes are submerged and “fried” by the hot oil. This process toasts the chilies, deepening their flavor and aroma.
- Cool and Settle: Allow the chili oil to cool completely to room temperature in the bowl, stirring occasionally during the first hour to prevent the chilies from clumping. As it cools, the flavors will continue to meld, and the chili sediment will settle at the bottom.
- Add Sesame Oil (Optional): Once completely cool, stir in the toasted sesame oil, if desired, for an extra layer of nutty fragrance.
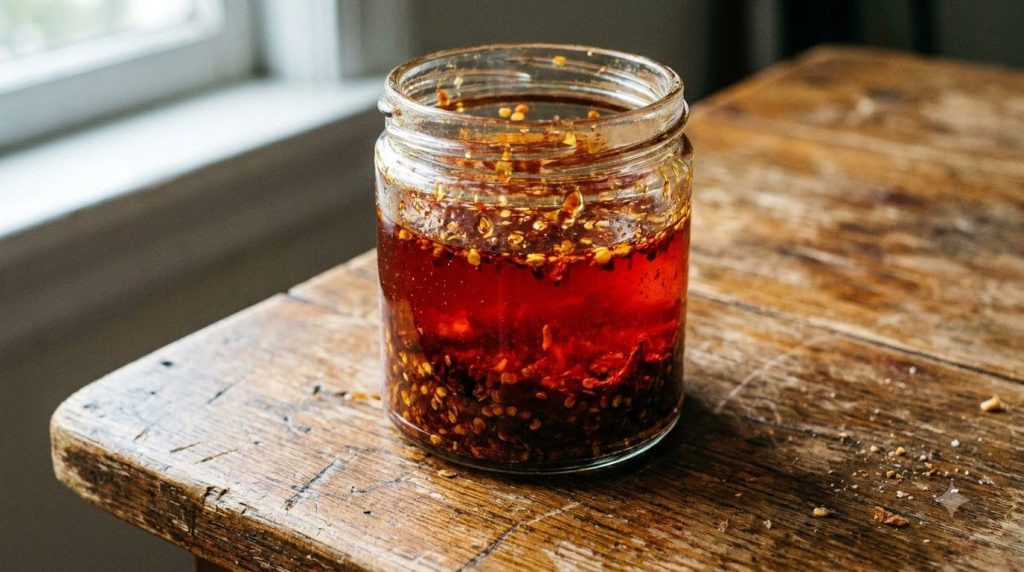
- Store: Carefully transfer the cooled chili oil to a clean, airtight glass jar. It’s ready to use!
Pro Tips for the Best Results
- Control Oil Temperature: Using a thermometer helps ensure the oil is hot enough to toast the chilies but not so hot that it burns them. Aim for 250-280°F (120-140°C) when straining. If it’s too cool, the chilies won’t “fry” properly; too hot, and they’ll burn and turn bitter.
- Layer Your Chili Flakes: For maximum flavor and texture, use a blend of fine chili powder and coarser chili flakes. The powder infuses color and deeper flavor, while the flakes provide a pleasant texture.
- Don’t Rush the Infusion: Cooking the aromatics gently over low heat for a longer period allows their flavors to fully extract into the oil without burning. Patience is key here.
- Use Quality Ingredients: The better your oil and chili flakes, the more superior your final chili oil will be. Invest in good quality neutral oil and fragrant chili flakes.
- Cool Completely: Allow the chili oil to cool to room temperature undisturbed. This allows the flavors to truly develop and the chili flakes to settle, creating clearer oil on top and a rich sediment at the bottom.
- Avoid Moisture: Ensure all your equipment and ingredients are completely dry. Any water introduced into the hot oil can cause splattering and shorten the shelf life of your chili oil.
- Adjust Salt and Sugar: Taste your chili oil once it’s cooled. You may want to add a tiny pinch more salt to enhance savory notes or sugar to balance the heat.
Common Mistakes to Avoid
- Burning the Chilies: Pouring oil that is too hot directly onto the chili flakes can burn them, resulting in a bitter, acrid taste. Always monitor your oil temperature.
- Overheating Aromatics: Cooking garlic and ginger too quickly or at too high a temperature will make them bitter and can impart an unpleasant taste to the oil. Cook them slowly until just golden.
- Using Oil with a Low Smoke Point: Oils like extra virgin olive oil are not suitable for high-heat infusion and can impart unwanted flavors when heated. Stick to neutral oils with high smoke points.
- Not Straining Aromatics: While some prefer to leave aromatics in, straining them out prevents them from continuing to cook and potentially burning or turning soggy over time, which can affect the oil’s flavor and shelf life.
- Storing While Warm: Always let the chili oil cool completely to room temperature before transferring it to a storage jar. Sealing warm oil can create condensation, which introduces moisture and can lead to spoilage.
Variations & Substitutions
This base recipe is just the beginning! Here’s how to customize your homemade chili oil:
- Spice Level: Adjust the amount of chili flakes to your preference. For extra heat, add a pinch of cayenne pepper to the flakes. For milder oil, use less chili or opt for milder gochugaru.
- Aromatic Variations:
- More Garlic: Add thinly sliced garlic cloves to the hot oil for crispy garlic bits you can leave in or strain out.
- Shallots: Thinly sliced shallots can be fried until crispy for a sweet, oniony crunch.
- Peanuts or Seeds: Add a handful of raw peanuts, sesame seeds, or sunflower seeds to the oil during the cooling process for added texture and nutty flavor.
- Spice Blends:
- Five-Spice Powder: A pinch added to the chili flakes (before pouring hot oil) can introduce a complex, aromatic note.
- Cumin Seeds or Coriander Seeds: Lightly toast and crush these before adding to the oil with other aromatics for an earthy twist.
- Bay Leaves & Cinnamon: Omit if you prefer a simpler flavor, or add other whole spices like black cardamom for depth.
- Sweetness: A touch of brown sugar can add a delightful caramel note, complementing the heat.
- Umami Boost: A teaspoon of mushroom powder or a dash of soy sauce (added to the chilies, not the hot oil) can amplify the savory depth.
Serving Suggestions
Homemade chili oil is incredibly versatile. Here are some of our favorite ways to enjoy it:
- Noodle Dishes: Drizzle over ramen, pho, lo mein, or any stir-fried noodles.
- Dumplings & Wontons: Essential for dipping, it adds a burst of flavor to steamed or pan-fried dumplings.
- Eggs: A dash on scrambled eggs, fried eggs, or an omelet elevates your breakfast.
- Rice & Grains: Mix into plain rice, congee, or grain bowls for an instant flavor kick.
- Roasted Vegetables: Toss with roasted broccoli, Brussels sprouts, or potatoes before or after cooking.
- Tofu & Proteins: Great with crispy tofu, grilled chicken, or fish.
- Soup Topping: A spoonful swirled into clear broths adds warmth and complexity.
- Pizza: Forget traditional red pepper flakes; chili oil is a game-changer on pizza.
Storage & Reheating
Store your homemade chili oil in a clean, airtight glass jar. If you’ve strained out all fresh aromatics (garlic, ginger), it can be stored at cool room temperature in a pantry away from direct sunlight for up to 2-3 weeks. However, for maximum freshness and to be safe, especially if you leave any bits of aromatics in, refrigerating is recommended. When refrigerated, it will last for up to 1-2 months. The oil may solidify slightly in the fridge; simply let it come to room temperature or warm it gently in a bowl of warm water before using. Do not microwave the entire jar. Always use a clean, dry spoon when serving to avoid introducing contaminants.
FAQ
- What kind of oil is best for chili oil? Neutral oils with a high smoke point like canola, grapeseed, sunflower, or soybean oil are best. They allow the chili and aromatic flavors to shine through without overpowering them.
- Can I use fresh chilies instead of dried? While some recipes do use fresh chilies, dried chilies are traditional for chili oil as they provide a deeper, toastier flavor and allow for longer shelf life. Using fresh chilies would require different preparation and storage methods due to moisture content.
- Why did my chili oil turn bitter? This usually happens if the oil was too hot when poured over the chilies, causing them to burn, or if the aromatics were overcooked and scorched. Gentle heat and careful monitoring are key.
- How long does homemade chili oil last? If stored properly in an airtight jar and ideally refrigerated (especially if fresh aromatics are left in), homemade chili oil can last for 1-2 months. If all fresh aromatics are strained out, it might last longer at room temperature, but refrigeration is always safer.
- Can I make a large batch? Yes, you can easily scale this recipe up or down. Just ensure you have a large enough heat-proof bowl and pot to handle the quantities safely.
- Is it safe to store chili oil at room temperature? If the oil has been heated sufficiently and all fresh aromatics (like garlic and ginger) are completely strained out, it’s generally considered safe for short-term room temperature storage. However, if any fresh ingredients remain, refrigeration is crucial to prevent the risk of botulism. When in doubt, refrigerate.
- What if I don’t have a thermometer? You can test the oil temperature by dropping a small piece of garlic into it. If it sizzles gently but doesn’t brown immediately, it’s a good temperature. If it boils vigorously, it’s too hot. If nothing happens, it’s too cool.
Recipe Card
Recipe Name: Homemade Chili Oil
Short Description: A versatile, flavorful, and customizable spicy condiment made with hot oil infused with dried chilies and aromatics. Perfect for boosting any dish!
Prep Time: 15 minutes
Cook Time: 20 minutes
Total Time: 35 minutes (plus cooling time)
Servings: Approximately 2 cups (480 ml)
Course: Condiment
Cuisine: Asian-inspired
Cooking Method: Infusion, Simmering
Ingredients:
- 2 cups (480 ml) neutral oil (canola, grapeseed, or sunflower)
- 1 cup (90 g) dried red chili flakes (fine and coarse mix)
- 1/4 cup (60 g) finely minced garlic
- 2 tbsp (30 g) finely grated fresh ginger
- 1 tbsp (15 ml) toasted sesame oil (optional)
- 1 tbsp (15 g) Sichuan peppercorns (optional)
- 2 star anise pods (optional)
- 1 small cinnamon stick (optional)
- 1 bay leaf (optional)
- 1/2 tsp salt
- 1/2 tsp sugar
Instructions:
- Prepare Chili Flakes: In a large, heat-proof bowl, combine dried red chili flakes, salt, and sugar. If using Sichuan peppercorns, lightly toast and crush them, then add to the bowl. Set aside.
- Infuse Oil: Pour neutral oil into a heavy-bottomed saucepan. Add minced garlic, grated ginger, star anise, cinnamon stick, and bay leaf (if using). Heat over medium-low heat.
- Gently Cook Aromatics: Slowly bring oil to 250-280°F (120-140°C). Maintain this temperature for 15-20 minutes until aromatics are light golden brown.
- Strain Oil: Carefully remove saucepan from heat. Strain hot oil directly over the prepared chili flakes in the heat-proof bowl. Discard cooked aromatics.
- Sizzle and Stir: Stir the mixture well to ensure all chili flakes are submerged and “fried” by the hot oil.
- Cool: Allow chili oil to cool completely to room temperature, stirring occasionally during the first hour.
- Add Sesame Oil: Once completely cool, stir in toasted sesame oil, if using.
- Store: Transfer cooled chili oil to a clean, airtight glass jar.
Notes:
For best flavor, use a mix of fine and coarse chili flakes. Monitor oil temperature carefully to prevent burning the chilies. Always ensure all equipment is dry to avoid splattering and spoilage.
Storage:
Store in a clean, airtight glass jar. If all fresh aromatics are strained out, store at cool room temperature for up to 2-3 weeks. For longer storage (1-2 months) or if any fresh aromatics remain, refrigerate. Oil may solidify in the fridge; let it come to room temperature before use.
Nutrition:
Nutrition information is an estimate and may vary depending on the ingredients and brands used.
