Gravy: it’s more than just a sauce; it’s the savory soul of countless meals. From holiday feasts to comforting weeknight dinners, a perfectly made gravy can elevate even the simplest dish into something extraordinary. Imagine a succulent roast turkey without its rich, accompanying gravy, or a plate of fluffy mashed potatoes yearning for that velvety, flavorful cascade. That’s why mastering the art of gravy is an essential skill for any home cook.
This comprehensive guide will walk you through the fundamentals of creating magnificent gravy, focusing on the techniques that apply to a wide variety of flavors. We’ll explore 9 essential types, ensuring you have a perfect pairing for every meal, whether it’s a classic beef roast, a festive turkey dinner, or a hearty vegetarian spread. Get ready to transform humble pan drippings and simple ingredients into a luscious, savory masterpiece that will impress everyone at your table.

Why You’ll Love Mastering Gravy
- Elevates Any Meal: Gravy adds moisture, richness, and depth of flavor, transforming ordinary dishes into something special.
- Versatile Skill: Once you understand the basic principles, you can create countless variations to pair with different meats, vegetables, and starches.
- Simple Ingredients, Big Flavor: Often made from pan drippings and pantry staples, gravy proves that incredible taste doesn’t require complex components.
- Customizable: Easily adjust seasonings, consistency, and base flavors to suit your personal preferences or the dish you’re serving.
- Comforting & Impressive: There’s something inherently comforting about a good gravy, and serving a homemade version always leaves a lasting impression.
Ingredients for a Basic Gravy
While specific ingredients will vary for each of the 9 gravies, the fundamental building blocks remain consistent. Here’s what you’ll generally need for a classic pan gravy, serving 4-6:
- 2-4 tablespoons (30-60g) fat (pan drippings, butter, or oil)
- 2-4 tablespoons (15-30g) all-purpose flour
- 2 cups (470 ml) liquid (broth, stock, or additional pan drippings)
- Salt and freshly ground black pepper, to taste
- Optional: herbs (thyme, sage, rosemary), a splash of wine, or a dash of Worcestershire sauce
Ingredient Notes
- Fat: The foundation of flavor. Pan drippings from roasted meats (turkey, beef, chicken) are ideal. If you don’t have enough drippings, supplement with unsalted butter or a neutral oil.
- All-Purpose Flour: This is the most common thickener, creating a roux when combined with fat. It provides a rich, opaque gravy. Cornstarch can also be used for a clearer, glossier gravy, often mixed with cold water to form a slurry before adding.
- Liquid: This is where the core flavor develops. Rich beef, chicken, or vegetable broth/stock is perfect. For pan gravies, use leftover pan drippings (de-fatted, if preferred) and supplement with stock to reach the desired volume. A splash of wine (red or white) can add complexity.
- Seasoning: Salt and pepper are crucial. Taste as you go and adjust. Consider adding fresh or dried herbs like thyme, sage, or rosemary for specific flavor profiles.
Equipment You’ll Need
- Medium saucepan or skillet (large enough to accommodate your liquid)
- Whisk
- Fat separator (optional, but very helpful for de-fatting drippings)
- Fine-mesh sieve (optional, for ultra-smooth gravy)
- Measuring cups and spoons
How to Make a Classic Pan Gravy
This method forms the basis for many of the essential gravies you’ll master. We’ll focus on using a roux (fat + flour) as the thickener.
-
Prepare Your Drippings (if using):
After roasting meat, carefully pour the pan drippings into a fat separator or a heatproof bowl. Allow the fat to separate and rise to the top. Skim off excess fat, leaving about 2-4 tablespoons in the roasting pan or pour the desired amount of fat into your saucepan. You can also save the flavorful defatted drippings for the liquid component.
-
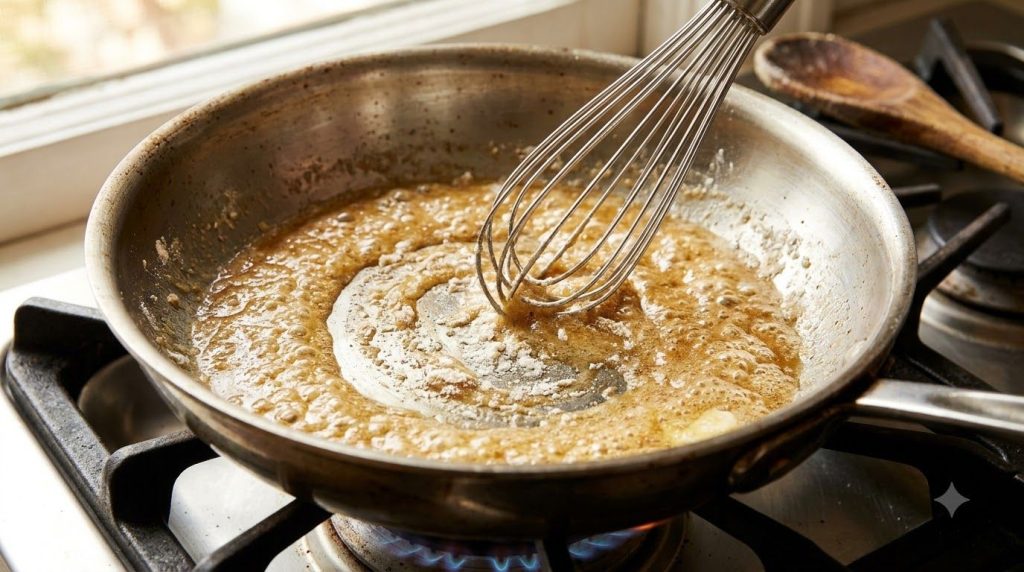
Make the Roux:
Place your saucepan or roasting pan (if making gravy directly in it) over medium heat. If you don’t have enough drippings, add unsalted butter or oil. Once the fat is shimmering, sprinkle in the all-purpose flour. Whisk continuously for 1-2 minutes, creating a smooth paste (the roux). Cook the roux until it’s light golden brown for a lighter gravy, or a deeper golden brown for a richer, nuttier flavor.
-
Whisk in Liquid:
Gradually pour in the liquid (broth, stock, or reserved drippings), whisking constantly to prevent lumps. Start with a small amount of liquid to create a thick paste, then slowly add the rest. Continue whisking until the gravy is smooth and lump-free.
-
Simmer and Thicken:
Bring the gravy to a gentle simmer, continuing to whisk occasionally. Let it simmer for 5-10 minutes, or until it reaches your desired thickness. The gravy will thicken as it cooks. If it becomes too thick, add a splash more liquid. If it’s too thin, you can continue simmering to reduce it, or create a small cornstarch slurry (1 tsp cornstarch mixed with 1 tbsp cold water) and whisk it in gradually.
-
Season and Finish:
Remove the gravy from the heat. Taste and adjust seasoning with salt and freshly ground black pepper. This is also the time to stir in any optional ingredients like fresh herbs or a dash of Worcestershire sauce. For an extra smooth finish, you can strain the gravy through a fine-mesh sieve.
Pro Tips for the Best Results
- Deglaze for Flavor: If making pan gravy, after removing the roasted meat, add a splash of liquid (broth, wine, or water) to the hot roasting pan and scrape up all the browned bits (fond) from the bottom. These bits are packed with flavor and should be incorporated into your gravy.
- Cook Your Roux Properly: Don’t rush the roux. Cooking it long enough removes the raw flour taste and develops a deeper flavor. The darker the roux, the richer the flavor.
- Whisk Constantly: When adding liquid to the roux, continuous whisking is key to prevent lumps. Start with cold liquid into a hot roux (or vice versa) for the smoothest results.
- Taste and Adjust: Gravy needs proper seasoning. Always taste your gravy throughout the cooking process and adjust salt, pepper, and other seasonings as needed.
- Strain for Smoothness: For an impeccably smooth gravy, pass it through a fine-mesh sieve before serving. This removes any small lumps, herb stems, or bits of fond.
- Control Consistency: Gravy should be thick enough to coat the back of a spoon but still pourable. Adjust with more liquid if too thick, or a cornstarch slurry if too thin.
- Use Quality Broth: If not relying solely on pan drippings, a high-quality, flavorful broth or stock makes a significant difference in the final taste of your gravy.
Common Mistakes to Avoid
- Lumpy Gravy: The most common culprit is adding liquid too quickly to the roux or not whisking enough. Always add liquid gradually and whisk vigorously.
- Too Thin or Too Thick: Gravy consistency is personal, but avoid extremes. Too thin and it’s watery; too thick and it’s pasty. Adjust with more liquid or a slurry as needed.
- Greasy Gravy: Not skimming enough fat from pan drippings can result in a greasy texture. A fat separator is a great tool for this.
- Under-Seasoning: Gravy, especially if made with unsalted broth, needs proper seasoning. Don’t be afraid to add salt and pepper to taste.
- Burning the Roux: A burned roux will make your gravy bitter. Keep an eye on it and stir constantly, especially if cooking it to a darker color.
9 Essential Gravies to Master: Variations & Substitutions
Once you’ve mastered the basic pan gravy technique, you can easily adapt it to create these diverse and delicious variations.
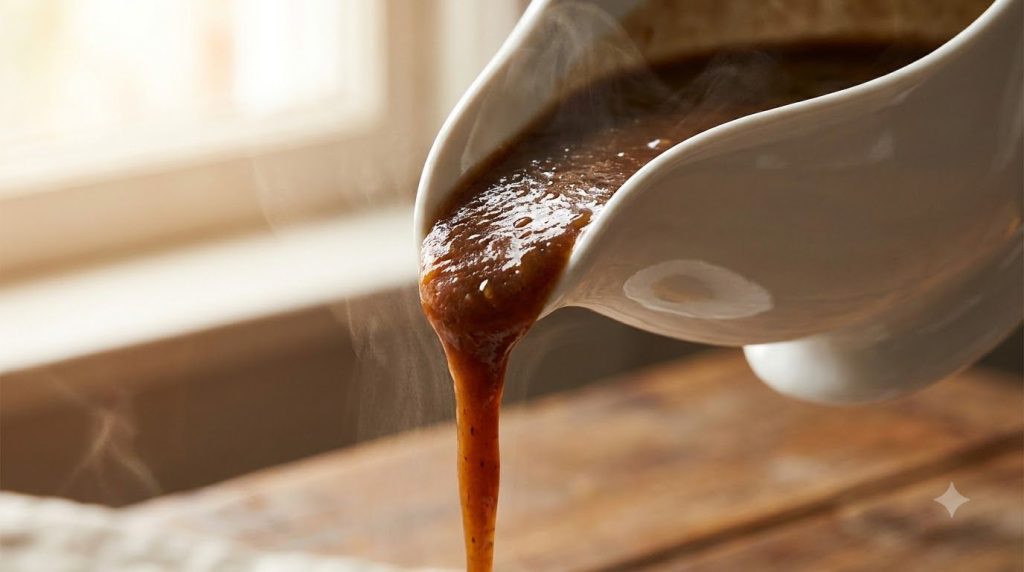
- Classic Turkey Gravy: Made with turkey drippings, often enhanced with herbs like sage and thyme. Perfect for holiday dinners.
- Rich Beef Gravy: Uses beef drippings and rich beef stock. A natural pairing for roast beef, pot roast, or mashed potatoes.
- Creamy Chicken Gravy: Based on chicken drippings and chicken broth, sometimes with a touch of cream or milk for extra richness. Great with roasted chicken or fried chicken.
- Savory Mushroom Gravy: Sautéed mushrooms (cremini or button) are added to the roux, then simmered with vegetable broth or mushroom stock. Excellent for vegetarian meals or beef dishes.
- Red Wine Gravy: Red wine is used to deglaze the pan and forms part of the liquid base, adding a sophisticated, slightly tangy depth. Best with beef or lamb.
- Hearty Vegetarian Gravy: Made with a robust vegetable broth, often with sautéed onions, garlic, and sometimes a splash of soy sauce or nutritional yeast for umami. A versatile option for plant-based meals.
- Country Sausage Gravy: Made by browning breakfast sausage, then using the rendered fat to make the roux. Milk is typically used as the liquid, creating a thick, creamy, peppery gravy perfect for biscuits.
- Sweet Onion Gravy: Caramelized onions are slow-cooked until sweet and deeply browned, then combined with a roux and beef or vegetable broth. A fantastic partner for sausages, pork, or steak.
- Basic Pan Gravy: The versatile base we discussed, made from the drippings of any roasted meat (pork, lamb, chicken) and broth. Customizable with various herbs and seasonings.
Serving Suggestions
Gravy is incredibly versatile! Here are some classic and creative ways to enjoy your homemade creations:
- Mashed Potatoes: The ultimate classic pairing.
- Roasted Meats: Turkey, chicken, beef, pork, lamb – any roast benefits from a generous pour.
- Stuffing or Dressing: Moistens and flavors your holiday sides.
- Biscuits and Gravy: A Southern breakfast staple, especially with sausage gravy.
- Hot Sandwiches: Elevate a simple open-faced turkey or beef sandwich.
- French Fries or Poutine: For a decadent twist.
- Steamed Vegetables: A flavorful way to dress up broccoli, green beans, or asparagus.
Storage & Reheating
- Refrigerator Storage: Store leftover gravy in an airtight container in the refrigerator for up to 3-4 days.
- Freezer Suitability: Gravy freezes well for up to 3 months. Note that gravies thickened with flour might separate slightly upon thawing, but a good whisking during reheating can often bring them back together. Cornstarch-thickened gravies tend to fare better in the freezer.
- Reheating Method: Reheat gravy gently on the stovetop over medium-low heat, whisking frequently. If it’s too thick, add a splash of broth, water, or milk until it reaches your desired consistency.
FAQ
How do I fix lumpy gravy?
If your gravy is lumpy, don’t despair! You can carefully pour it through a fine-mesh sieve, pressing any solids with a spoon, or use an immersion blender or standard blender to smooth it out. Just be cautious with hot liquids in a blender.
Can I make gravy without drippings?
Absolutely! You can use butter or oil for the fat component of your roux and then use a high-quality broth (beef, chicken, or vegetable) as your liquid base. Sautéing aromatic vegetables like onions and garlic at the beginning can add depth of flavor.
How can I make gravy thicker/thinner?
To thicken gravy, simmer it longer to reduce the liquid, or whisk in a small cornstarch slurry (1 tsp cornstarch mixed with 1 tbsp cold water) and bring to a simmer. To thin gravy, simply whisk in a splash more broth or water until it reaches your desired consistency.
Can I freeze homemade gravy?
Yes, most gravies can be frozen. Store in an airtight container, leaving some headspace for expansion. Thaw overnight in the refrigerator and reheat gently on the stovetop, whisking to recombine.
What’s the difference between a roux and a slurry?
A roux is a cooked mixture of fat (butter or drippings) and flour, used as a thickener and flavor base, particularly for opaque gravies and sauces. A slurry is a mixture of cold liquid (water or broth) and a starch (like cornstarch or arrowroot), which is then whisked into a simmering liquid to thicken it. Slurries create a more translucent, glossy finish.
Can I use milk instead of broth in gravy?
Yes, you can use milk, especially for creamier gravies like country sausage gravy or a white sauce (béchamel base) that can be seasoned into a gravy. It will yield a lighter color and a richer, creamier texture compared to broth.
Recipe Card: Homemade Pan Gravy (The Art of Gravy)
Master the fundamental technique of making a rich, flavorful pan gravy – the perfect foundation for all your gravy adventures.
Short Description:
A versatile, savory gravy base made from pan drippings or butter, perfect for enhancing any roasted meat or mashed potatoes.
- Prep Time: 5 minutes
- Cook Time: 10-15 minutes
- Total Time: 15-20 minutes
- Servings: 4-6
- Course: Sauce, Side
- Cuisine: American, Classic
- Cooking Method: Stovetop
Ingredients:
- 2-4 tablespoons (30-60g) fat (pan drippings, unsalted butter, or oil)
- 2-4 tablespoons (15-30g) all-purpose flour
- 2 cups (470 ml) liquid (beef, chicken, or vegetable broth/stock, or reserved drippings)
- Salt, to taste
- Freshly ground black pepper, to taste
- Optional: dash of Worcestershire sauce, fresh herbs (thyme, sage)
Instructions:
- Prepare Your Drippings (if applicable): If using pan drippings, separate the fat, reserving 2-4 tablespoons of fat and the defatted liquid for the gravy. If not, melt butter or heat oil in your saucepan.
- Make the Roux: Heat the fat in a medium saucepan or skillet over medium heat. Sprinkle in the flour and whisk continuously for 1-2 minutes until a smooth paste (roux) forms and turns light golden brown.
- Whisk in Liquid: Gradually pour in the liquid, whisking constantly to prevent lumps. Start with a small amount to create a thick paste, then add the remaining liquid slowly.
- Simmer and Thicken: Bring the gravy to a gentle simmer, whisking occasionally. Let it simmer for 5-10 minutes, or until it reaches your desired thickness.
- Season and Finish: Remove from heat. Taste and adjust seasoning with salt and pepper. Stir in any optional Worcestershire sauce or fresh herbs. For a smoother gravy, strain through a fine-mesh sieve before serving.
Notes:
This basic recipe is highly customizable. Experiment with different broths, herbs, and even a splash of wine to create your preferred flavor profile. The amount of fat and flour can be adjusted slightly for desired thickness and yield.
Storage:
Store in an airtight container in the refrigerator for up to 3-4 days. Can be frozen for up to 3 months; reheat gently on the stovetop, adding liquid as needed.
Nutrition:
Nutrition information is an estimate and may vary depending on the ingredients and brands used.