The sweet start to something delicious often begins with a simple, humble ingredient: perfectly mashed bananas. Whether you’re whipping up a batch of moist banana bread, fluffy pancakes, or a healthy smoothie, knowing how to prepare this foundational ingredient just right makes all the difference. Say goodbye to guesswork and hello to consistently delicious results!
How to Make Perfect Mashed Bananas: Your Sweet Start to Delicious Creations
Mashed bananas are a versatile kitchen staple, acting as a natural sweetener, binder, and moistening agent in countless recipes. This guide will walk you through the simple steps to achieve the ideal mashed banana consistency every time, ensuring your baked goods are tender, your smoothies are creamy, and your breakfast bowls are naturally sweet. Get ready to transform those ripe bananas into something truly wonderful!
Why You’ll Love This Mashed Banana Guide
- Effortlessly Simple: Mashing bananas is one of the easiest kitchen tasks, requiring minimal effort and no special cooking skills.
- Versatile Foundation: This guide prepares you for countless recipes, from classic banana bread to inventive desserts and healthy snacks.
- Reduces Food Waste: It’s the perfect way to utilize those overripe bananas that might otherwise go to waste, turning them into a valuable ingredient.
- Natural Sweetener: Mashed ripe bananas add natural sweetness to your dishes, often allowing you to reduce added sugars.
- Customizable Consistency: Learn how to achieve your preferred texture, whether you like a few chunks or a silky-smooth puree.
Ingredients
- 3-4 medium very ripe bananas (about 1.5-2 cups mashed)
- Optional: 1/2 tsp (2.5 ml) lemon juice (to prevent browning if not using immediately)
Ingredient Notes
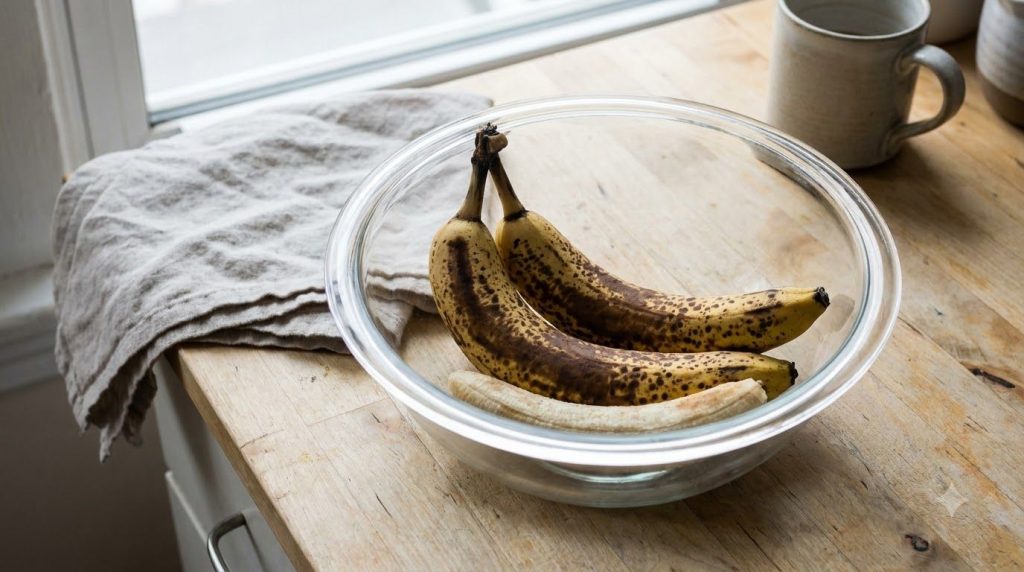
- Bananas: The key to truly delicious mashed bananas lies in their ripeness. Look for bananas with plenty of brown spots or even entirely brown peels. These bananas are at their peak sweetness and softness, making them easy to mash and packed with flavor. Green or firm yellow bananas will be harder to mash and less sweet.
- Lemon Juice: While optional, a small amount of lemon juice can be stirred into your mashed bananas if you plan to store them for a bit before use. The acidity helps to slow down oxidation, which is what causes bananas to turn brown.
Equipment You’ll Need
- Medium mixing bowl
- Fork or potato masher
- Measuring cups (to gauge yield)
How to Make Perfect Mashed Bananas
Follow these simple steps to prepare your bananas for all your culinary creations:
- Prepare the Bananas: Start by peeling your very ripe bananas. Discard the peels.
- Place in a Bowl: Place the peeled bananas into a medium-sized mixing bowl. It’s helpful to use a bowl with slightly higher sides to prevent any mess during mashing.
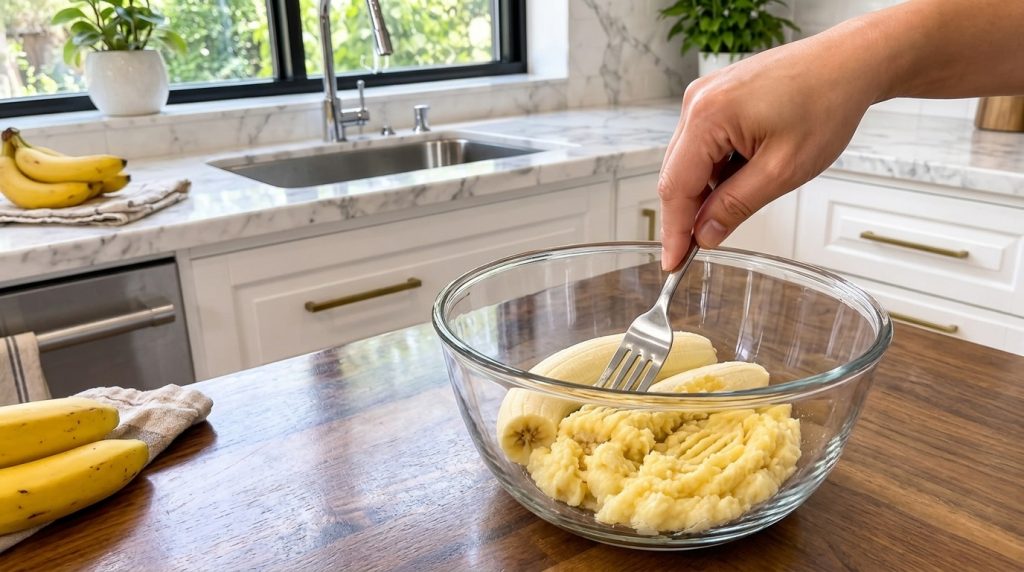
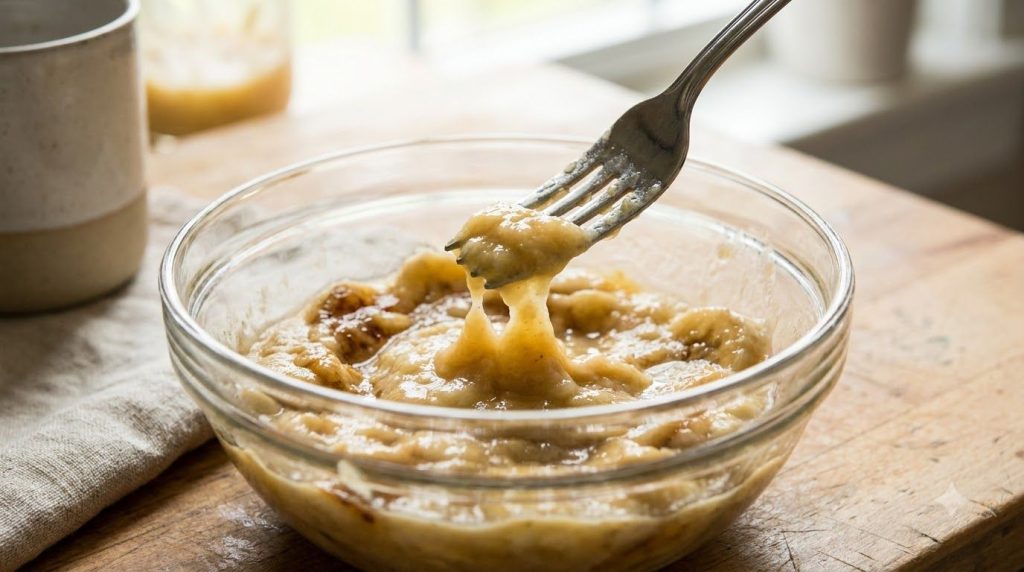
- Begin Mashing: Using a fork or a potato masher, press down firmly on the bananas. Begin to mash them against the side or bottom of the bowl.
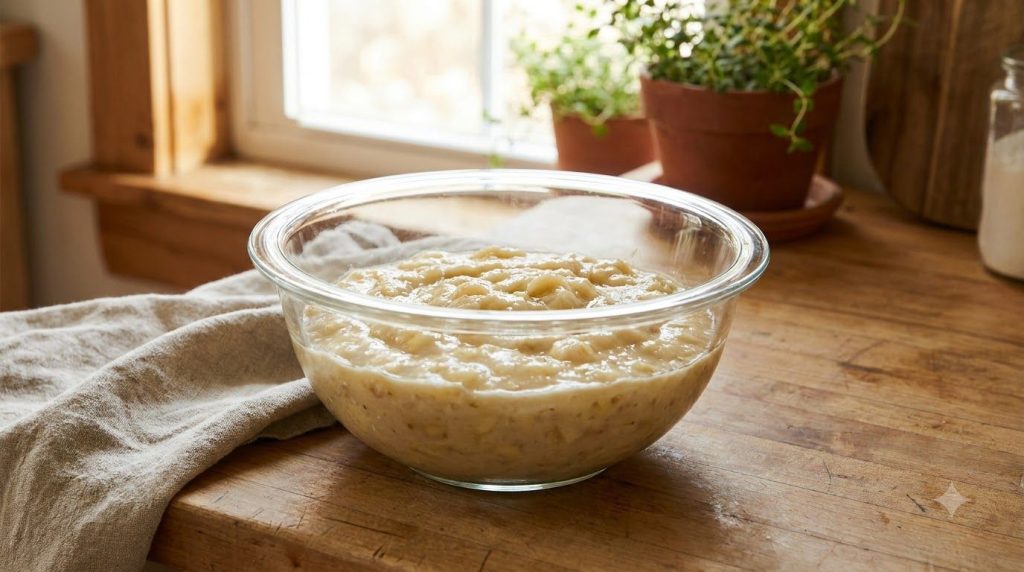
- Achieve Desired Consistency: Continue mashing until your desired consistency is reached. For a chunkier mash, which is great for some banana bread recipes, mash lightly, leaving some small pieces intact. For a smoother puree, ideal for smoothies or baby food, continue mashing until mostly lump-free and creamy.
- Use or Store: Use your freshly mashed bananas immediately in your recipe, or prepare them for storage as directed below. If storing, you can stir in the optional lemon juice now.
Pro Tips for the Best Results
- Prioritize Ripeness: This cannot be stressed enough. The riper the banana, the sweeter it will be and the easier it will be to mash into a smooth consistency. Brown spots on the peel are your best friend!
- Control the Consistency: Think about your end goal. For recipes like banana bread, a slightly chunky mash adds texture. For smoothies or delicate batters, aim for a smoother, almost puréed consistency.
- Prevent Browning: If you’re not using the mashed bananas right away, stir in a tiny bit of lemon juice or even a splash of orange juice. This acidic addition helps to slow down the natural oxidation process that turns bananas brown.
- Don’t Over-Mash: While you want a good consistency, mashing too vigorously or for too long can sometimes make the bananas a bit watery. Stop once you reach your desired texture.
Common Mistakes to Avoid
- Using Underripe Bananas: Trying to mash bananas that are still mostly green or firm yellow will result in a lumpy, less sweet, and often stringy mash. Patience is key!
- Not Mashing Evenly: Unless you specifically want large chunks, ensure you mash thoroughly. Unevenly mashed bananas can lead to inconsistent textures in your baked goods.
- Letting Them Sit Uncovered: Exposure to air causes mashed bananas to brown quickly. Always cover them tightly if not using immediately.
Variations & Substitutions
- Smoother Mash: For an exceptionally smooth puree, you can use a food processor or blender. This is especially useful for baby food or very fine batters.
- Spiced Mash: For specific baking recipes, you can stir in a pinch of cinnamon, nutmeg, or pumpkin pie spice into your mashed bananas for an added layer of flavor.
- Different Mashing Tools: While a fork and potato masher are common, a pastry blender or even a clean, sturdy whisk can also be used to mash bananas.
Serving Suggestions
Mashed bananas are incredibly versatile. Here are just a few ideas for what you can make with your perfectly mashed batch:
- Baked Goods: The classic choice! Use them in banana bread, muffins, pancakes, waffles, cookies, and even cakes.
- Smoothies: Add a creamy, sweet boost to your favorite fruit and veggie smoothies.
- Oatmeal & Yogurt: Stir into hot oatmeal or cold yogurt for a naturally sweet and satisfying breakfast.
- Baby Food: A healthy, easily digestible first food for infants.
- Healthy Desserts: Use as a base for ‘nice cream’ (blended frozen bananas), or as a topping for healthy desserts.
Storage & Reheating
- Refrigerator Storage: Store mashed bananas in an airtight container in the refrigerator for up to 2-3 days. Stir in a little lemon juice if you want to keep them from browning for as long as possible.
- Freezer Suitability: Mashed bananas freeze wonderfully! Portion them into individual freezer-safe bags or ice cube trays, then transfer to a larger freezer bag once solid. They can be stored in the freezer for up to 2-3 months.
- Reheating/Thawing: To use frozen mashed bananas, simply transfer them to the refrigerator overnight to thaw. For quicker thawing, you can place the sealed bag in a bowl of cold water for about 30 minutes. Once thawed, use as you would fresh mashed bananas.
FAQ
How ripe should bananas be for mashing?
Bananas should be very ripe, meaning their peels are covered in brown spots or are entirely brown. This indicates maximum sweetness and a soft texture that’s easy to mash.
Can I freeze mashed bananas?
Yes, absolutely! Mashed bananas freeze very well. Portion them and store them in airtight, freezer-safe containers or bags for up to 2-3 months. Thaw in the refrigerator before use.
How long do mashed bananas last?
When stored in an airtight container in the refrigerator, mashed bananas will last for 2-3 days. Adding a little lemon juice can help extend their freshness and prevent browning.
What can I make with mashed bananas?
Mashed bananas are perfect for banana bread, muffins, pancakes, waffles, cookies, smoothies, oatmeal, baby food, and even healthy ‘nice cream’. Their natural sweetness and moisture make them incredibly versatile.
What’s the best tool for mashing bananas?
A simple fork or a potato masher works best for achieving a good consistency. For a super smooth puree, a food processor or blender can also be used.
Can I use underripe bananas if that’s all I have?
While not ideal, you can use slightly underripe bananas. However, they will be less sweet and harder to mash, resulting in a lumpier texture. For better results, let them ripen a bit longer if possible.
Recipe Card
Recipe Name: Perfect Mashed Bananas
Short Description: A simple guide to preparing perfectly mashed bananas, ideal for all your baking and cooking needs.
Prep Time: 5 minutes
Cook Time: 0 minutes
Total Time: 5 minutes
Servings: Yields about 1.5-2 cups (from 3-4 medium bananas)
Course: Ingredient Prep / Basic
Cuisine: American
Cooking Method: Mashing
Ingredients:
- 3-4 medium very ripe bananas
- Optional: 1/2 tsp (2.5 ml) lemon juice
Instructions:
- Peel the bananas. Discard the peels.
- Place the peeled bananas into a medium-sized mixing bowl.
- Using a fork or potato masher, press down on the bananas and mash them until your desired consistency is reached. For a chunky texture, mash lightly, leaving some small pieces. For a smoother puree, continue mashing until mostly lump-free.
- Use immediately in your favorite recipe or stir in the optional lemon juice if storing.
Notes:
For best results, use bananas that have plenty of brown spots on their skin. This indicates optimal sweetness and mashing consistency.
To prevent browning if not using immediately, stir in 1/2 teaspoon of lemon juice.
Storage:
Refrigerate in an airtight container for up to 2-3 days. For longer storage, freeze in an airtight freezer-safe bag or container for up to 2-3 months. Thaw in the refrigerator before use.
Nutrition:
Nutrition information is an estimate and may vary depending on the ingredients and brands used.