Most people believe gardening ends when the first frost hits, limiting fresh produce to just a few short months. But what if you could defy the seasons, cultivating vibrant vegetables and herbs even when snow blankets the ground? The secret lies not above, but beneath the earth – in a brilliant, ancient-inspired design known as the Walipini greenhouse. This isn’t a fleeting trend; it’s a time-tested method empowering you to grow an abundance of food year-round, creating your own personal food sanctuary regardless of your climate.
What is a Walipini Greenhouse?
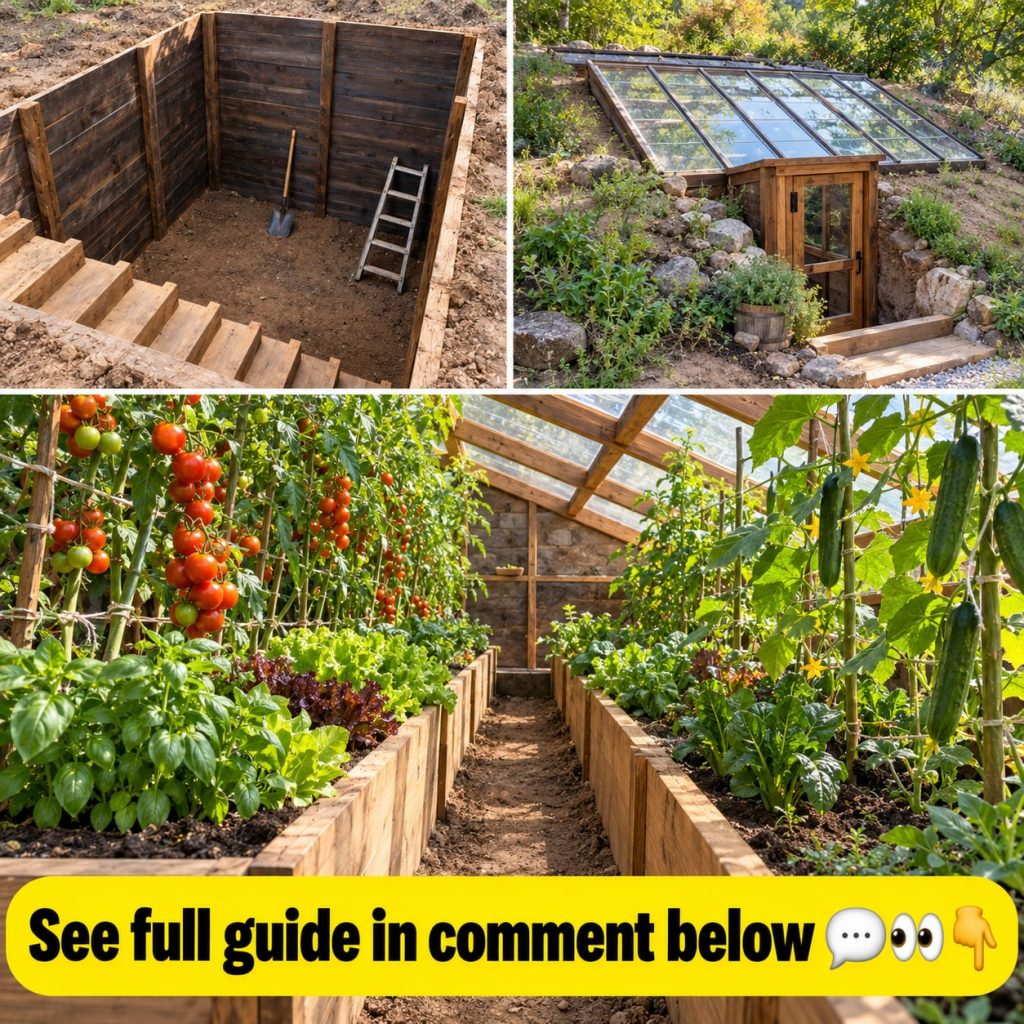
Originating from the Andean regions of South America, the term “Walipini” translates to “place of warmth” in the Aymara language. It’s essentially a pit greenhouse, dug into the earth to harness the insulating properties of the ground. By sinking the structure below frost line, the Walipini naturally maintains a more stable, warmer temperature than outdoor air or even above-ground greenhouses, requiring minimal artificial heating. The sun’s energy, captured through a sloped, transparent roof, provides light and warmth, while the earth acts as a massive thermal battery.
This ingenious design creates a microclimate perfect for tender plants, extending your growing season indefinitely. It’s a game-changer for anyone seeking food self-sufficiency and a deeper connection to their food source.
Essential Construction Materials
Building a Walipini requires careful planning and a selection of durable, readily available materials. Here’s what you’ll typically need:
- Excavation Equipment: Shovels, picks, or even a small excavator for larger projects.
- Retaining Wall Materials: Cinder blocks, treated lumber, rock, or compacted earth (earthbags) to prevent soil collapse.
- Roofing Material: Double-layer 6-mil UV-stabilized polyethylene film, polycarbonate panels, or tempered glass.
- Framing: Pressure-treated lumber, galvanized steel pipes, or rebar for the roof support structure.
- Drainage: Gravel, perforated drainage pipes, and a sump pump (if groundwater is a concern).
- Ventilation: Vents (manual or automated) on the north and south walls, or a hinged roof section.
- Miscellaneous: Fasteners, sealants, tape, measuring tools, and safety gear.
Approximate Measurements and Design Principles
While exact dimensions will vary based on your needs and property, a typical Walipini adheres to several key principles:
- Depth: 6 to 8 feet below grade is common, reaching below the frost line in most temperate climates. Deeper can provide more thermal stability.
- Width: Usually 8 to 12 feet wide to allow for comfortable working space and efficient light penetration.
- Length: As long as desired, often 10 to 30 feet, depending on your growing needs.
- Roof Angle: Crucial for maximizing solar gain. The roof should be angled to match your location’s latitude, allowing direct sunlight during winter months. A common starting point is your latitude plus 10-15 degrees.
- Orientation: Always orient the longest side of the Walipini towards true south (in the Northern Hemisphere) to capture maximum sunlight throughout the day.
Quick Tip: Understanding Your Latitude
To calculate your optimal roof angle, find your geographical latitude (easy with a quick online search). This angle is vital for efficient solar heat gain, especially during winter when the sun is lower in the sky.
Step-by-Step Walipini Construction Method
Building a Walipini is a significant undertaking, but entirely achievable for a dedicated DIY enthusiast. Here’s a simplified breakdown of the process:
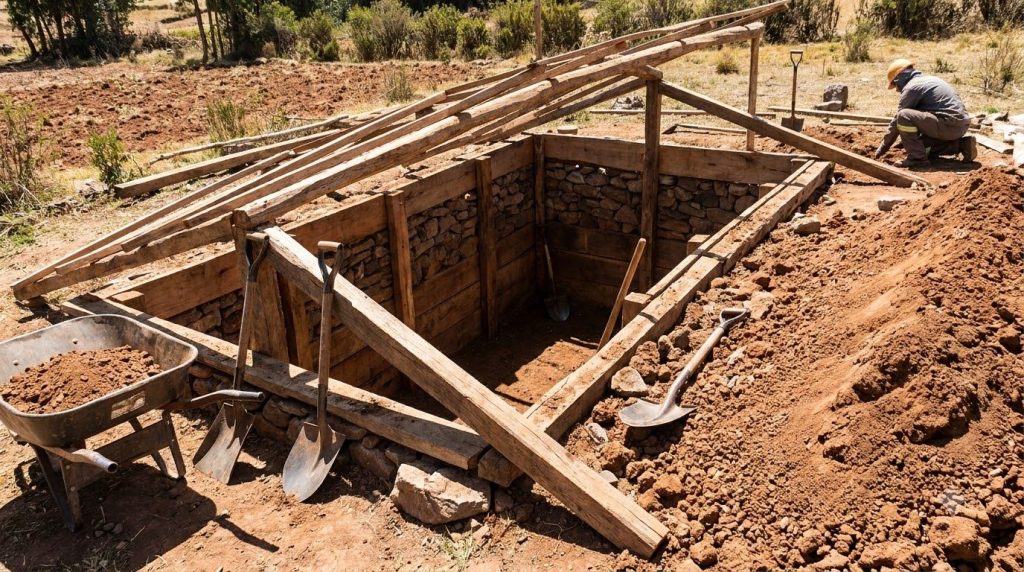
- Site Selection and Planning: Choose a south-facing slope or a flat area with good drainage. Mark out your dimensions and confirm soil conditions (avoid high water tables).
- Excavation: Dig the pit to your desired depth and dimensions. Ensure the walls are as straight as possible.
- Retaining Walls: Construct sturdy retaining walls around the perimeter to prevent soil collapse. These can be block, treated wood, or even compacted earthbag walls.
- Drainage System: Install a perimeter drainage trench with gravel and perforated pipes leading to a French drain or sump pump pit. Good drainage is paramount to prevent flooding.
- Backfill: Backfill the exterior of the retaining walls with compacted soil, creating a gentle slope away from the structure to shed rainwater.
- Roof Framing: Build a sturdy roof frame, typically sloped, that will support your transparent covering. Ensure it can withstand snow loads for your region.
- Roof Covering: Attach your chosen transparent material (polyethylene, polycarbonate, or glass). For film, often a double layer with an air gap for insulation is best. Seal all edges thoroughly.
- Ventilation: Install vents on the upper (north) and lower (south) ends to allow for passive airflow, crucial for temperature and humidity control.
- Interior Prep: Level the floor, add raised beds or planting areas, and prepare your soil for planting.
How to Use Your Walipini
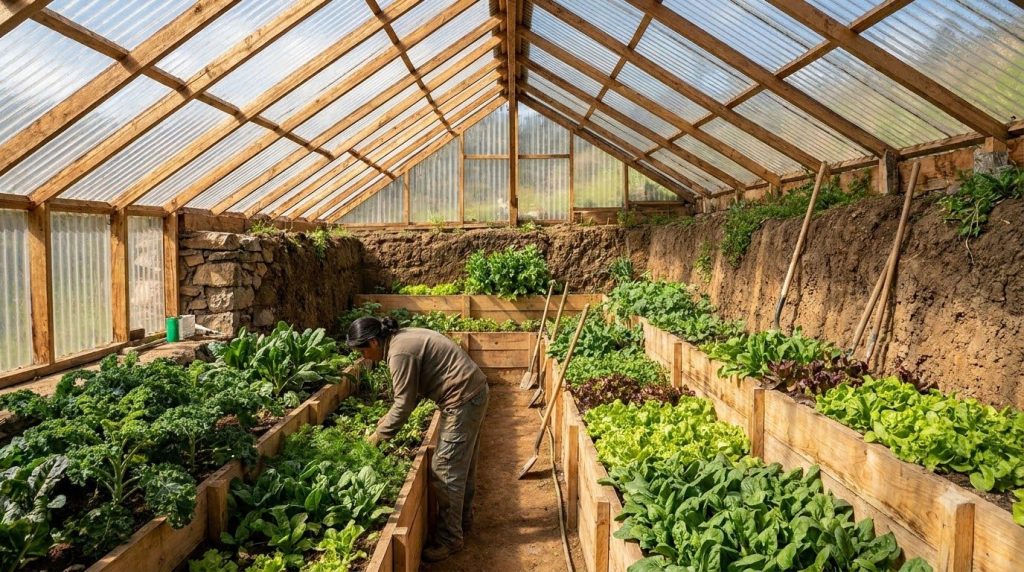
Once built, your Walipini becomes a thriving growing space. Treat it much like a regular greenhouse but with enhanced thermal stability. Plant your desired crops in raised beds or directly in the prepared soil. Monitor internal temperatures and humidity levels. Use the ventilation system to cool the space on warm days and circulate air. Consider adding a small fan for better air circulation if passive ventilation isn’t sufficient. The deep soil acts as a natural buffer, keeping the interior warm through cool nights and cool during hot days.
How Often to Use
The beauty of a Walipini is its year-round functionality. You can continuously grow and harvest, simply adjusting your plant choices to suit the season. In winter, focus on cold-hardy greens, root vegetables, and herbs. In warmer months, you can cultivate heat-loving plants that might struggle outdoors. It truly unlocks continuous gardening.
How to Choose & Buy Materials
Invest in quality materials. UV-stabilized polyethylene film for the roof is affordable but may need replacement every 3-5 years. Polycarbonate panels or tempered glass are more expensive but offer greater durability and insulation, lasting 10-20 years or more. For framing, pressure-treated lumber resists rot and insects, crucial for a subterranean structure. Always source materials known for their longevity and suitability for outdoor, structural use.
Did You Know? Thermal Mass Matters
The earth itself is your primary thermal mass, absorbing heat during the day and releasing it slowly at night. You can enhance this effect by painting interior walls dark colors or adding barrels of water inside to absorb and radiate heat.
Storage
The Walipini is a storage solution, providing an ideal environment for growing. As for tools, keep them organized within or near the structure for easy access. Any excess construction materials should be stored appropriately to prevent weather damage. The consistent cool temperatures and high humidity of a Walipini can also be excellent for storing root vegetables directly in the ground or in sand for extended periods after harvest, akin to a root cellar.
Practical Tips for Success
- Water Wisely: The enclosed environment means less evaporation, so monitor soil moisture carefully to avoid overwatering.
- Ventilation is Key: Even in winter, sunny days can cause overheating. Open vents to release excess heat and prevent fungal issues.
- Light Reflection: Paint interior north-facing walls white to reflect more light onto your plants, especially during shorter winter days.
- Pest Management: Monitor for pests, as the enclosed space can become a breeding ground if not managed. Introduce beneficial insects if needed.
- Compost Power: Utilize compost within your beds; its decomposition generates a small amount of heat, further warming the soil.
Common Mistakes to Avoid
Building a Walipini involves specific challenges. Here are common pitfalls:
- Poor Drainage: The number one mistake. Without proper drainage, your Walipini can turn into a pond, ruining crops and potentially damaging the structure.
- Insufficient Depth: Not digging deep enough means missing the full insulating benefits of the earth, leading to unstable temperatures.
- Wrong Roof Angle/Orientation: Incorrectly angled or oriented roofs will drastically reduce solar gain, defeating the purpose of passive heating.
- Lack of Ventilation: Without adequate airflow, humidity can soar, leading to mold, mildew, and disease, while also causing overheating.
- Ignoring Local Regulations: Always check local building codes and permits. Digging a deep pit may require specific permissions.
- Weak Structure: Underestimating soil pressure and snow loads can lead to structural failure. Invest in strong retaining walls and roof framing.
Cautions / Who Should Avoid It
While a Walipini is fantastic, it’s not for everyone or every location:
- High Water Table: If your property has a consistently high water table, building a Walipini will be extremely challenging and potentially prone to flooding, even with extensive drainage systems.
- Rocky Soil: Excavation can be difficult and costly in extremely rocky soil.
- Shaded Areas: A Walipini needs full sun exposure, especially from the south. Avoid areas with significant tree cover or large buildings to the south.
- Lack of Physical Ability: Construction is labor-intensive and requires significant physical effort.
- Local Regulations: Some areas have strict zoning or building codes that might make Walipini construction difficult or impossible without significant permitting.
Quick Summary: Your Year-Round Growing Haven
The Walipini greenhouse is an excavated, underground greenhouse designed to utilize the earth’s thermal mass for stable temperatures. Best for year-round cultivation of diverse plants, it minimizes heating needs. Key elements include proper depth (6-8ft), south-facing orientation, and an angled roof. Avoid high water tables and ensure excellent drainage and ventilation. Invest in durable roofing and framing materials for longevity. This powerful remedy creates an abundant food source, season after season.
FAQ
- How much does a Walipini cost to build?
Costs vary widely depending on size, materials, and whether you DIY or hire help. Small DIY projects might cost a few hundred dollars for basic materials, while larger, professionally built structures with durable roofing could run into several thousands.
- How long does a Walipini last?
With proper construction and maintenance, the structural integrity can last decades. Roofing materials like polyethylene film may need replacement every 3-5 years, while polycarbonate or glass can last 10-20+ years.
- Can I grow anything in a Walipini?
You can grow a wide variety of plants. Cold-hardy greens thrive in winter, while in summer, you can grow more heat-loving crops like tomatoes, peppers, and cucumbers. The key is managing ventilation and light.
- Is a Walipini suitable for all climates?
It’s most effective in climates with distinct seasons and temperature fluctuations. It still works in warmer climates for cooling benefits, but the primary advantage is year-round growing in colder regions.
- How do I manage humidity and condensation?
Good ventilation is crucial. Opening vents on sunny days, even in winter, helps release moist air. A small fan can also aid air circulation. Ensuring good drainage below the soil level also helps.
- Do I need electricity for a Walipini?
Not necessarily. Many Walipinis are passive, relying solely on solar gain and passive ventilation. However, a small solar-powered fan or lighting for seedlings can be beneficial but not essential.
- What about pests?
The enclosed environment can be susceptible to pests. Regular inspection, good air circulation, and integrating beneficial insects are effective organic pest management strategies.
Conclusion
The Walipini greenhouse offers a profound solution to seasonal gardening limitations, transforming your ability to produce fresh, healthy food year-round. It’s an investment in self-sufficiency, sustainability, and a deeper connection to nature’s rhythms. By understanding its principles and committing to careful construction, you can unlock a thriving food sanctuary beneath your feet, enjoying the bounty of your land no matter what the weather outside brings.
You may also like: DIY Composting for a Thriving Garden
Read more: Benefits of Raised Garden Beds for Beginners