Is your shower head looking a little dull, clogged, or covered in unsightly mineral buildup? Over time, hard water deposits, commonly known as limescale, can accumulate on your shower head, reducing water pressure and making it look less than sparkling. Before you consider replacing it, try this simple and effective DIY cleaning method using common household ingredients.
This practical approach is designed to dissolve mineral buildup and grime, restoring your shower head’s shine and improving its performance without harsh chemicals. It’s an affordable and satisfying way to refresh your bathroom!
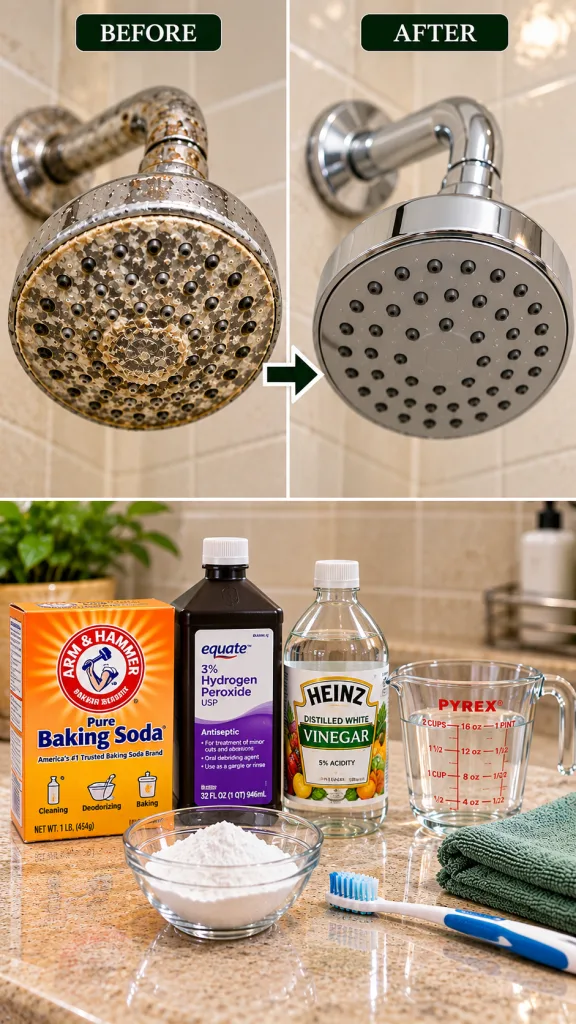 See how simple ingredients can make a big difference.
What You’ll Need
- 1 cup Distilled White Vinegar
- 1/2 cup 3% Hydrogen Peroxide
- 2 cups Warm Water
- 2 tablespoons Baking Soda
- Large container (a bucket or bowl for soaking, or a sturdy plastic bag if not removing the shower head)
- Measuring cups
- Old toothbrush or small scrub brush
- Microfiber towel
Why This DIY Can Be Useful
Each ingredient in this DIY plays a specific role in tackling shower head grime:
- Distilled White Vinegar: Its acetic acid is excellent at dissolving hard water stains, limescale, and mineral deposits, which are alkaline in nature.
- Baking Soda: A mild abrasive that helps scrub away stubborn residue without scratching. It also helps neutralize odors and provides an extra boost of cleaning power when combined with vinegar.
- Hydrogen Peroxide: A gentle bleaching agent and disinfectant that helps brighten surfaces and kill mold or mildew spores.
How to Make It
Preparing your cleaning solution is quick and easy:
- In your large container, combine the 2 cups of warm water, 1 cup of distilled white vinegar, and 1/2 cup of 3% hydrogen peroxide. Stir gently to mix.
- Carefully add the 2 tablespoons of baking soda to the liquid mixture. It will likely fizz and bubble as it reacts with the vinegar. This reaction is part of its cleaning action. Allow the fizzing to subside.
- Your soaking solution is now ready.
How to Use It
Here’s how to put your DIY cleaning solution to work:
- Prepare the Shower Head: If your shower head is easily detachable, remove it from the pipe. This allows for a more thorough soak. If it’s not removable, you can use a sturdy plastic bag filled with the solution and secure it around the shower head with a rubber band, ensuring the head is fully submerged.
- Soak: Place the detached shower head into the cleaning solution, ensuring it is completely submerged. For best results, allow it to soak for at least 1-4 hours. For very heavy buildup, you can leave it to soak overnight.
- Scrub: After soaking, remove the shower head from the solution. Use an old toothbrush or a small scrub brush to thoroughly scrub all surfaces, paying extra attention to the nozzles where clogs and mineral deposits are most prevalent. The loosened grime should come off easily.
- Rinse: Rinse the shower head thoroughly under running water, ensuring all solution and dislodged debris are washed away. For detachable heads, you can run water through it to flush out any internal buildup.
- Dry and Reassemble: Wipe the shower head dry with a clean microfiber towel to prevent new water spots. Reattach it to the shower arm if you removed it.
What to Expect
You can expect a significant improvement in the appearance and function of your shower head. Mineral deposits and limescale should be visibly reduced or entirely gone, leaving your shower head looking much shinier and cleaner. You may also notice improved water flow and pressure, as the cleaned nozzles allow water to pass through more freely. While this method is highly effective, it may not remove deep scratches or tarnishing that have permanently damaged the finish.
Helpful Tips
- Using warm water for your solution can help speed up the cleaning process.
- For extremely stubborn buildup, a second round of soaking or creating a paste with baking soda and a little water to scrub directly onto problem areas before the main soak can be very effective.
- A dental pick or toothpick can be useful for clearing out individual nozzle holes if they are still partially clogged after soaking and scrubbing.
- Regular cleaning, perhaps once a month or every few months depending on your water hardness, can prevent heavy buildup and keep your shower head in top condition.
Important Notes / Safety
- Always work in a well-ventilated area, especially when working with vinegar, as its fumes can be strong.
- Never mix hydrogen peroxide or vinegar with bleach, as this can create dangerous gases.
- While these ingredients are generally safe for most shower head finishes (like chrome, stainless steel), if you have a unique or antique finish, it’s always wise to test a small, inconspicuous area first.
- Ensure you rinse the shower head completely after cleaning to remove all traces of the cleaning solution before use.
- Keep all cleaning supplies out of reach of children and pets.