Craving a delightful frozen treat that’s both indulgent and surprisingly simple to make? Look no further than this incredible Homemade Banana Chocolate Fudge Ice Cream! It’s the perfect blend of creamy, sweet banana and rich, decadent chocolate fudge, all without the need for an ice cream maker.
This recipe transforms ripe, frozen bananas into a luscious, soft-serve-like base, then swirls in a quick homemade chocolate fudge sauce for that irresistible combination we all love. It’s an easy, healthier dessert that tastes utterly luxurious and is ideal for satisfying those sweet cravings any time of year.
Why You’ll Love This Homemade Banana Chocolate Fudge Ice Cream
- No Ice Cream Maker Needed: Forget bulky gadgets! This recipe relies on a blender or food processor and your freezer.
- Simple Ingredients: You only need a handful of common items, mostly pantry staples.
- Naturally Sweet: Ripe bananas provide natural sweetness, reducing the need for excessive added sugars.
- Creamy & Delicious: Achieves an incredibly smooth, satisfying texture that rivals traditional ice cream.
- Quick to Prepare: Active prep time is minimal, making it a great last-minute dessert option.
- Customizable: Easily adapt the flavors and add-ins to suit your preferences.
Ingredients
For the Banana Ice Cream Base:
- 4-5 large (about 500-600g) ripe bananas, peeled and sliced into 1-inch (2.5 cm) pieces, then frozen solid
- 2 tbsp (30 ml) unsweetened plant-based milk (almond, soy, or coconut milk) or dairy milk, optional, for blending
- 1 tsp (5 ml) vanilla extract
- Pinch of salt (enhances sweetness)
For the Homemade Chocolate Fudge Swirl:
- 1/4 cup (25 g) unsweetened cocoa powder
- 3 tbsp (45 ml) maple syrup or honey (adjust to desired sweetness)
- 2 tbsp (30 ml) unsweetened plant-based milk or dairy milk
- 1/2 tsp (2.5 ml) vanilla extract
- Pinch of salt
Ingredient Notes
- Bananas: The riper the bananas, the sweeter your ice cream will be. Look for bananas with brown spots. Freezing them in slices makes them easier to blend.
- Milk: A small amount of liquid helps achieve a smooth consistency. Use your favorite plant-based milk for a dairy-free option, or regular dairy milk.
- Sweetener: Maple syrup or honey works wonderfully for the fudge swirl, providing natural sweetness and a liquid consistency that blends well. Granulated sugar can also be used, but may require slightly more liquid to dissolve.
- Cocoa Powder: Unsweetened cocoa powder is key for that rich, dark chocolate flavor.
Equipment You’ll Need
- High-speed blender or food processor
- Freezer-safe loaf pan or container (approx. 8×4 inches or 20×10 cm)
- Parchment paper (optional, for easy removal)
- Small saucepan or microwave-safe bowl (for fudge)
- Whisk
How to Make Homemade Banana Chocolate Fudge Ice Cream
-
Prepare the Frozen Bananas:
The day before or at least 4-6 hours prior, peel your ripe bananas and slice them into 1-inch (2.5 cm) thick rounds. Spread them in a single layer on a parchment-lined baking sheet or plate and freeze until solid. This ensures they blend into a creamy, thick base.
-
Make the Chocolate Fudge Swirl:
In a small saucepan over low heat, or in a microwave-safe bowl, combine the cocoa powder, maple syrup (or honey), milk, vanilla extract, and a pinch of salt. Whisk continuously until the mixture is smooth, glossy, and slightly thickened. If using a saucepan, heat for just 1-2 minutes until warmed through and combined. If using a microwave, heat in 15-second intervals, stirring after each, until smooth. Set aside to cool slightly.
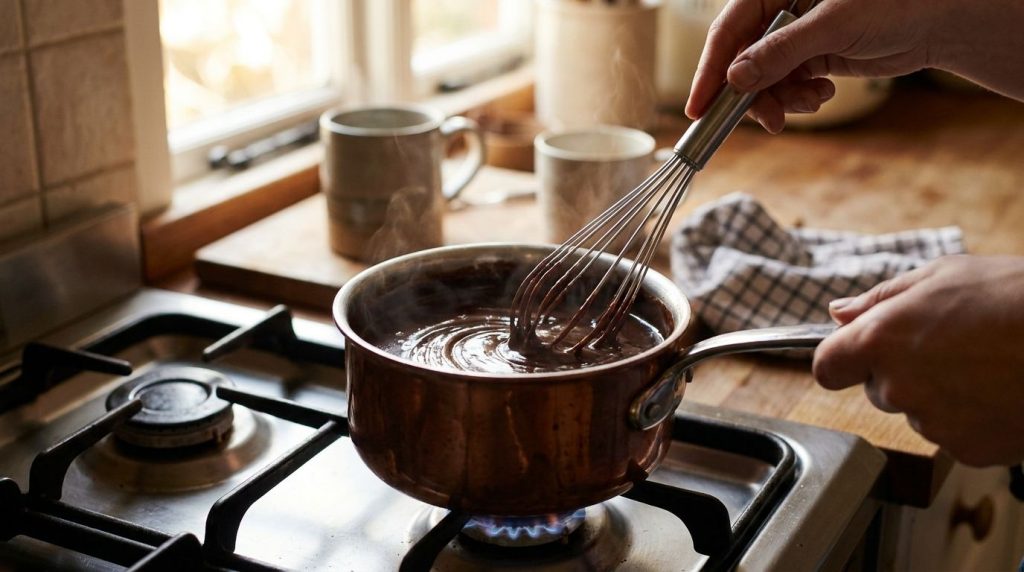
Whisk together the fudge ingredients until smooth and glossy. -
Blend the Banana Base:
Add the frozen banana slices to a high-speed blender or food processor. If your blender is struggling, add 1-2 tablespoons (15-30 ml) of milk to help it along. Blend, scraping down the sides as needed, until a smooth, soft-serve consistency is achieved. This may take a few minutes. It will go from crumbly to thick and creamy. Stir in the 1 teaspoon of vanilla extract and pinch of salt.
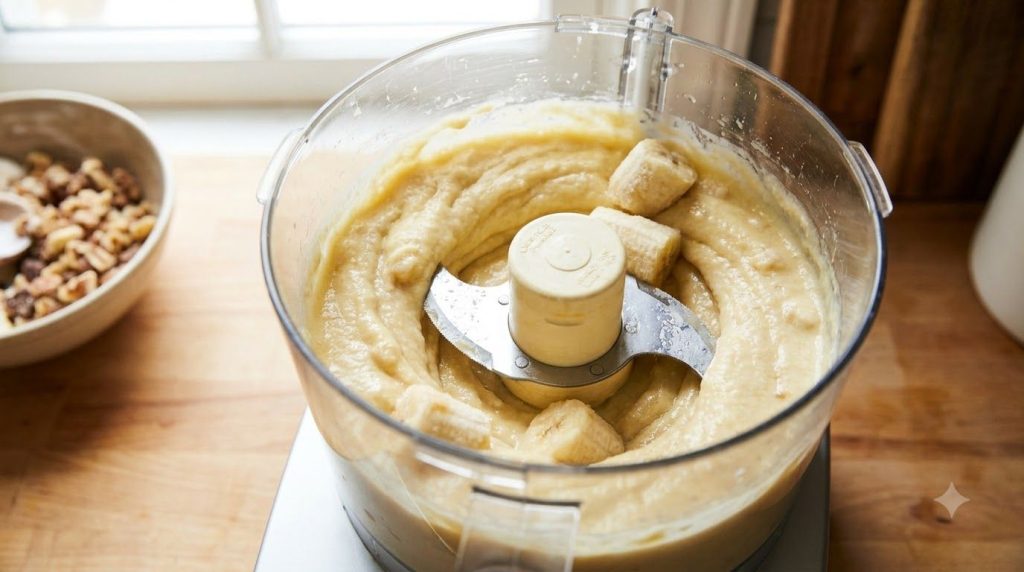
Blend the frozen bananas until they reach a smooth, soft-serve consistency. -
Assemble the Ice Cream:
Pour about half of the banana ice cream base into your freezer-safe loaf pan (lined with parchment paper for easier removal, if desired). Drizzle about half of the cooled chocolate fudge sauce over the banana layer. Use a spoon or knife to gently swirl the fudge into the banana base, creating ribbons.
-
Layer and Freeze:
Add the remaining banana ice cream base to the pan, spreading it evenly. Drizzle the remaining chocolate fudge sauce on top and swirl again. Cover the pan tightly with plastic wrap or a lid and freeze for a minimum of 4-6 hours, or until firm enough to scoop.
-
Serve:
When ready to serve, remove the ice cream from the freezer and let it sit at room temperature for 5-10 minutes to soften slightly, making it easier to scoop. Scoop into bowls and enjoy your homemade treat!
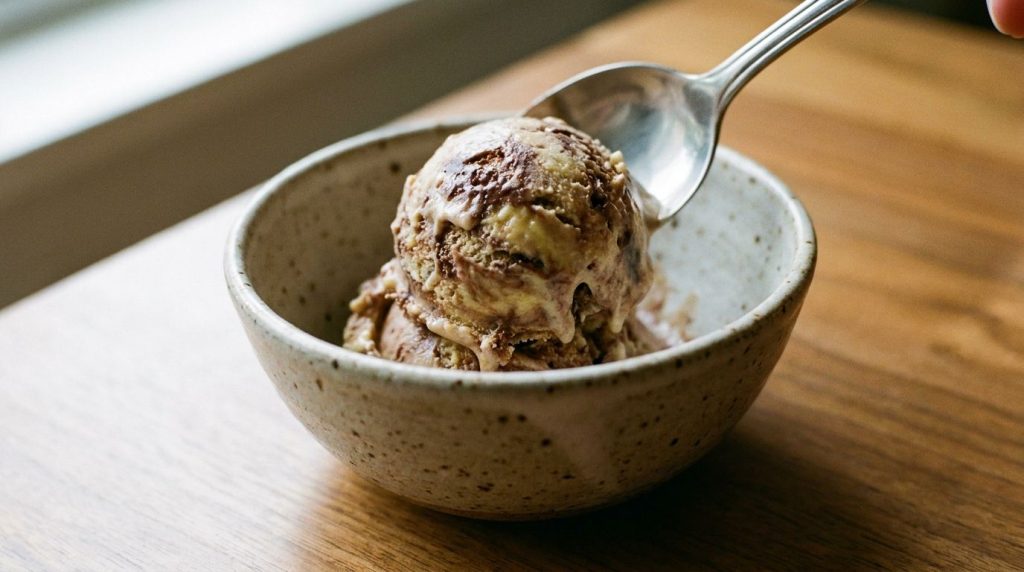
Serve chilled and enjoy the creamy, fudgy goodness!
Pro Tips for the Best Results
- Use Very Ripe Bananas: The browner the spots, the sweeter and more flavorful your ice cream will be. Unripe bananas will yield a less sweet and potentially icy result.
- Freeze Bananas Thoroughly: Ensure your banana slices are completely frozen solid. This is crucial for achieving that creamy, thick texture when blended.
- Don’t Over-blend: Blend just until smooth. Over-blending can warm the mixture, making it too soft and requiring longer freezing time.
- Cool the Fudge: Make sure your chocolate fudge swirl has cooled down before adding it to the banana base. Warm fudge will melt the banana mixture.
- Line Your Pan: Lining your loaf pan with parchment paper, leaving an overhang on the sides, makes it incredibly easy to lift the entire block of ice cream out for slicing or scooping.
- Allow to Soften: Don’t try to scoop directly from the freezer. Letting it sit out for 5-10 minutes makes a huge difference in scoopability.
Common Mistakes to Avoid
- Using Fresh or Partially Frozen Bananas: This will result in a smoothie-like consistency, not ice cream. Always freeze your bananas solid!
- Adding Too Much Liquid: While a splash of milk can help, too much liquid will make the ice cream icy. Add just enough to get the blender moving.
- Not Scraping Down the Blender: Banana ice cream can be thick, so frequently stopping to scrape down the sides ensures all pieces are evenly blended.
- Skipping the Freezing Step: After blending, the mixture is more like a soft-serve. The final freeze is essential for a scoopable ice cream texture.
Variations & Substitutions
- Nut Butter Swirl: For extra creaminess and flavor, add a tablespoon or two of peanut butter or almond butter to the banana base before freezing.
- Mint Chocolate Fudge: Add 1/4 teaspoon of peppermint extract to the chocolate fudge mixture for a refreshing twist.
- Extra Chocolate: Stir in a handful of mini chocolate chips or chopped dark chocolate into the banana base before the final freeze for more chocolatey goodness.
- Spiced Fudge: A tiny pinch of cayenne pepper or cinnamon in the fudge can add a subtle depth of flavor.
- Different Sweeteners: You can experiment with agave nectar or date syrup in the fudge swirl.
Serving Suggestions
This Homemade Banana Chocolate Fudge Ice Cream is fantastic on its own, but you can elevate it with various toppings:
- A sprinkle of flaky sea salt for a salted caramel-like effect.
- A dollop of whipped cream (dairy or coconut).
- Fresh banana slices or berries.
- A drizzle of extra chocolate sauce or caramel.
- Chopped nuts like walnuts, pecans, or almonds.
- Serve alongside a warm brownie or a slice of pie for an indulgent dessert.
Storage & Reheating
Store leftover Homemade Banana Chocolate Fudge Ice Cream in an airtight, freezer-safe container in the freezer for up to 2-3 weeks. To maintain the best texture, press a piece of parchment paper directly onto the surface of the ice cream before sealing the container. This helps prevent ice crystals from forming.
When ready to enjoy again, let the container sit at room temperature for 10-15 minutes to allow the ice cream to soften slightly for easier scooping. It will get quite firm when frozen solid.
FAQ
Can I use fresh bananas instead of frozen?
No, frozen bananas are crucial for the creamy, thick ice cream consistency. Fresh bananas will result in a smoothie-like drink.
Is this ice cream dairy-free?
Yes, if you use plant-based milk (like almond, soy, or coconut milk) for both the banana base and the fudge swirl, this recipe is naturally dairy-free and vegan.
How long does the ice cream need to freeze?
It needs a minimum of 4-6 hours to firm up to a scoopable consistency. For best results, freeze overnight.
Why is my banana ice cream icy?
This can happen if you added too much liquid during blending, or if the bananas weren’t thoroughly frozen. Ensure your bananas are solid and add liquid sparingly.
Can I make the chocolate fudge ahead of time?
Yes, you can make the fudge sauce a day or two in advance and store it in an airtight container in the refrigerator. Reheat gently to loosen before swirling.
How do I make the fudge swirl more pronounced?
For more distinct fudge ribbons, drizzle the fudge into the banana mixture and swirl minimally. You can also create more layers by alternating banana and fudge in thinner increments.
What if I don’t have a high-speed blender?
A good food processor can also work well. You might need to stop and scrape down the sides more frequently and allow the machine to rest to prevent overheating.
Recipe Card: Homemade Banana Chocolate Fudge Ice Cream
Short Description: Indulge in this easy, no-churn homemade ice cream featuring a creamy frozen banana base swirled with a rich, decadent chocolate fudge sauce.
Prep Time: 15 minutes
Cook Time: 5 minutes (for fudge)
Total Time: 4 hours 20 minutes (includes freeze time)
Servings: 4
Course: Dessert
Cuisine: American
Cooking Method: No-Churn, Freezing
Ingredients:
- 4-5 large (about 500-600g) ripe bananas, peeled and sliced into 1-inch (2.5 cm) pieces, then frozen solid
- 2 tbsp (30 ml) unsweetened plant-based milk (almond, soy, or coconut milk) or dairy milk, optional, for blending
- 1 tsp (5 ml) vanilla extract
- Pinch of salt
- 1/4 cup (25 g) unsweetened cocoa powder
- 3 tbsp (45 ml) maple syrup or honey (adjust to desired sweetness)
- 2 tbsp (30 ml) unsweetened plant-based milk or dairy milk
- 1/2 tsp (2.5 ml) vanilla extract
- Pinch of salt
Instructions:
- Prepare Bananas: The day before or at least 4-6 hours prior, peel and slice ripe bananas into 1-inch (2.5 cm) pieces. Freeze them in a single layer on a parchment-lined baking sheet until solid.
- Make Fudge Swirl: In a small saucepan over low heat (or microwave-safe bowl), combine cocoa powder, 3 tbsp maple syrup/honey, 2 tbsp milk, 1/2 tsp vanilla extract, and a pinch of salt. Whisk until smooth, glossy, and slightly thickened. Let cool.
- Blend Banana Base: Add frozen banana slices to a high-speed blender or food processor. If needed, add 1-2 tbsp milk to aid blending. Blend, scraping sides, until smooth and creamy like soft-serve. Stir in 1 tsp vanilla extract and a pinch of salt.
- Assemble: Pour half of the banana base into a freezer-safe loaf pan. Drizzle half of the cooled fudge sauce over it. Gently swirl with a spoon or knife.
- Layer & Freeze: Add remaining banana base, then remaining fudge sauce. Swirl again. Cover tightly and freeze for at least 4-6 hours, or until firm.
- Serve: Let sit at room temperature for 5-10 minutes to soften before scooping and serving.
Notes:
For a dairy-free and vegan option, ensure you use plant-based milk.
Storage:
Store in an airtight, freezer-safe container for up to 2-3 weeks. Press parchment paper onto the surface to prevent ice crystals.
Nutrition:
Nutrition information is an estimate and may vary depending on the ingredients and brands used.
FEATURED IMAGE FILE NAME: homemade-banana-chocolate-fudge-ice-cream.jpg
FEATURED IMAGE ALT TEXT: A scoop of homemade banana chocolate fudge ice cream in a bowl, showing creamy textures and chocolate swirls.
PROCESS PHOTO 1 ALT TEXT: A small saucepan with rich, glossy chocolate fudge sauce being whisked for the ice cream.
PROCESS PHOTO 2 ALT TEXT: Frozen banana slices being blended in a food processor to create the creamy ice cream base.
PROCESS PHOTO 3 ALT TEXT: A close-up shot of a scoop of homemade banana chocolate fudge ice cream being placed into a serving bowl.