A heavily burnt pan can feel like a lost cause, but before you think about throwing it out, there’s a simple, effective DIY solution worth trying! That stubborn, baked-on grime and carbonized bits can be incredibly challenging to remove with just regular scrubbing. This method harnesses the power of common household ingredients to loosen even the toughest residues, making cleanup much easier and potentially saving your favorite cookware.
What You’ll Need
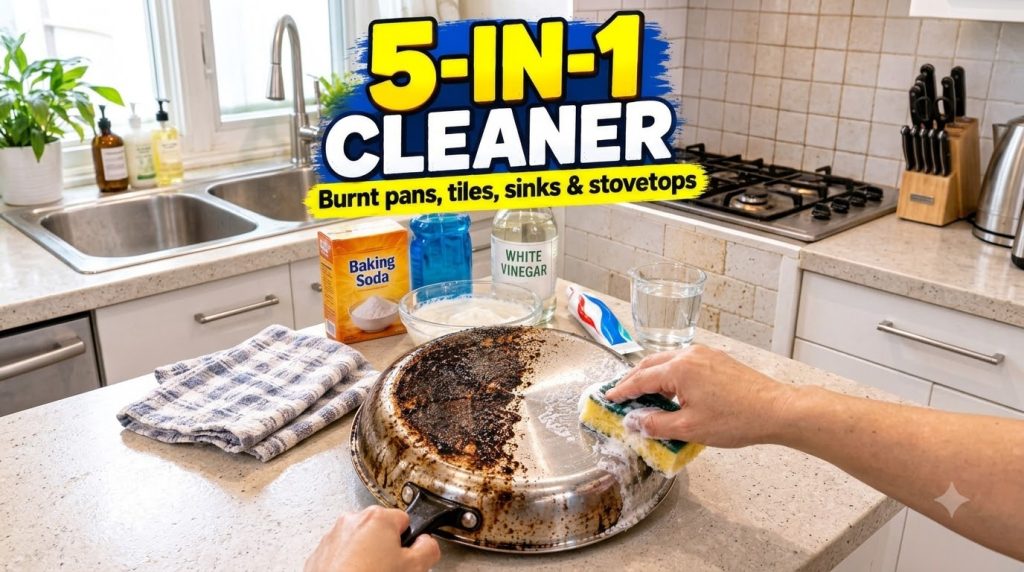
Gather these readily available items to tackle your burnt pan:
- Baking soda: Approximately 1/4 to 1/2 cup (or enough to generously cover the burnt area)
- White vinegar: Approximately 1/4 to 1/2 cup (or enough to create a fizzing reaction)
- Dish soap: A few squirts
- Warm water
- Non-scratch scrub brush or sponge
- Optional: Rubber gloves for hand protection
Why This DIY Can Be Useful
This cleaning method works by combining the strengths of its key ingredients:
- Baking Soda: This mild abrasive helps to gently scour away burnt food particles without scratching your pan. It’s also effective at absorbing odors.
- White Vinegar: As an acid, white vinegar reacts with the alkaline baking soda to create a fizzing action. This chemical reaction helps to physically lift and loosen baked-on grime, making it easier to remove.
- Dish Soap: Dish soap is a degreaser, breaking down oily residues and helping the other ingredients penetrate the burnt layers. It also helps to suspend the loosened particles, making them easier to rinse away.
How to Make It
This “cleaner” is made directly in your pan, allowing the ingredients to work exactly where they’re needed.
- Ensure your pan is completely cool and empty of any food.
- Generously sprinkle baking soda over the entire burnt area at the bottom and sides of the pan. Aim for a layer that covers the grime.
- Add a few squirts of dish soap directly over the baking soda.
- Slowly pour white vinegar over the baking soda and dish soap mixture. You’ll immediately notice a fizzing and bubbling reaction. This is normal and indicates the cleaner is activating.
How to Use It
Once you’ve “made” your cleaner in the pan, it’s time to let it work its magic.
- Allow the mixture to sit and work on the burnt areas for at least 15-30 minutes. For very stubborn, heavily burnt grime, you might need to let it sit for several hours, or even overnight.
- After the waiting period, use your non-scratch scrub brush or sponge to thoroughly scrub the burnt areas. The grime should be significantly softer and easier to remove.
- Once you’ve scrubbed away as much as possible, rinse the pan thoroughly with warm water.
- If any stubborn spots remain, you can repeat the process.
What to Expect
This DIY cleaner is highly effective at loosening and removing most baked-on grime and carbon deposits. You can expect to see a significant improvement in the cleanliness of your pan, with many of the tough stains coming off with much less effort than traditional scrubbing. While it may not make a heavily damaged pan look brand new instantly, it will restore much of its original appearance and functionality, making it usable again without harsh chemicals.
Helpful Tips
- Start with a Scraper: If there are large, loose chunks of burnt food, use a plastic or wooden scraper to remove them before applying the cleaner. This allows the mixture to penetrate the smaller, more stubborn bits.
- Warm the Pan (Carefully): For extremely tough stains, you can sometimes warm the pan on the stovetop for a minute or two before adding the baking soda and vinegar. Ensure the pan is not hot to the touch, just slightly warm, as this can help activate the cleaning agents more effectively.
- Use a Paste: For localized, very dark spots, you can make a thicker paste with baking soda and a tiny bit of water or vinegar, apply it directly to the spot, and let it sit before scrubbing.
- Repeat if Necessary: Don’t be discouraged if all the grime doesn’t come off in one go. Stubborn stains may require a second application and soak.
Important Notes / Safety
- Ventilation: While non-toxic, the fizzing reaction of baking soda and vinegar can produce some fumes. Ensure good ventilation in your kitchen.
- Gloves: Wearing rubber gloves is recommended to protect your hands, especially if you have sensitive skin or any cuts.
- Pan Material: This method is generally safe for most stainless steel, cast iron (unseasoned, or re-season after), and ceramic-coated pans. However, avoid using vinegar on aluminum pans, as it can cause discoloration. Always test on an inconspicuous area if you are unsure about your pan’s material.
- Thorough Rinsing: Always rinse your pan thoroughly after cleaning to remove all cleaning residues.
- Avoid Abrasive Scrubbers: Stick to non-scratch sponges or brushes to prevent damaging the pan’s surface, especially if it’s non-stick or coated.