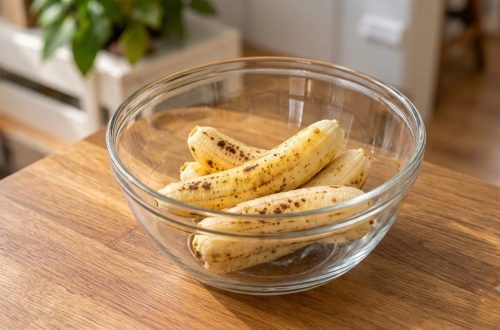
Homemade Honey-Milk Buns: A Soft & Sweet Delight
There’s nothing quite like the comforting aroma and taste of freshly baked bread. And when that bread is a batch of warm, incredibly soft, and subtly sweet homemade honey-milk buns, it’s pure bliss. These delightful rolls are a true crowd-pleaser, boasting a pillowy texture and a delicate sweetness that makes them irresistible.
Whether you’re looking for the perfect accompaniment to your dinner, a comforting breakfast treat with a smear of butter and jam, or simply a sweet snack to enjoy with your afternoon coffee, these honey-milk buns fit the bill. Their light, airy crumb and golden crust make them a standout, offering that satisfying homemade taste without being overly complicated to prepare. Get ready to impress your family and friends with this timeless, tender bread recipe!
Why You’ll Love This Homemade Honey-Milk Bun Recipe
-
Incredibly Soft & Fluffy: Achieves a light, tender crumb that melts in your mouth, thanks to the combination of milk, honey, and butter.
-
Perfectly Sweet: The honey adds a natural, delicate sweetness that’s balanced and not overpowering, making these buns enjoyable on their own or with savory dishes.
-
Satisfyingly Homemade: There’s immense satisfaction in baking your own bread from scratch, and this recipe makes the process enjoyable and rewarding.
-
Versatile for Any Occasion: Ideal for breakfast, brunch, dinner rolls, or even a sweet snack. They pair beautifully with both sweet and savory toppings.
-
Simple Ingredients: Uses common pantry staples, so you likely have most of what you need already.
-
Family-Friendly: A beloved treat for all ages, these buns are sure to become a regular request in your household.
Ingredients for Honey-Milk Buns
Here’s what you’ll need to create these wonderful homemade rolls:
- All-purpose flour: 3 ½ cups (420 g), plus more for dusting
- Granulated sugar: ¼ cup (50 g)
- Active dry yeast: 2 ¼ teaspoons (1 standard packet, 7 g)
- Fine sea salt: 1 teaspoon (6 g)
- Whole milk: 1 cup (240 ml), warmed
- Honey: ¼ cup (60 ml)
- Large egg: 1, at room temperature
- Unsalted butter: ¼ cup (56 g), softened and cut into small pieces
For the Egg Wash (Optional):
- Large egg: 1
- Milk or water: 1 tablespoon
Ingredient Notes
-
Flour: All-purpose flour works well, but for an even chewier and softer texture, you can substitute up to half of the all-purpose flour with bread flour.
-
Yeast: Ensure your active dry yeast is fresh. If using instant yeast, you can skip the activation step and add it directly with the dry ingredients, though I still recommend proofing it to be safe.
-
Milk: Whole milk provides the richest flavor and most tender crumb. You can use 2% milk, but avoid skim milk for the best results. Make sure it’s warmed to between 105-115°F (40-46°C) to activate the yeast without killing it.
-
Honey: Any liquid honey will work. It adds moisture, flavor, and helps achieve a beautiful golden crust.
-
Butter: Unsalted butter is preferred so you can control the salt content. Make sure it’s softened to room temperature for easier incorporation into the dough.
Equipment You’ll Need
- Large mixing bowl (or stand mixer with a dough hook attachment)
- Measuring cups and spoons
- Whisk
- Rubber spatula or wooden spoon
- Plastic wrap or a clean kitchen towel
- Baking sheet
- Parchment paper
- Pastry brush (for egg wash)
How to Make Homemade Honey-Milk Buns
Follow these steps for perfectly soft and fluffy buns:
-
Activate the Yeast: In a large mixing bowl (or the bowl of a stand mixer), combine the warm milk (105-115°F / 40-46°C) and 1 teaspoon of granulated sugar. Sprinkle the active dry yeast over the top and let it sit for 5-10 minutes. It should become foamy and bubbly, indicating the yeast is active. If it doesn’t foam, your yeast may be old, or your milk was too hot or cold; start over with fresh yeast.
-
Combine Dry Ingredients: In a separate bowl, whisk together the remaining granulated sugar, all-purpose flour, and salt.
-
Mix the Dough: To the yeast mixture, add the honey and the room-temperature egg, whisking until well combined. Gradually add the dry flour mixture to the wet ingredients, mixing with a wooden spoon or a stand mixer on low speed until a shaggy dough forms. At this point, gradually add the softened butter pieces, one by one, allowing each to incorporate slightly before adding the next.
-
Knead the Dough: If using a stand mixer, increase the speed to medium-low and knead for 8-10 minutes until the dough is smooth, elastic, and pulls away from the sides of the bowl. If kneading by hand, turn the dough out onto a lightly floured surface and knead for 10-15 minutes until it reaches the same smooth, elastic consistency.
-
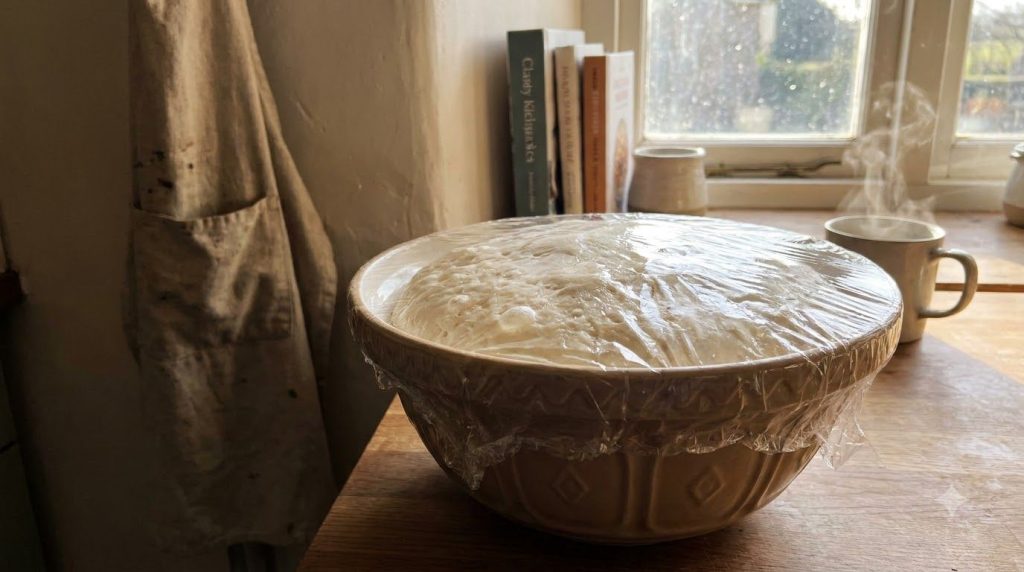
First Rise (Bulk Fermentation): Lightly grease a clean large bowl with a little oil. Transfer the dough to the bowl, turning it once to coat. Cover the bowl tightly with plastic wrap or a clean kitchen towel and let it rise in a warm, draft-free place for 1 to 1 ½ hours, or until it has doubled in size. The exact time will depend on the warmth of your kitchen.
-
Divide and Shape: Gently punch down the risen dough to release the air. Turn it out onto a lightly floured surface. Divide the dough into 12-16 equal pieces (approximately 60-70g each for 12 buns). Shape each piece into a smooth, round ball. To do this, pull the edges of the dough under itself, pinching at the bottom to create a smooth top surface, then roll gently between your palm and the counter.
-
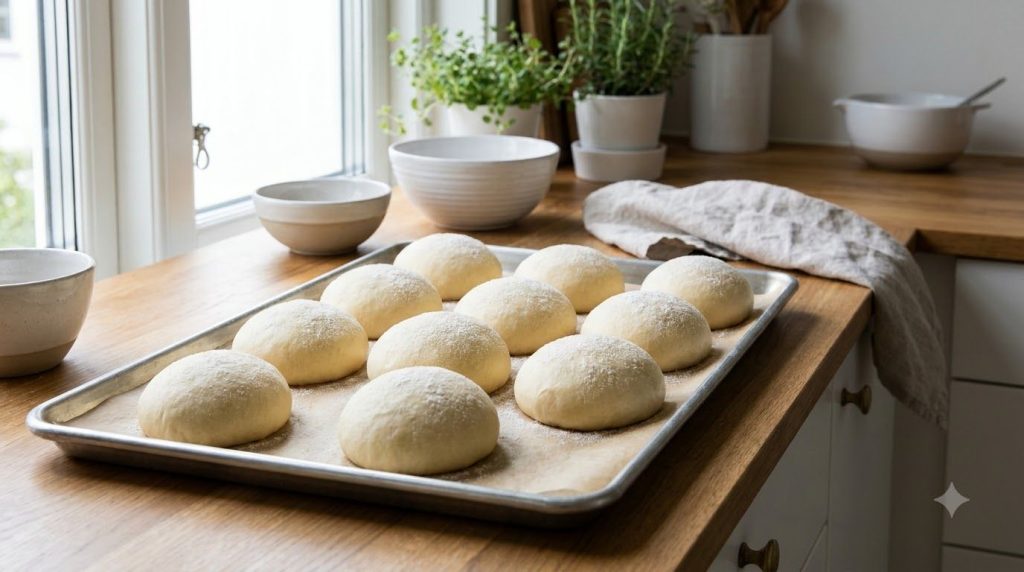
Second Rise (Proofing): Line a large baking sheet (approximately 9×13 inches or 23×33 cm) with parchment paper. Arrange the shaped dough balls on the prepared baking sheet, leaving about 1 inch (2.5 cm) between them. Cover loosely with plastic wrap or a clean kitchen towel and let them rise in a warm place for another 45-60 minutes, or until they look visibly puffy and nearly doubled in size.
-
Preheat Oven & Prepare Egg Wash: While the buns are on their second rise, preheat your oven to 375°F (190°C). If using, prepare the egg wash by whisking one egg with 1 tablespoon of milk or water in a small bowl.
-
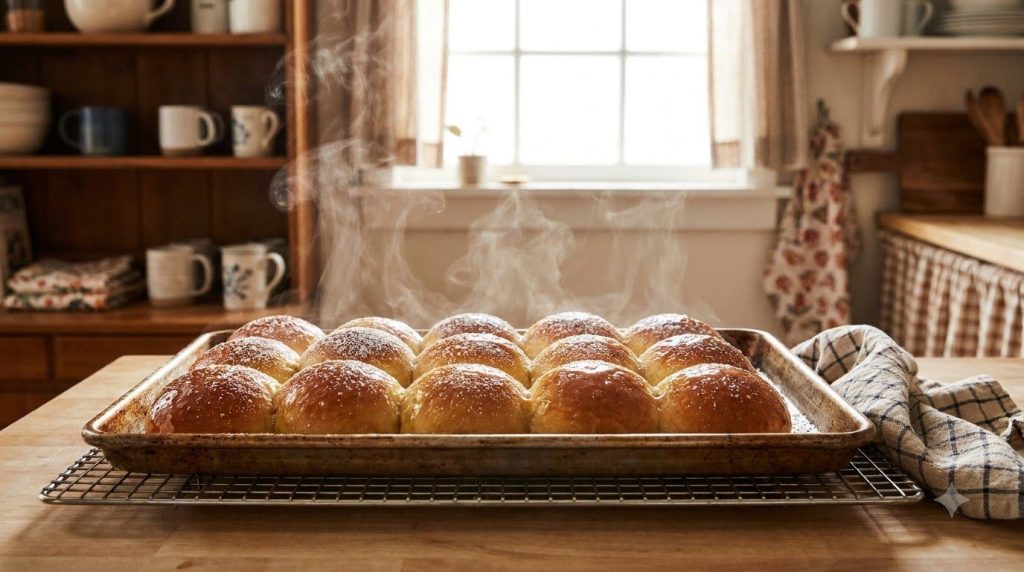
Bake the Buns: Gently brush the tops of the risen buns with the egg wash (if using). This will give them a beautiful golden-brown shine. Bake for 15-20 minutes, or until the tops are deeply golden brown and the internal temperature reaches 200-210°F (93-99°C) when checked with an instant-read thermometer.
-
Cool: Once baked, transfer the buns to a wire rack to cool slightly. For extra softness and a glossy finish, you can brush the warm buns with a little melted butter right after they come out of the oven. Serve warm or at room temperature.
-
Measure Flour Accurately: For baking, especially bread, precise flour measurement is key. Use a kitchen scale for the most accurate results, or use the spoon-and-level method if using measuring cups.
-
Don’t Overheat Your Milk: The ideal temperature for activating active dry yeast is between 105-115°F (40-46°C). Too hot, and you’ll kill the yeast; too cold, and it won’t activate properly. Use a thermometer if unsure.
-
Knead Sufficiently: Proper kneading develops the gluten, which is essential for the buns’ soft, chewy texture. The dough should be smooth, elastic, and pass the windowpane test (stretch a small piece of dough thinly enough to see light through it without tearing).
-
Create a Warm Rising Environment: If your kitchen is cool, you can create a warm spot for rising by placing the covered dough in an oven that’s turned off, with the light on (the light provides enough warmth). You can also place it in a microwave with a cup of hot water next to it.
-
Avoid Overbaking: Overbaked buns will be dry and tough. Keep an eye on them, and remove them from the oven once they reach a deep golden brown and register the correct internal temperature.
-
Brush with Butter: For an extra luxurious finish and even softer crust, brush the hot buns with a little melted unsalted butter immediately after taking them out of the oven.
-
Killing the Yeast: Using milk that is too hot will kill the yeast, preventing the dough from rising. Always check the temperature.
-
Not Kneading Enough: Under-kneaded dough will result in dense, tough buns. Don’t rush the kneading process.
-
Over-Proofing the Dough: While under-proofing is a common issue, over-proofing can also lead to problems. If the dough rises for too long, it can collapse in the oven, resulting in a flat texture and a yeasty, alcoholic smell. The dough should be puffy but still have some structure.
-
Adding Too Much Flour: Resist the urge to add too much extra flour during kneading or shaping. A slightly sticky dough is often a good thing for soft buns. Too much flour will make the buns dry.
-
Overcrowding the Baking Sheet: Give your buns enough space to rise and expand. If they are too close together, they won’t brown evenly on the sides and may stick together excessively.
-
Sweetener Swaps: You can experiment with other liquid sweeteners like maple syrup or agave nectar, though the flavor profile will change slightly.
-
Different Milk: While whole milk is recommended, you can use 2% milk or even a plant-based milk like almond or soy milk for a dairy-free version, keeping in mind the texture might be slightly less rich.
-
Savory Buns: Reduce the honey to 1-2 tablespoons and add garlic powder, dried herbs (like rosemary or thyme), or grated Parmesan cheese to the dough for a savory roll.
-
Add Seeds: Sprinkle sesame seeds, poppy seeds, or everything bagel seasoning on top of the buns after the egg wash for added texture and flavor.
-
Cinnamon Swirl Buns: After the first rise, roll out the dough into a rectangle. Spread with softened butter, a sprinkle of cinnamon sugar, and a drizzle of honey. Roll up tightly, slice, and bake for delicious cinnamon buns.
-
Breakfast Delight: Enjoy them warm with butter, jam, fruit preserves, or a drizzle of extra honey.
-
Dinner Rolls: Serve them as a comforting side to any meal, from roasts and stews to pasta dishes.
-
Mini Sandwiches/Sliders: Their soft texture makes them perfect for small sandwiches with deli meat, cheese, or even sloppy joes.
-
With Soup or Salad: A warm, tender bun is the ideal accompaniment to a hearty soup or a fresh salad.
-
Sweet Snack: Simply enjoy them plain with a cup of coffee or tea.
-
Room Temperature: Store cooled honey-milk buns in an airtight container or a large zip-top bag at room temperature for up to 2-3 days. They are best enjoyed fresh.
-
Refrigerator: For longer storage, you can refrigerate them for up to a week. They may dry out slightly, so reheating is recommended.
-
Freezer: These buns freeze beautifully! Once completely cooled, place them in a freezer-safe bag or airtight container. They can be frozen for up to 2-3 months.
-
Reheating:
- From Room Temperature/Refrigerator: Warm individual buns in the microwave for 10-20 seconds, or wrap them in foil and reheat in a preheated oven at 300°F (150°C) for 5-10 minutes until warmed through.
- From Frozen: Thaw frozen buns overnight in the refrigerator or at room temperature. Then, reheat as described above. For quicker reheating, you can wrap frozen buns in foil and bake them directly in a 300°F (150°C) oven for 15-20 minutes, or until soft and warm.
- 3 ½ cups (420 g) all-purpose flour, plus more for dusting
- ¼ cup (50 g) granulated sugar
- 2 ¼ teaspoons (7 g) active dry yeast
- 1 teaspoon (6 g) fine sea salt
- 1 cup (240 ml) whole milk, warmed to 105-115°F (40-46°C)
- ¼ cup (60 ml) honey
- 1 large egg, at room temperature
- ¼ cup (56 g) unsalted butter, softened and cut into small pieces
- 1 large egg
- 1 tablespoon milk or water
- Activate Yeast: In a large mixing bowl, combine warm milk and 1 tsp sugar. Sprinkle yeast over, let sit 5-10 min until foamy.
- Combine Dry Ingredients: In a separate bowl, whisk remaining sugar, flour, and salt.
- Mix Dough: Add honey and egg to yeast mixture. Gradually add dry ingredients, then softened butter pieces, mixing until a shaggy dough forms.
- Knead Dough: Knead in a stand mixer (8-10 min) or by hand (10-15 min) until smooth and elastic.
- First Rise: Lightly grease a bowl, transfer dough, turn to coat. Cover and rise in a warm, draft-free place for 1-1.5 hours, or until doubled.
- Divide and Shape: Punch down dough, turn onto a lightly floured surface. Divide into 12-16 equal pieces and shape into smooth balls.
- Second Rise: Arrange shaped balls on a parchment-lined baking sheet, leaving space. Cover loosely and rise for 45-60 minutes, or until visibly puffy.
- Preheat Oven & Egg Wash: Preheat oven to 375°F (190°C). Whisk 1 egg with 1 tbsp milk/water for egg wash (if using).
- Bake Buns: Brush tops with egg wash. Bake 15-20 minutes, or until deep golden brown and internal temperature is 200-210°F (93-99°C).
- Cool: Transfer to a wire rack to cool. Brush with melted butter for extra softness, if desired. Serve warm.
Pro Tips for the Best Results
Common Mistakes to Avoid
Variations & Substitutions
Serving Suggestions
These homemade honey-milk buns are incredibly versatile:
Storage & Reheating
FAQ
Can I use instant yeast instead of active dry yeast?
Yes, you can use instant yeast. Typically, instant yeast can be mixed directly with the dry ingredients without prior activation. However, for best results and to ensure your yeast is active, you can still proof it in the warm milk and sugar mixture for 5 minutes before proceeding.
Why are my honey-milk buns dense?
Dense buns can result from several factors: not enough kneading (which means gluten hasn’t developed sufficiently), using too much flour, the yeast not being active, or not allowing the dough enough time to rise (under-proofing).
Can I make the dough ahead of time?
Absolutely! After the first rise, you can punch down the dough, cover it tightly with plastic wrap, and refrigerate it for up to 24 hours. When you’re ready to bake, remove it from the fridge, let it come to room temperature for about 30-60 minutes, then proceed with shaping and the second rise.
How do I know when the buns are done baking?
The buns should be a beautiful golden-brown color on top. For absolute certainty, use an instant-read thermometer. The internal temperature of a properly baked bun should be between 200-210°F (93-99°C).
What if I don’t have a stand mixer?
No problem! This recipe can be made entirely by hand. Expect to spend a bit more time kneading, usually 10-15 minutes, until the dough is smooth and elastic. It’s a great arm workout!
Can I make this recipe dairy-free?
You can substitute whole milk with a plain, unsweetened plant-based milk (like almond or soy milk) and use a dairy-free butter alternative. The texture and flavor might vary slightly but will still be delicious.
Recipe Card
Recipe Name: Homemade Honey-Milk Buns
Short Description: Delightfully soft, fluffy, and subtly sweet buns perfect for any meal or snack.
Prep Time: 30 minutes
Cook Time: 15-20 minutes
Total Time: 2 hours 30 minutes (includes rising time)
Servings: 12-16 buns
Course: Bread, Breakfast, Side Dish
Cuisine: American
Cooking Method: Baking
Ingredients:
For the Egg Wash (Optional):
Instructions:
Notes:
For best results, measure flour by weight using a kitchen scale. Ensure milk temperature is accurate to properly activate yeast. Don’t overbake to keep buns soft.
Storage:
Store in an airtight container at room temperature for 2-3 days, refrigerated for up to a week, or frozen for up to 2-3 months. Reheat gently in the microwave or oven.
Nutrition:
Nutrition information is an estimate and may vary depending on the ingredients and brands used.