Remember the Dalgona candy challenge that took the internet by storm? Now you can easily recreate that delicious, crispy, and oh-so-fun treat right in your own kitchen! This isn’t just a recipe; it’s a delightful experience that brings a touch of playful nostalgia and culinary magic to your day.
With just two simple ingredients, you’ll learn how to transform ordinary sugar into a golden, crunchy delight that’s perfect for snacking, sharing, or even playing a game inspired by the hit show. Forget complicated desserts; this Dalgona candy recipe is all about minimal effort with maximum satisfaction. It’s a fantastic activity for all ages, offering a sweet reward that’s incredibly satisfying to make and eat.
Whether you’re looking for a quick dessert, a unique party favor, or just a fun kitchen experiment, this guide will walk you through every step. You’ll be amazed at how simple it is to achieve that perfect brittle texture and signature honeycomb appearance. Get ready to impress your friends and family with your newfound candy-making skills!
Recipe Summary
- Prep Time: 5 minutes
- Cook Time: 5 minutes
- Total Time: 10 minutes
- Servings: 4-6 pieces
- Difficulty Level: Easy
- Course: Dessert, Snack
- Cuisine: Korean
- Diet Type: Vegetarian
Why You’ll Love This Recipe
- Ready in Minutes: From start to finish, you can have homemade Dalgona candy in just 10 minutes.
- Beginner-Friendly: With only two ingredients and straightforward steps, anyone can make this.
- Minimal Ingredients: All you need is sugar and baking soda – likely already in your pantry!
- Fun to Make: The process is as enjoyable as eating the candy, perfect for family activities.
- Crispy & Delicious: Achieve that signature brittle, melt-in-your-mouth texture.
- Unique Treat: Impress guests with this trendy and unique homemade confection.
- Customizable: Easily adapt with different shapes and a touch of flavor if desired.
Ingredients
- ½ cup (100g) granulated sugar: The base for our candy.
- ¼ teaspoon baking soda: Essential for creating the airy, honeycomb texture.
- 1-2 drops vegetable oil (optional): For greasing surfaces, if not using a silicone mat.
Equipment Needed
- Small non-stick saucepan or stainless steel ladle
- Heat-resistant spatula or wooden chopstick
- Silicone baking mat or parchment paper
- Metal cookie cutter (optional, for shaping)
- Flat bottomed metal cup or spatula (for pressing)
Step-by-Step Instructions
-
Prepare Your Workspace:
Before you start, lay out a silicone baking mat or a sheet of parchment paper on a heat-proof surface. If using parchment paper, you can lightly grease it with a drop or two of vegetable oil to prevent sticking, although a silicone mat is highly recommended for best results. Have your cookie cutter (if using) and pressing tool ready nearby, as you’ll need to work quickly.
-
Melt the Sugar:
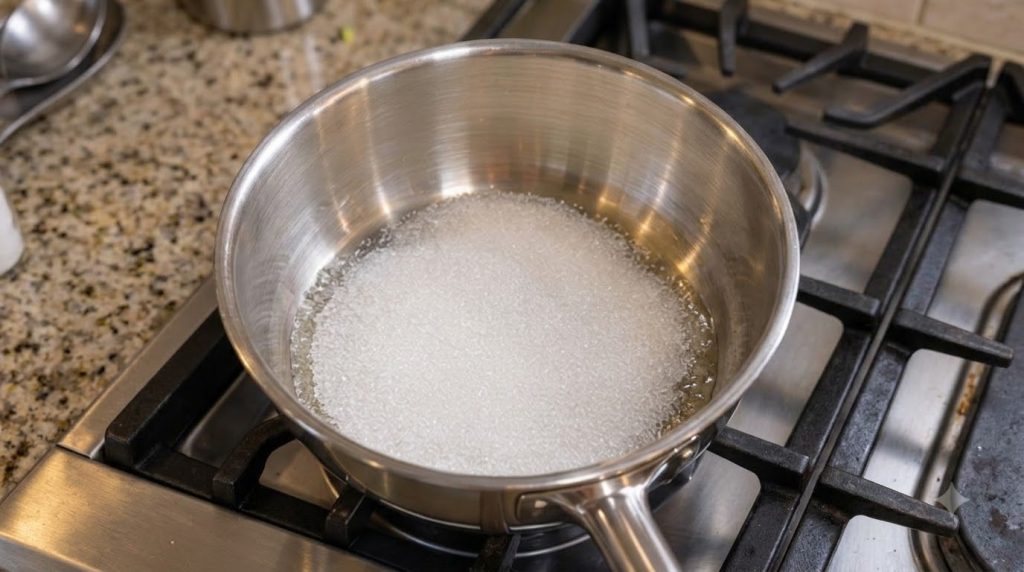
Place the granulated sugar in your small non-stick saucepan or ladle. Set it over medium-low heat. Let the sugar melt slowly and evenly without stirring initially. As the edges begin to melt, you can gently push the melted sugar towards the center with your spatula or chopstick. Continue to cook until all the sugar has completely melted into a clear, amber-colored liquid. This should take about 3-5 minutes. Be careful not to burn the sugar, as it will turn bitter.
-
Add Baking Soda:
Once the sugar is fully melted and has a smooth, syrupy consistency, immediately remove it from the heat. Add the ¼ teaspoon of baking soda to the melted sugar. Stir vigorously and quickly with your spatula or chopstick. The mixture will instantly begin to lighten in color and puff up, expanding significantly. Keep stirring until the baking soda is fully incorporated and the mixture looks frothy and light golden brown, about 10-15 seconds.
-
Pour and Shape:
Immediately pour the puffed-up sugar mixture onto your prepared silicone mat or parchment paper. Try to pour it into a roughly circular shape. If using, quickly place your desired cookie cutter on top of the poured candy. Gently press down on the candy with the flat bottom of a metal cup or spatula for about 5-10 seconds. Don’t press too hard, or the candy will stick to the tool. The candy should have a smooth top and a bubbly, porous inside.
-
Cool and Release:
Allow the Dalgona candy to cool for about 1-2 minutes. It should harden relatively quickly. Once cooled and firm, gently lift the cookie cutter (if used) from the candy. Then, carefully peel the Dalgona candy off the silicone mat or parchment paper. It should come off easily with a satisfying snap. Your crispy Dalgona candy is now ready to enjoy!
Nutrition Highlights
This Dalgona candy is a simple, sweet treat, primarily made from sugar, offering a quick source of energy. While it’s a delicious indulgence, it’s important to remember it’s a confection. It provides a fun, homemade alternative to store-bought candies, allowing you to control the ingredients and enjoy a unique flavor and texture experience.
Ingredient Benefits
- Granulated Sugar: Beyond its primary role in providing sweetness, sugar caramelizes beautifully, giving Dalgona candy its signature rich, slightly toasted flavor and golden-brown color. It forms the essential brittle structure.
- Baking Soda: This humble leavening agent is the secret to Dalgona’s iconic honeycomb texture. When it reacts with the hot, melted sugar, it releases carbon dioxide gas, causing the sugar to puff up and become porous and crunchy.
Expert Tips
- Use Low Heat: Melting the sugar over medium-low heat is crucial to prevent burning, which can lead to a bitter taste. Patience is key!
- Work Quickly: Once the baking soda is added, the sugar mixture hardens very fast. Have all your tools ready and work swiftly to pour, press, and shape the candy.
- Don’t Overmix Baking Soda: Stirring too long after adding baking soda can cause the candy to become crumbly instead of airy. Stop stirring as soon as it’s fully incorporated and puffed.
- Grease if Not Using Silicone: If you don’t have a silicone mat, lightly greasing parchment paper or a metal surface is essential to prevent sticking.
- Test the Press: When pressing the candy, a light, even press is enough. Pressing too hard can cause the candy to stick to your pressing tool, making it difficult to remove.
- Clean Up Immediately: The hardened sugar can be tricky to clean. Fill your saucepan/ladle with hot water immediately after pouring to loosen any stuck-on sugar.
- Humidity is the Enemy: Dalgona candy is highly susceptible to humidity, which can make it sticky and lose its crunch. Make sure to work in a dry environment.
Recipe Variations
- Coffee Dalgona: Add a tiny pinch of instant coffee powder along with the baking soda for a subtle coffee flavor.
- Chocolate Dalgona: Stir in a very small amount of unsweetened cocoa powder (less than ¼ tsp) with the baking soda for a chocolatey twist.
- Spiced Dalgona: For a unique aroma, add a tiny dash of cinnamon or cardamom powder.
- Fun Shapes: Use different small cookie cutters (stars, hearts, flowers) to create a variety of playful shapes.
- Thicker Candy: If you prefer a thicker, chewier Dalgona, use slightly more sugar per batch and press it less thinly.
Storage Instructions
Dalgona candy is best enjoyed fresh, as its crispy texture is very sensitive to humidity. However, if you have leftovers, store them in an airtight container at room temperature. Place a piece of parchment paper between layers of candy to prevent sticking. Avoid refrigerating or freezing, as this can introduce moisture and cause the candy to become sticky and soft. When stored properly, Dalgona candy can retain its crunch for up to 1-2 days, though it’s typically best within the first few hours of making it.
Frequently Asked Questions
Can I use brown sugar instead of granulated sugar?
While technically possible, brown sugar contains molasses, which can make the candy chewier and harder to achieve the signature brittle Dalgona texture. Granulated white sugar is recommended for authentic results.
Why did my Dalgona candy burn?
Dalgona candy often burns if the heat is too high. Ensure you’re melting the sugar over medium-low heat and remove it from the heat as soon as it’s fully melted and amber-colored. Sugar burns quickly!
My candy didn’t puff up. What went wrong?
This usually happens if the baking soda isn’t fresh or if it wasn’t stirred in quickly and vigorously enough. Ensure your baking soda is active and that you incorporate it into the hot sugar rapidly.
How do I clean the sticky saucepan and tools?
Immediately after use, fill the saucepan/ladle with hot water and let it sit. The hot water will dissolve the hardened sugar, making cleanup much easier. For tools, a quick soak in hot water also works wonders.
Can children help make Dalgona candy?
Children can definitely help with the shaping and decorating parts, but adult supervision is essential for melting the sugar, as it gets extremely hot and can cause severe burns.
Can I make a large batch at once?
It’s best to make Dalgona candy in small batches (using ½ cup sugar per batch) to ensure the sugar melts evenly and you have enough time to incorporate the baking soda and shape the candy before it hardens. Working in small batches ensures better results.
What makes the candy have holes?
The holes are created by the reaction between the baking soda and the melted sugar. When baking soda (sodium bicarbonate) is heated and mixed with the acidic components that form when sugar caramelizes, it releases carbon dioxide gas, which gets trapped in the candy, creating its porous, honeycomb structure.
Conclusion
And there you have it – your very own homemade Dalgona candy! This simple yet captivating treat is a testament to how just two ingredients can create something truly magical and memorable. It’s not just a delicious snack; it’s a fun project, a delightful challenge, and a sweet taste of a global phenomenon.
So, gather your sugar and baking soda, and give this viral sensation a try. Whether you’re carefully trying to break out a shape or simply enjoying the satisfying crunch, this Dalgona candy is sure to bring a smile to your face. Happy candy making!

