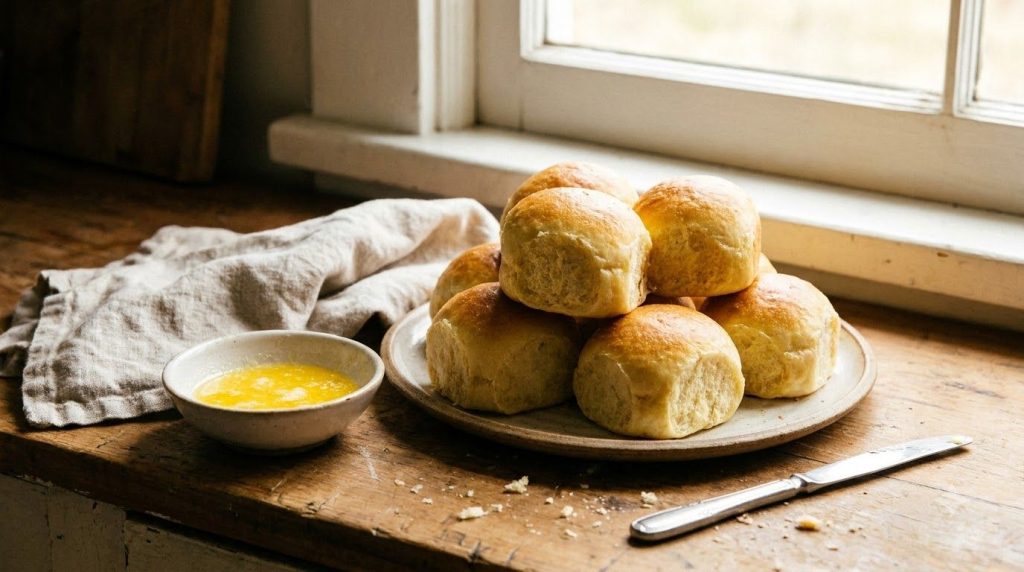
There’s nothing quite like the smell of fresh bread baking in your kitchen. It’s a scent that instantly brings warmth, comfort, and a flood of cherished memories. Today, I’m thrilled to share a recipe that embodies all of that and more: My Mother’s Secret Soft Potato Rolls. These aren’t just any rolls; they’re the kind that your family will rave about, asking for seconds (and maybe even thirds!).
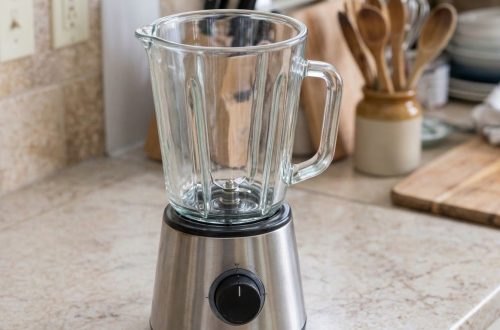
What makes these potato rolls so special? Beyond their incredible fluffiness and melt-in-your-mouth texture, it’s the surprising ease with which they come together. Forget endless kneading and complicated steps. This recipe harnesses the power of your blender to mix most of the ingredients, creating a perfect, smooth dough with minimal effort. It’s a game-changer for anyone who loves homemade bread but is short on time or intimidated by traditional baking.
These delightful rolls are perfect for any occasion, whether you’re serving them alongside a holiday meal, enjoying them as a comforting snack, or using them to elevate your everyday sandwiches. They’re a wholesome, homemade treat that you can feel good about sharing. Plus, learning to make bread from scratch, especially one this simple, is a truly rewarding experience.
In this article, you’ll discover the full step-by-step guide to mastering these soft potato rolls, complete with expert tips, variations, and answers to all your baking questions. Get ready to impress your loved ones and fill your home with the irresistible aroma of freshly baked goodness!
Recipe Summary
- Prep Time: 25 minutes
- Cook Time: 18-22 minutes
- Total Time: 2 hours 30 minutes (includes rise times)
- Servings: 12 rolls
- Difficulty Level: Easy
- Course: Side Dish, Bread
- Cuisine: American
- Diet Type: Vegetarian
Why You’ll Love This Recipe
- Incredibly Soft & Fluffy: The potato in the dough makes these rolls exceptionally tender.
- Blender-Friendly: Most ingredients are mixed in a blender, saving you time and effort.
- Beginner-Friendly: Simple, clear steps make this recipe approachable for new bakers.
- Homemade Comfort: Enjoy the satisfaction and warmth of freshly baked bread from scratch.
- Versatile: Perfect for dinner, sandwiches, or just as a wholesome snack.
- Kid-Approved: Their mild flavor and soft texture make them a hit with kids.
- No Preservatives: Enjoy wholesome ingredients without any artificial additives.
Ingredients
- 1 medium russet potato, peeled and cubed (about 1.5 cups cubed)
- ¾ cup warm milk (about 105-115°F / 40-46°C)
- 2 ¼ teaspoons (1 standard packet) active dry yeast
- ¼ cup granulated sugar
- ¼ cup unsalted butter, melted
- 1 large egg
- 1 teaspoon salt
- 3 to 3 ½ cups all-purpose flour, divided, plus more for dusting
- 2 tablespoons melted butter, for brushing (optional)
Optional Substitutions:
- Milk: You can use non-dairy milk (like almond or soy milk) for a dairy-free version, ensuring it’s warmed to the correct temperature.
- Flour: While all-purpose works best for softness, you can experiment with up to half whole wheat flour for a slightly denser, more nutritious roll.
- Sugar: Honey or maple syrup can be used as a substitute, but may slightly alter the texture and color.
Equipment Needed
- Large pot (for boiling potatoes)
- Potato masher or fork
- Measuring cups and spoons
- Small bowl (for yeast)
- Blender
- Large mixing bowl
- Rubber spatula or wooden spoon
- Clean kitchen towel or plastic wrap
- 9×13 inch baking pan
- Wire rack (for cooling)
- Pastry brush (optional, for melted butter topping)
Step-by-Step Instructions
Step 1: Prepare the Potato
- Peel and cube your russet potato into approximately 1-inch pieces.
- Place the cubed potato in a large pot and cover with cold water. Bring to a boil over high heat, then reduce heat and simmer until the potatoes are very tender, about 10-15 minutes.
- Drain the potatoes well and return them to the empty hot pot for a minute or two to allow any excess moisture to evaporate.
- Mash the potatoes until completely smooth, ensuring no lumps remain. You should have about 1 cup of mashed potato. Set aside to cool slightly.
Step 2: Activate the Yeast
- In a small bowl, combine the warm milk (ensure it’s not too hot, or it will kill the yeast) and 1 teaspoon of the granulated sugar.
- Sprinkle the active dry yeast over the milk mixture. Gently stir, then let it sit for 5-10 minutes until it becomes foamy. This indicates the yeast is active and ready to go.
Step 3: Blend the Wet Ingredients
- In your blender, add the slightly cooled mashed potato, the remaining granulated sugar, melted butter, and the egg.
- Pour in the foamy yeast mixture. Blend on low speed until everything is well combined and smooth, scraping down the sides as needed. The mixture should be creamy with no potato lumps.
Step 4: Combine Wet and Dry Ingredients
- In a large mixing bowl, combine 3 cups of the all-purpose flour and the salt.
- Pour the blended potato mixture from the blender into the dry ingredients.
- Using a rubber spatula or wooden spoon, mix until a shaggy dough forms.
Step 5: Knead the Dough
- Turn the dough out onto a lightly floured surface.
- Knead for 5-7 minutes, gradually adding up to ½ cup more flour if the dough is too sticky. The dough should become smooth, elastic, and no longer sticky to the touch. It will still be quite soft.
Step 6: First Rise
- Lightly grease the large mixing bowl. Place the dough in the bowl, turning it once to coat with oil.
- Cover the bowl with a clean kitchen towel or plastic wrap.
- Let the dough rise in a warm, draft-free place for 60-90 minutes, or until it has doubled in size.
Step 7: Shape the Rolls
- Gently punch down the risen dough to release the air.
- Turn the dough out onto a lightly floured surface and divide it into 12 equal pieces. You can use a kitchen scale for precision, aiming for about 2.5 ounces (70g) per roll.
- Shape each piece into a smooth, round ball by pinching the seams at the bottom or rolling it against your countertop.
- Arrange the shaped rolls in a lightly greased 9×13 inch baking pan, leaving a little space between each.
Step 8: Second Rise
- Cover the baking pan loosely with plastic wrap or a clean kitchen towel.
- Let the rolls rise again in a warm place for another 30-45 minutes, or until they look puffy and have nearly doubled in size.
- Towards the end of the second rise, preheat your oven to 375°F (190°C).
Step 9: Bake the Rolls
- Bake the rolls in the preheated oven for 18-22 minutes, or until they are golden brown on top and sound hollow when tapped on the bottom.
- For an extra soft crust and buttery flavor, brush the tops of the hot rolls with 2 tablespoons of melted butter immediately after removing them from the oven.
Step 10: Cool and Serve
- Allow the rolls to cool slightly in the pan for 5 minutes before transferring them to a wire rack to cool completely.
- Serve warm and enjoy!
Nutrition Highlights
These homemade potato rolls offer more than just delicious flavor. The addition of mashed potato contributes a wonderful moistness and softness to the bread, along with some dietary fiber and essential vitamins and minerals like Vitamin C and Potassium. Made with wholesome ingredients like flour, milk, and eggs, they provide a good source of carbohydrates for energy. Compared to many store-bought options, these rolls are free from artificial preservatives and high-fructose corn syrup, making them a more natural and satisfying choice for your family.
Ingredient Benefits
- Russet Potato: Beyond contributing to the rolls’ incredibly soft and moist texture, mashed potato adds natural starch, making the crumb tender. It also provides dietary fiber, Vitamin C, and Potassium.
- Milk: Adds richness and helps create a tender crumb. The protein in milk interacts with the gluten in flour, contributing to a soft structure. Warm milk is crucial for activating the yeast.
- Active Dry Yeast: The leavening agent that makes the rolls rise, creating their characteristic fluffy texture.
- Granulated Sugar: Feeds the yeast, helping it activate and rise effectively, and adds a subtle sweetness to the rolls.
- Unsalted Butter: Contributes richness, flavor, and helps tenderize the dough, leading to a more luxurious texture.
- Egg: Adds richness, moisture, and helps with binding the ingredients, contributing to a soft and slightly chewy texture. It also lends a lovely golden color to the crust.
- Salt: Essential for enhancing the flavor of the rolls and regulating yeast activity. Without salt, bread can taste bland and yeast can over-proof.
- All-Purpose Flour: Provides the structural base for the rolls, creating the gluten network necessary for a chewy yet tender crumb.
Expert Tips
- Don’t Over-Flour: Adding too much flour is the most common mistake in bread baking. It makes the dough tough. Aim for a dough that is soft and slightly tacky, not dry.
- Check Yeast Activity: Always ensure your yeast is active by letting it foam in warm milk. If it doesn’t foam, your milk might be too cold/hot, or your yeast is old.
- Proper Potato Preparation: Mash potatoes very smoothly. Lumps can make your rolls uneven. Also, ensure they are not too wet; excess moisture can lead to a sticky dough that’s hard to work with.
- Warm Rising Environment: Dough rises best in a warm, draft-free place. Ideas include a slightly warmed (then turned off) oven, near a sunny window, or on top of a warm appliance.
- Shaping for Success: To get perfectly round rolls, gently cup each piece of dough in your hand and roll it against the clean countertop, creating tension on the surface. Pinch the bottom seam closed.
- Don’t Rush the Rise: Patience is key in bread making. Let the dough rise fully for both rises; this develops flavor and creates the fluffy texture.
- Test for Doneness: Rolls are done when they are golden brown on top and bottom, and sound hollow when tapped. An internal temperature of 200-210°F (93-99°C) is ideal.
- Brush with Butter: For an extra special touch, brush the hot rolls with melted butter right out of the oven. It adds shine, flavor, and contributes to a softer crust.
Recipe Variations
- Garlic Herb Potato Rolls: Add 1-2 cloves of minced garlic and 1 tablespoon of fresh chopped herbs (like rosemary, thyme, or chives) to the dough along with the flour.
- Cheesy Potato Rolls: Fold in ½ cup of shredded cheddar or Parmesan cheese when adding the flour to the dough.
- Sweet Potato Rolls: Substitute the russet potato with cooked and mashed sweet potato for a slightly sweeter, earthier flavor and beautiful orange hue.
- Whole Wheat Potato Rolls: Replace up to 1.5 cups of all-purpose flour with whole wheat flour for a more wholesome, fiber-rich roll. You may need a little extra liquid.
- Dairy-Free Potato Rolls: Use a non-dairy milk (such as almond or soy milk) and a plant-based butter substitute in place of dairy milk and butter.
- Bacon Cheddar Potato Rolls: Add ¼ cup cooked and crumbled bacon bits and ¼ cup shredded cheddar cheese to the dough with the flour.
Storage Instructions
Homemade potato rolls are best enjoyed fresh, but they can be stored for later enjoyment.
- Refrigerator Storage: Store cooled rolls in an airtight container or a resealable bag at room temperature for up to 2-3 days. For longer freshness, refrigerate for up to 5 days.
- Freezer Storage: Once completely cooled, place rolls in a single layer in a freezer-safe bag or container. They can be frozen for up to 2-3 months. Thaw at room temperature or gently reheat in the oven.
- Reheating: To reheat, wrap rolls in foil and bake at 300°F (150°C) for 10-15 minutes, or until warmed through. You can also microwave for 15-30 seconds, but this can sometimes make them slightly chewy.
- Best Storage Containers: Use airtight containers or heavy-duty freezer bags to prevent drying out.
Frequently Asked Questions
Can I make this dough ahead of time?
Yes! After the first rise, you can punch down the dough, shape the rolls, and then place them in the baking pan. Cover tightly with plastic wrap and refrigerate overnight (up to 24 hours). The next day, take them out, let them come to room temperature and rise for about 1-2 hours (or until puffy), then bake as directed.
Can I freeze the baked rolls?
Absolutely! Once baked and completely cooled, place the rolls in a freezer-safe bag or container. They can be frozen for up to 2-3 months. Thaw at room temperature or reheat from frozen in a 300°F (150°C) oven, wrapped in foil, for about 20-25 minutes.
Can I use instant yeast instead of active dry yeast?
Yes, you can! Instant yeast can typically be mixed directly with the dry ingredients without proofing. However, for this recipe, blending it with the wet ingredients works perfectly fine. You can use the same amount.
What kind of potato is best for potato rolls?
Russet potatoes are ideal because they are starchy and low in moisture, resulting in a very smooth mash that yields a light and fluffy roll. Yukon Gold also works well.
My dough isn’t rising. What went wrong?
The most common reasons for dough not rising are expired yeast, water/milk that was too hot (killing the yeast), or a cold environment. Ensure your warm milk is between 105-115°F (40-46°C) and check your yeast’s expiry date. Find a warm, draft-free spot for rising.
How do I know if my milk is the right temperature for yeast?
Use a kitchen thermometer! If you don’t have one, it should feel comfortably warm to the touch, like a baby bottle. If it’s too hot to touch, it’s too hot for the yeast.
Can I make these rolls without a blender?
You can! Mash the potato extra smoothly. Then, combine the mashed potato with the warm milk, melted butter, egg, and yeast mixture in a large bowl and whisk well before proceeding with adding the dry ingredients. Ensure no potato lumps remain.
Can I use whole wheat flour?
Yes, you can substitute up to half of the all-purpose flour with whole wheat flour for a more rustic and nutritious roll. The texture will be slightly denser. You might need to add a touch more liquid as whole wheat flour absorbs more.
Conclusion
There you have it – the secret to incredibly soft, fluffy, and utterly delicious potato rolls, just like my mother used to make! This recipe proves that homemade bread doesn’t have to be complicated or time-consuming. With the magic of your blender, you can achieve perfect results every time, filling your home with an aroma that signals pure comfort.
These rolls are more than just a side dish; they’re a centerpiece of warmth and togetherness. So, gather your ingredients, fire up that blender, and get ready to create some truly unforgettable moments around your table. I promise, once you try these, you’ll never go back to store-bought rolls. Happy baking, and enjoy every tender bite!