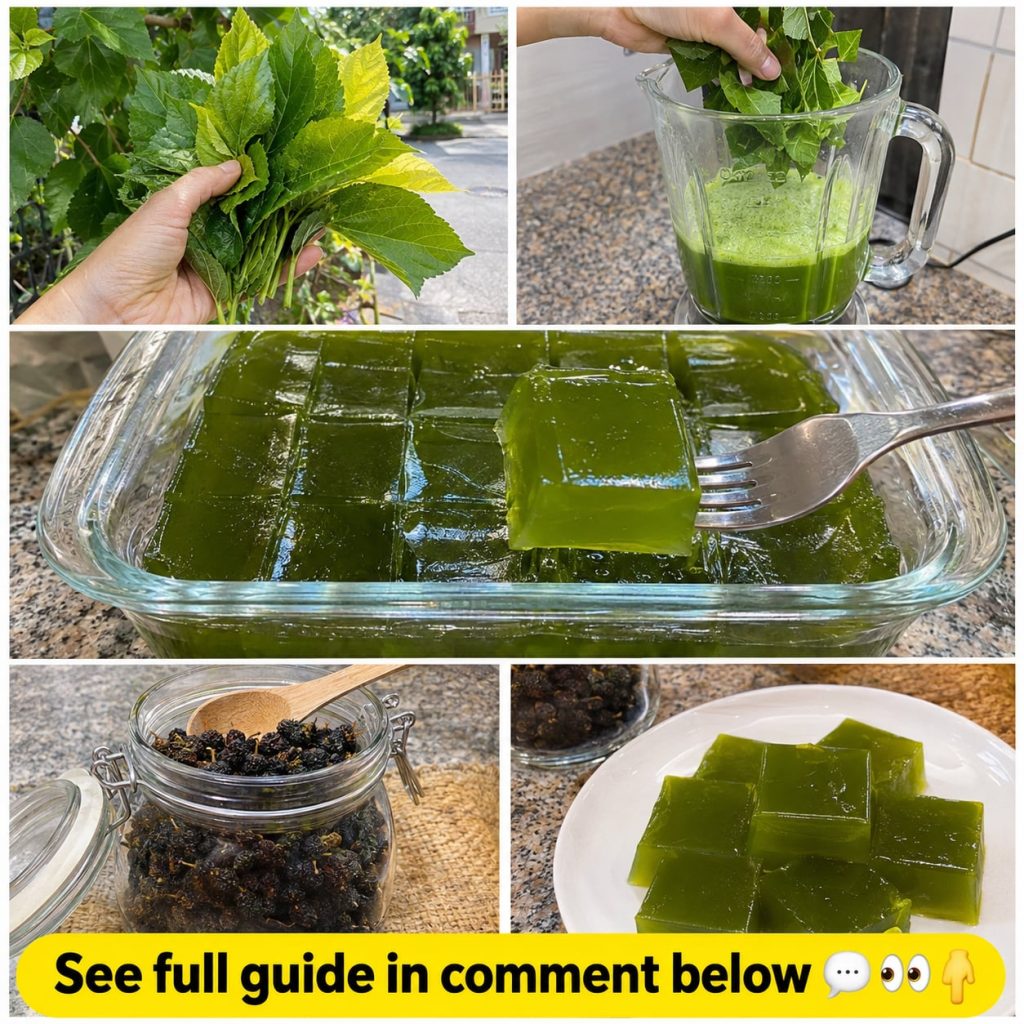
Most people walk past a mulberry tree without a second thought, seeing only its berries or shade. But what if those humble leaves held the secret to a surprisingly delightful, vibrant green jelly? This isn’t just another fruit preserve; it’s a unique, subtly flavored jelly that taps into a lesser-known traditional use of mulberry leaves, transforming common backyard foliage into a sweet, wobbly treat.
Forget store-bought pectin; this recipe leverages the natural gelling properties and subtle earthiness of mulberry leaves to create something truly special. It’s a simple process, but one that requires a bit of patience and attention to detail. Ready to turn the unexpected into your next kitchen triumph?
What is Mulberry Leaf Jelly?
Mulberry leaf jelly is a unique spread made by extracting the natural flavors and gelling agents from fresh mulberry leaves. Unlike typical fruit jellies, its flavor profile is mild, slightly herbaceous, and delicately sweet, often enhanced with lemon to brighten the taste and aid in setting. It’s a wonderful way to utilize a readily available natural ingredient and create a conversation-starting addition to your pantry.
Ingredients
Gathering the right ingredients is the first step to a perfect batch of green jelly. Focus on fresh, clean mulberry leaves for the best flavor and color.
- Fresh Mulberry Leaves: Approximately 6-8 cups, lightly packed (from young, tender branches).
- Water: 6 cups, filtered if possible.
- Granulated Sugar: 4 cups.
- Fresh Lemon Juice: 1/4 cup (about 2 lemons), freshly squeezed.
Approximate Measurements
While the recipe allows for some flexibility, these measurements are a good starting point for a successful jelly batch. Adjust sugar to your sweetness preference, but remember it also aids in the set.
- Yields: Approximately 4-5 half-pint (8 oz) jars.
- Prep time: 20 minutes.
- Cook time: 45-60 minutes (simmering and boiling).
Formula / Recipe Overview
The process is straightforward: steep the leaves to make a flavorful tea, strain it, then combine with sugar and lemon juice, boiling until it reaches the gelling point.
- Harvest and prepare mulberry leaves.
- Steep leaves in hot water to create an infusion.
- Strain the infusion to remove all leaf material.
- Combine the infused liquid with sugar and lemon juice.
- Boil the mixture rapidly until it reaches the setting point.
- Pour into sterilized jars and seal.
Step-by-Step Method: Crafting Your Green Jelly
Precision and hygiene are key when making any preserve. Follow these steps carefully for the best results.
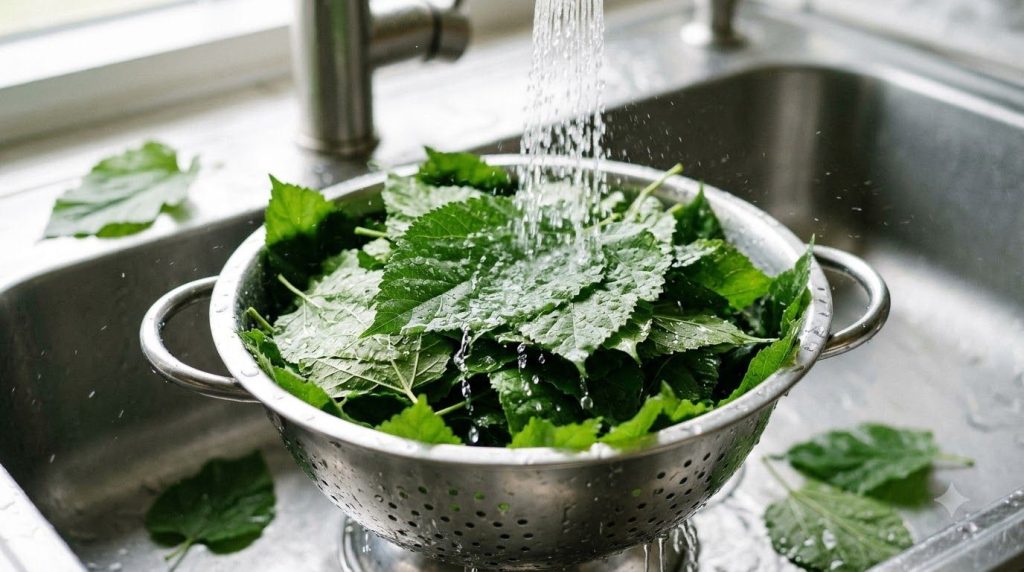
- Harvest & Prepare Leaves: Choose young, tender, vibrant green mulberry leaves from branches that haven’t been sprayed with pesticides or herbicides. Rinse them thoroughly under cold water to remove any dirt or insects. Discard any damaged or discolored leaves.
- Steep the Leaves: In a large pot, bring 6 cups of water to a rolling boil. Add the clean mulberry leaves, pushing them down so they are fully submerged. Reduce heat to low, cover the pot, and let the leaves steep for at least 30 minutes, or up to an hour, to extract maximum flavor and color.
- Strain the Infusion: Place a fine-mesh sieve lined with cheesecloth over a large bowl. Carefully pour the steeped leaves and water into the sieve, allowing the liquid to drain completely. Do not squeeze the leaves, as this can release bitter compounds and cloud your jelly. You should have approximately 4-5 cups of dark green liquid.
- Prepare for Jelly Making: Clean out your pot. Return the strained mulberry leaf infusion to the clean pot. Add the granulated sugar and fresh lemon juice. Stir well until the sugar begins to dissolve.
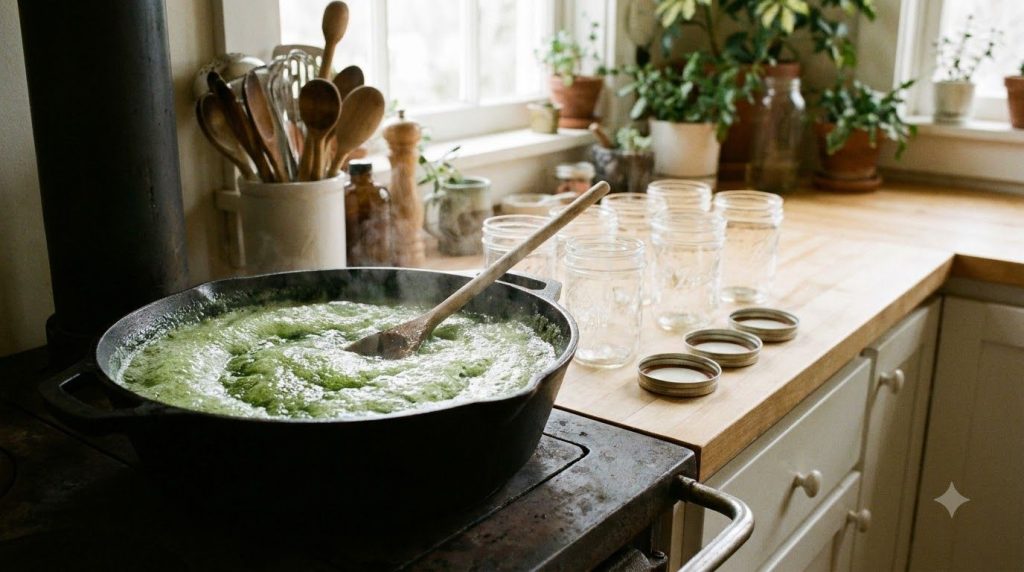
- Boil to Set: Bring the mixture to a rolling boil over high heat, stirring occasionally to prevent scorching. Maintain a vigorous boil. The jelly is ready when it reaches 220°F (104°C) on a candy thermometer, or when it passes the cold plate test (see ‘Practical Tips’ below). This usually takes 15-25 minutes of active boiling.
- Jar & Seal: Ladle the hot jelly into sterilized half-pint jars, leaving 1/4 inch headspace. Wipe the rims clean, center the lids, and screw on the bands until fingertip tight. Process in a boiling water canner for 10 minutes (adjust for altitude if necessary) to ensure a stable, shelf-stable seal. Alternatively, if not canning, refrigerate after cooling.
How to Use Your Mulberry Leaf Jelly
Once your beautiful green jelly is set, the possibilities are endless! It’s delicious spread on toast, scones, or biscuits. Try swirling it into plain yogurt or oatmeal for a unique breakfast. For a savory twist, it can even act as a glaze for poultry or pork, offering a subtle, earthy sweetness. It also makes for an intriguing ingredient in homemade desserts or cocktails.
How Often to Use
As a sweet preserve, mulberry leaf jelly is best enjoyed in moderation, just like any other jelly or jam. There are no strict frequency guidelines, but consider it a special treat to savor rather than a daily staple.
How to Buy / How to Choose Ingredients
The star of this recipe is the mulberry leaf, and quality matters:
- Freshness is Key: Always use fresh, vibrant green leaves. Young, tender leaves from the tips of branches are usually best, as older leaves can be tougher and sometimes more fibrous, potentially leading to a less pleasant flavor.
- Source Matters: Crucially, harvest leaves from mulberry trees that have NOT been sprayed with pesticides, herbicides, or other chemicals. Avoid trees near busy roads due to exhaust fumes. If you don’t have a personal tree, seek out organic sources or reliable foragers.
- Lemon: Choose fresh, unwaxed lemons for the best juice quality.
- Sugar: Standard granulated sugar works perfectly.
Quick Tip: Best Time to Harvest
The best time to harvest mulberry leaves for jelly is in the spring or early summer when they are young, tender, and most flavorful. Avoid harvesting after a heavy rain, which can dilute some of their compounds, or too late in the season when they become tough.
Storage
Proper storage ensures your homemade jelly stays fresh and safe to enjoy.
- Canned Jars: If processed in a boiling water canner, sealed jars can be stored in a cool, dark place for up to 1 year. Once opened, refrigerate and consume within 2-3 weeks.
- Uncanned Jars: If you skip the canning step, store the cooled jelly immediately in the refrigerator. It will last for 2-3 weeks.
Practical Tips for Perfect Jelly
- The Cold Plate Test: Before you start boiling, place a small ceramic plate in the freezer. When you think the jelly is done, spoon a small amount onto the cold plate. Wait 30 seconds, then push the jelly with your finger. If it wrinkles, it’s ready. If not, continue boiling and retest.
- Don’t Squeeze the Leaves: It’s tempting to squeeze the last drops of liquid from the steeped leaves, but resist! This can release tannins that make your jelly bitter and cloudy.
- Sterilize Your Jars: Always use clean, sterilized jars and lids to prevent spoilage and ensure a good seal. You can sterilize them in boiling water or a hot oven.
Common Mistakes to Avoid
Even seasoned jelly makers can slip up. Here’s what to watch out for:
- Using Old or Damaged Leaves: Tough, yellowed, or insect-eaten leaves will yield poor flavor and color. Stick to young, healthy foliage.
- Insufficient Straining: Any small leaf particles left in the infusion can affect the texture and clarity of your jelly. Double-strain if necessary.
- Not Boiling Long Enough: The jelly won’t set if it doesn’t reach the correct temperature and concentration. Don’t rush this step.
- Over-Boiling: Boiling too long can result in an overly stiff, rubbery jelly or a caramelized, less fresh flavor.
- Using Sprayed Plants: This is a critical safety mistake. Never use leaves from plants treated with chemicals.
Did You Know?
While often grown for its delicious berries, mulberry leaves have a long history of traditional use in various cultures, including as a tea. This jelly recipe is a sweet nod to its versatile nature.
Cautions / Who Should Avoid It
While mulberry leaves are generally considered safe for consumption, a few considerations are important:
- Allergies: If you have known allergies to mulberries or related plants, exercise caution.
- Plant Identification: Always be 100% certain you have identified the correct plant (mulberry tree, Morus species) before consuming its leaves. There are many look-alike plants, some of which may be toxic. When in doubt, do not consume.
- Blood Sugar: As this is a sugar-laden product, individuals managing blood sugar levels should consume it sparingly or consult with a healthcare professional.
- Medication Interactions: If you are on any medications, particularly for diabetes, consult your doctor.
Quick Summary: Your Mulberry Leaf Jelly Guide
Here’s a quick recap to ensure your homemade green jelly success:
- Best Preparation: Infuse fresh, young mulberry leaves in hot water, strain, then combine with sugar and lemon juice.
- Best Use-Case: Spread on toast, mix into yogurt, or use as a unique glaze.
- Storage: Refrigerate for 2-3 weeks; if canned, store for up to 1 year in a cool, dark place.
- When to Use: Enjoy as a sweet treat anytime, especially nice for breakfast or afternoon tea.
- What to Avoid: Old/damaged leaves, unsprayed plants, skipping straining, not reaching the proper set point.
FAQ: Common Questions About Mulberry Leaf Jelly
Got questions? We’ve got answers to help you perfect your backyard bounty jelly.
- Can I use dried mulberry leaves?
While possible for tea, fresh leaves are highly recommended for jelly. They provide better flavor extraction, color, and natural gelling properties. Dried leaves may yield a weaker flavor and less vibrant color. - How long does the jelly last?
If properly processed and sealed through water bath canning, it can last up to a year in a cool, dark pantry. Once opened or if not canned, keep refrigerated for 2-3 weeks. - Why isn’t my jelly setting?
Common reasons include not boiling to a high enough temperature (220°F/104°C), not enough lemon juice (which provides pectin), or simply not boiling long enough. Re-boil with a little more lemon juice if needed. - What part of the mulberry leaf is best?
Young, tender leaves from the tips of new growth branches are ideal for their flavor and texture. Avoid very large, old, or tough leaves. - Can I reduce the sugar?
You can reduce sugar slightly, but keep in mind that sugar is crucial for the jelly’s set and preservation. Reducing it significantly might prevent the jelly from firming up properly or shorten its shelf life. - Can I freeze the jelly?
Yes, jelly can be frozen, especially if you’re concerned about canning or refrigeration time. Leave 1/2 inch headspace in freezer-safe jars or containers, and it can last up to 6 months. - Do different mulberry varieties taste different?
Yes, while subtle, different mulberry species (white, red, black) can impart slightly different flavor nuances to the leaves, though the overall herbaceous taste remains similar. - When should I avoid making this jelly?
Avoid making this jelly if you cannot confidently identify the mulberry plant, if the leaves are from a chemically treated tree, or if you have any known allergies.
Related remedy: Discover other ways to utilize backyard greens in our guide to Edible Wild Greens for Wellness.
Conclusion
Turning common backyard mulberry leaves into a delicate, emerald-hued jelly is more than just a recipe—it’s an act of discovery. It’s a chance to connect with nature, appreciate the overlooked, and create something truly unique and delicious from scratch. This traditional remedy allows you to transform simple foliage into a delightful treat that will surprise and impress. So, next time you see a mulberry tree, remember the hidden potential within its leaves. Happy jelly making!
You may also like: Homemade Herbal Teas From Your Garden.