Most people ignore the simple, often overlooked methods that can transform their garden without spending a fortune. While many gardeners opt for complex rooting kits or expensive nursery plants, there’s a surprisingly effective, low-tech trick to propagating roses right in your own home: the damp tissue paper method. This fall, get ready to multiply your favorite rose bushes with minimal effort and maximum reward. Forget what you thought you knew about rooting cuttings; this easy project will have you creating beautiful new rose plants for free.
What It Is: The Tissue Paper Method
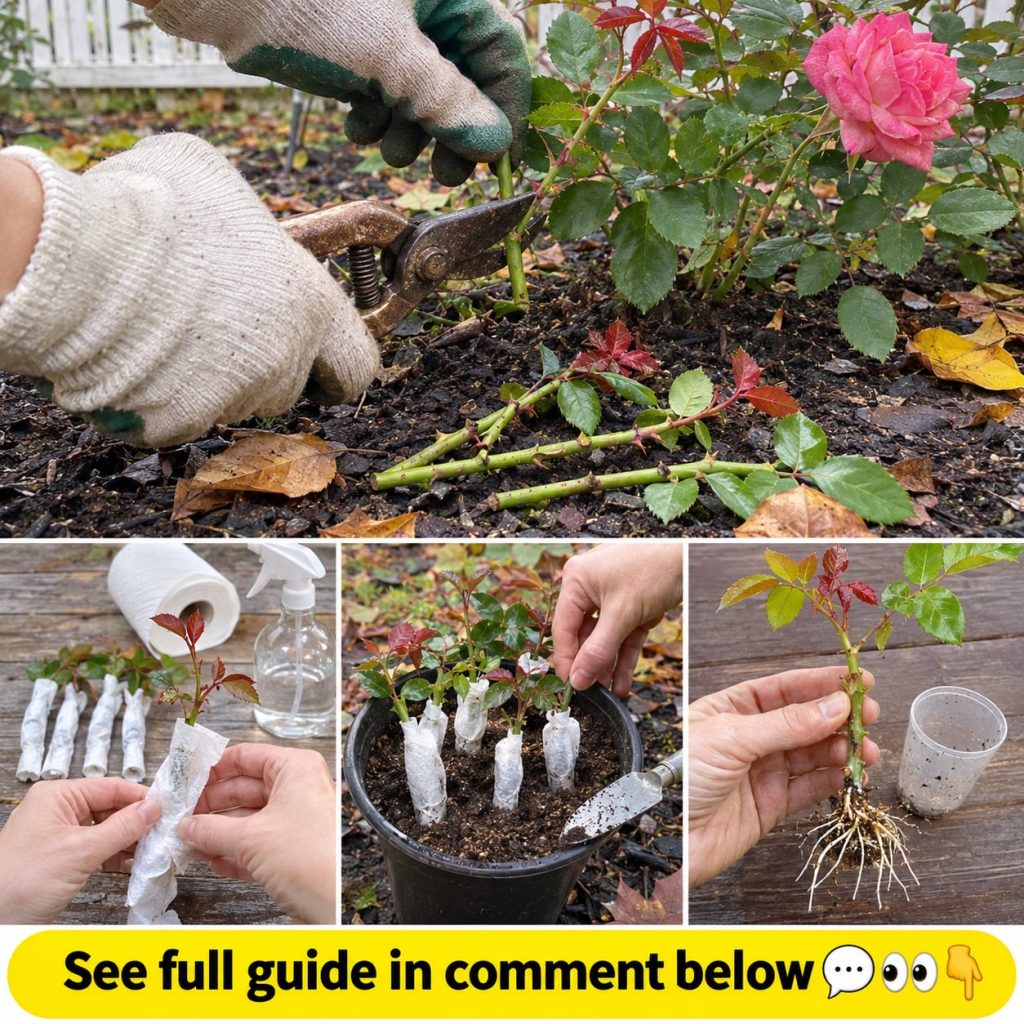
The tissue paper method for rooting rose cuttings is a simple, highly effective technique that provides a consistently moist and humid environment crucial for new root development. Instead of placing cuttings directly into water or soil where conditions can fluctuate, this method encloses the cutting in damp tissue paper within a sealed environment, like a plastic bag or container. This creates a mini-greenhouse effect, encouraging root growth without the risk of drying out or rotting that can occur in less controlled settings. It’s particularly popular for its simplicity and the high success rate it offers, especially during the cooler months of fall when roses are entering dormancy but still have energy reserves.
Ingredients & Materials
Before you begin, gather these essential items:
- Healthy Rose Stems: Choose vigorous stems that have recently flowered or are in the process of fading. Avoid old, woody stems or new, soft growth.
- Sharp Pruners or Knife: Clean and sterile tools are vital to prevent disease and ensure clean cuts.
- Damp Tissue Paper: Regular facial tissue or paper towel works well. It needs to be moist, not soaking wet.
- Plastic Bag or Airtight Container: A zip-top bag or a plastic food container with a lid will create the necessary humid environment.
- Rooting Hormone (Optional but Recommended): A liquid or powder rooting hormone can significantly increase your success rate.
- Spray Bottle with Water: For misting and keeping the tissue paper moist.
Approximate Measurements
- Cuttings Length: Aim for rose cuttings that are 6-8 inches (15-20 cm) long. Each cutting should have at least 3-4 nodes (the bumps where leaves or branches emerge).
- Tissue Paper: Use a single sheet of tissue paper, folded once or twice, large enough to wrap securely around the bottom 2-3 inches of the cutting.
- Water for Dampening: Just enough to thoroughly moisten the tissue paper without it dripping.
Formula / Recipe: Preparing Your Rose Cuttings
Think of this as your preparation formula for success:
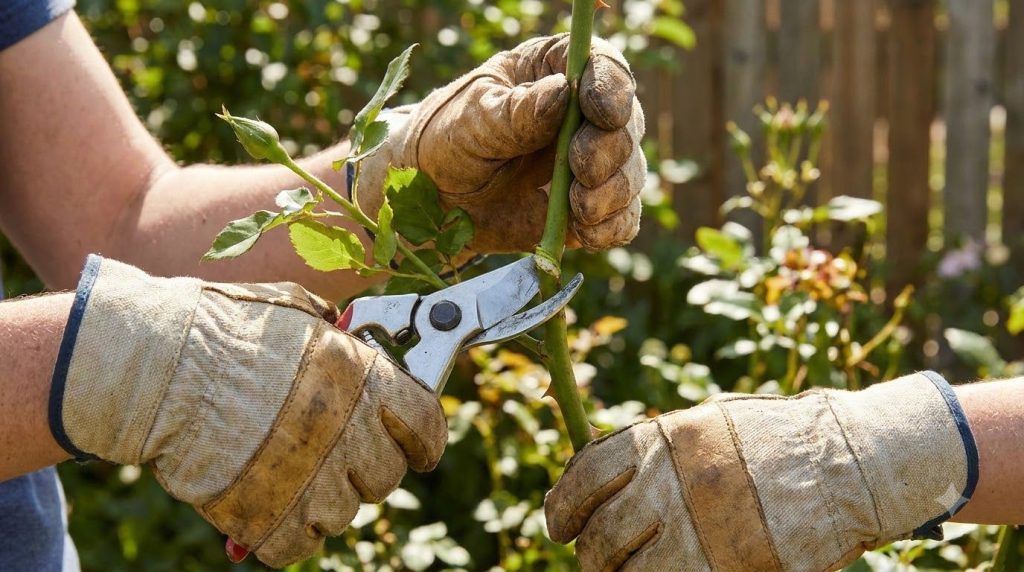
- Select & Cut: Choose healthy, pencil-thick stems from your rose bush, ideally from growth that has recently flowered. Make a clean cut at a 45-degree angle just below a node.
- Prepare the Cutting: Remove all leaves except for the top 1-2 sets. If the remaining leaves are large, you can cut them in half to reduce moisture loss. Remove any thorns from the bottom 2-3 inches of the stem.
- Score the Stem (Optional): Gently score or scrape a small strip of bark off the bottom inch of the cutting. This exposes more cambium layer, which can help with root development.
- Apply Rooting Hormone: Dip the bottom end of the cutting (about 1 inch) into rooting hormone powder or liquid, following product instructions. Tap off any excess.
Step-by-Step Method: Rooting with Tissue Paper
Once your cuttings are prepped, follow these steps:
- Dampen Tissue Paper: Lightly mist your tissue paper with water until it’s damp but not dripping wet.
- Wrap the Cuttings: Take one prepared rose cutting and place the hormone-treated end onto the damp tissue paper. Roll the tissue paper around the bottom 2-3 inches of the cutting, ensuring it’s snug.
- Place in Bag/Container: Carefully place the wrapped cuttings into your plastic bag or airtight container. Do not overcrowd; leave some space for air circulation.
- Seal It Up: Seal the bag or container, making sure it’s airtight. This locks in humidity.
- Find a Spot: Place the sealed bag/container in a warm, dark location. An ideal temperature is around 65-75°F (18-24°C). Avoid direct sunlight, which can cook the cuttings.
- Monitor: Check the cuttings every 3-5 days. If the tissue paper seems dry, lightly mist it with water. Look for any signs of mold; if mold appears, remove the affected cutting immediately and re-wrap healthy ones with fresh tissue.
- Wait for Roots: Roots typically begin to form within 2-4 weeks, though some varieties may take longer. You’ll see tiny white roots emerging from the bottom of the stem through the tissue paper.
Quick Tip: Label Everything
If you’re rooting multiple rose varieties, be sure to label your bags or containers clearly with the rose name and the date you started. This helps track progress and keeps your garden organized.
How to Use Rooted Cuttings
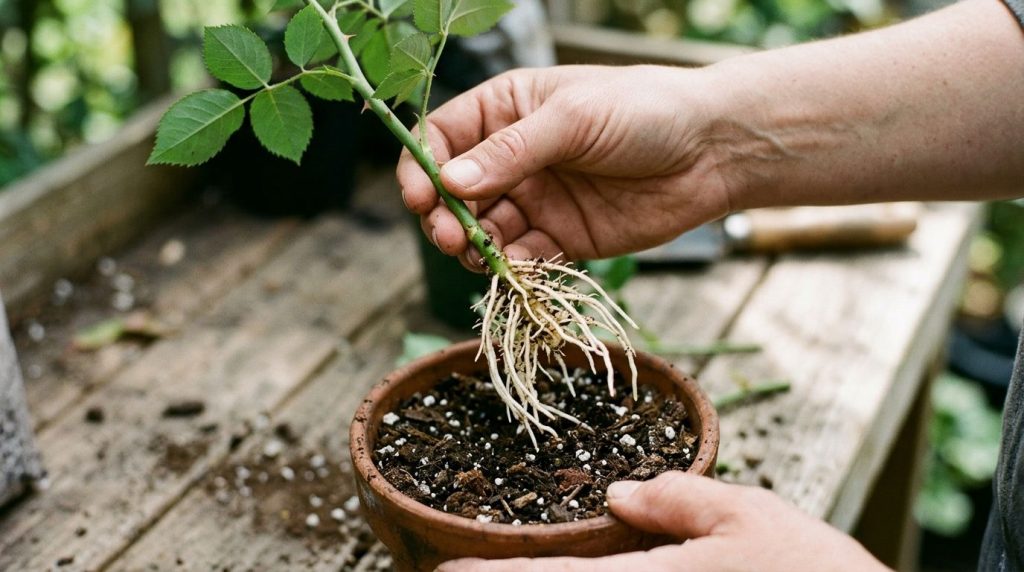
Once your rose cuttings have developed roots that are about 1/2 to 1 inch long (1-2.5 cm), they are ready for their next step: potting.
- Prepare Pots: Fill small pots (4-6 inches) with a well-draining potting mix, ideally one formulated for seedlings or roses.
- Plant Gently: Carefully unwrap the rooted cutting from the tissue paper. Make a small hole in the center of the potting mix. Gently place the cutting into the hole, ensuring the roots are spread out and not bent.
- Cover Roots: Lightly backfill with potting mix, ensuring the roots are fully covered. The soil level should be the same as it was when the roots formed.
- Water Thoroughly: Water the newly potted cutting gently but thoroughly until water drains from the bottom.
- Provide Indirect Light: Place the potted cutting in a location with bright, indirect light. Avoid direct, harsh sunlight initially.
- Acclimatize: Over the next few weeks, gradually expose the new rose plant to more light and outdoor conditions if you plan to plant it in the garden.
How Often to Use This Method
The tissue paper method is most effective when the rose stems are semi-hardwood, which typically occurs in late summer and fall after the blooms have faded. Fall is an excellent time as the plant is preparing for dormancy, making it less stressed by cutting and more inclined to put energy into root formation. You can also try this in spring with new growth, but fall generally yields better results.
How to Choose Ingredients: Selecting the Best Rose Stems
Success starts with the right material. Look for rose stems that are:
- Pencil-Thick: Not too thin, not too woody. This indicates semi-hardwood.
- Healthy and Disease-Free: Avoid stems with any signs of disease, pests, or discoloration.
- Recently Flowered: Stems that have just finished blooming often have the right balance of maturity and vitality for rooting.
- Free of Damage: No broken bits, scrapes, or other physical damage.
Storage During Rooting
The sealed plastic bag or container is your storage unit. Place it in a location that is:
- Dark: Light is not needed for root development at this stage and can encourage mold.
- Warm: Consistent temperatures between 65-75°F (18-24°C) are ideal.
- Stable: Avoid extreme temperature fluctuations.
Regularly check for condensation inside the bag/container. Too much condensation might mean too much moisture; open it briefly to air out. Too little means it’s drying out, requiring a light misting of the tissue paper.
Practical Tips for Success
- Sterilize Your Tools: Always clean your pruners with rubbing alcohol before and after making cuts to prevent disease transmission.
- Don’t Overwater: The tissue paper should be damp, not soggy. Excess water promotes rot.
- Patience is Key: Rooting takes time. Don’t constantly disturb the cuttings to check for roots.
- Consider Variety: Some rose varieties root more easily than others. Don’t get discouraged if a particular type is challenging.
Common Mistake: Using Old or Diseased Stems
One of the most frequent errors is trying to root cuttings from stems that are too old, too young, or show signs of disease. These cuttings lack the vigor and health needed to form new roots, leading to failure. Always prioritize the freshest, healthiest semi-hardwood from your rose bushes.
Common Mistakes to Avoid
To maximize your chances of success, steer clear of these pitfalls:
- Too Much Moisture: A soaking wet tissue paper or pooling water in the bag will inevitably lead to rot and fungal growth. Damp is good; drenched is bad.
- Inconsistent Temperatures: Wild swings in temperature can stress the cuttings and hinder root development.
- Opening the Bag Too Often: Each time you open the bag, you disrupt the carefully maintained humid environment. Check periodically, but avoid daily peeking.
- Planting Too Soon: Don’t pot up cuttings with only tiny nubs. Wait until roots are at least 1/2 inch long for a better chance of survival.
- Using Unsterilized Tools: Introduces bacteria and fungi, which can quickly destroy your cuttings.
Cautions / Who Should Avoid It
While this method is generally safe and easy, a few considerations apply:
- Sharp Tools: Always exercise caution when handling sharp pruners or knives. Keep them out of reach of children.
- Rooting Hormone: If using rooting hormone, follow the manufacturer’s safety instructions. Some products can be irritants. Use gloves and wash hands thoroughly after use.
- Allergies: If you have plant allergies or sensitivities, wear gloves when handling rose stems.
Quick Summary
The tissue paper method is an excellent, low-cost way to propagate roses. Select healthy, pencil-thick stems, prepare them with clean cuts and optional rooting hormone, then wrap the ends in damp tissue paper. Place these in a sealed bag in a warm, dark spot. Monitor for moisture and mold, and once roots are 1/2-1 inch long, gently pot them in well-draining soil. Best done in the fall for semi-hardwood cuttings.
FAQ
- Can I use fresh or dried tissue paper? You must use damp tissue paper. Dried tissue paper will not provide the necessary humidity.
- How long does it take for roots to appear? Typically 2-4 weeks, but it can vary by rose variety and environmental conditions.
- Can I refrigerate the cuttings? No, refrigerator temperatures are too cold and will prevent rooting. A warm, dark spot is needed.
- How often should I check the cuttings? Every 3-5 days is sufficient. Over-checking can disturb the environment.
- What if I see mold? Remove the affected cutting immediately. You can try to salvage healthy parts by cleaning them and re-wrapping with fresh tissue, but often it’s best to discard and start over.
- Do I need rooting hormone? While not strictly mandatory, rooting hormone significantly increases the success rate and speeds up root development.
- Can I use this method for other plants? Yes, many other plants, particularly those that root from semi-hardwood cuttings, can benefit from this high-humidity method.
- When should I avoid this method? Avoid using this method if you cannot provide a stable, warm, dark environment, or if your cuttings are diseased or too soft/woody.
Conclusion
The damp tissue paper method for rooting rose cuttings is a simple, effective, and incredibly rewarding way to expand your rose garden without breaking the bank. By paying attention to the details of stem selection, preparation, and providing the right environment, you can enjoy the satisfaction of growing beautiful new rose bushes from your existing favorites. Give it a try this fall, and watch your garden flourish!
You may also like: Simple DIY Flower Arrangements for Your Home
Read more: Boosting Your Garden’s Soil Health Naturally