Do you dream of skin that feels incredibly soft, hydrated, and has a natural glow? Achieving beautifully nourished skin doesn’t always require expensive store-bought products. Sometimes, the most effective remedies come from simple, natural ingredients you can find right in your home or local health store.
Today, we’re diving into the world of DIY skincare to create a luxurious and nourishing aloe vera cream. This homemade recipe is designed to help replenish your skin’s moisture, leaving it feeling supple and looking radiant. It’s a wonderful addition to any self-care routine, offering a gentle touch of nature to your daily beauty regimen.
Get ready to discover how easy it is to whip up your own soothing cream that your skin will thank you for!
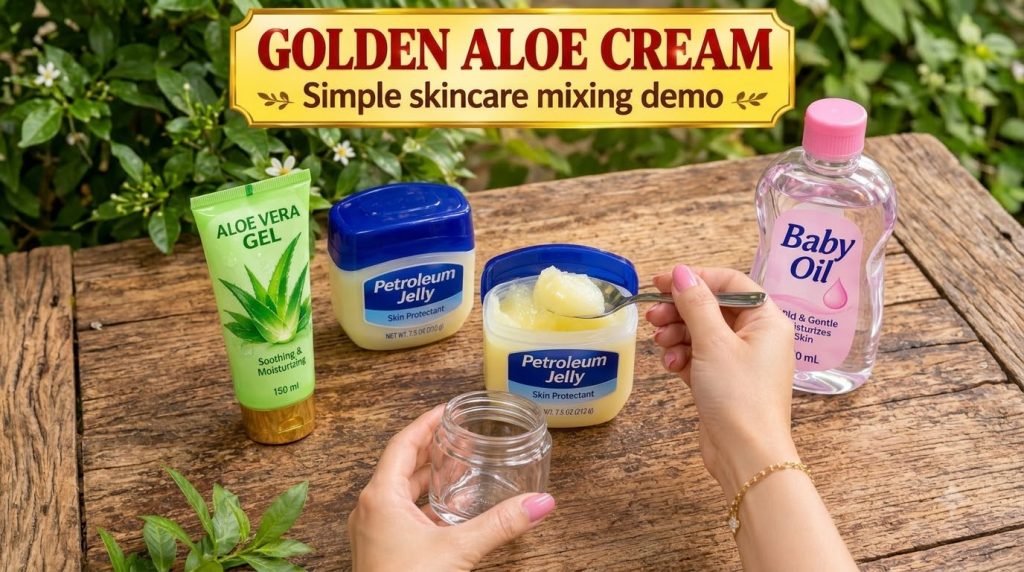
Beauty Recipe Overview
- Recipe Name: Nourishing Aloe Vera Cream
- Beauty Category: Facial & Body Care
- Suitable Skin Type: Normal, Dry, Combination, Mature (Patch test for sensitive skin)
- Preparation Time: 15 minutes
- Application Time: 1–2 minutes
- Total Time: Approximately 17 minutes
- Difficulty Level: Easy
- Yield: Approximately 4 tablespoons
- Recommended Usage Frequency: Daily or as needed
- Storage Recommendation: Refrigerate in an airtight container for up to 5-7 days
Why You’ll Love This Recipe
This DIY Nourishing Aloe Vera Cream is more than just a beauty treatment; it’s a simple act of self-care. Here’s why you’ll want to make it a part of your routine:
- Uses Accessible Ingredients: All components are easy to find at your local health store or even in your pantry.
- Easy to Prepare: With just a few simple steps, you can create a luxurious cream in minutes.
- Budget-Friendly: Avoid the high costs of commercial creams by making your own effective alternative.
- Simple Application: Glides smoothly onto the skin for quick and effortless moisturization.
- Customizable: Feel free to adjust the oils to suit your skin’s unique preferences (within safe limits).
- Part of a Gentle Routine: This cream helps support a comfortable and hydrating skincare routine without harsh chemicals.
Complete Ingredients List
Gather these natural ingredients to create your nourishing cream:
- 2 tablespoons unrefined shea butter (solid at room temperature)
- 1 tablespoon sweet almond oil (or jojoba oil as a substitution)
- 2 tablespoons pure aloe vera gel (99% or higher, commercially prepared for consistency and purity)
- ½ teaspoon Vitamin E oil (optional, for its antioxidant benefits for the skin)
Equipment Needed
You’ll need a few basic tools to prepare your homemade cream:
- Small heat-safe bowl
- Small saucepan (for a double boiler, or microwave-safe bowl if melting in microwave)
- Measuring spoons
- Small whisk or fork
- Clean, airtight container (preferably glass)
- Clean spatula or spoon for transferring
Step-by-Step Preparation
- Melt the Shea Butter: Place the shea butter in your small heat-safe bowl. Create a double boiler by placing the bowl over a saucepan with an inch or two of simmering water, ensuring the bowl doesn’t touch the water. Gently melt the shea butter until it becomes liquid. Alternatively, you can carefully melt it in a microwave in short bursts (15-20 seconds), stirring in between.
- Combine Oils: Once the shea butter is melted, remove it from the heat. Stir in the sweet almond oil (and Vitamin E oil, if using) until well combined.
- Cool Slightly: Allow the mixture to cool down for about 10-15 minutes at room temperature, or place it in the refrigerator for 5-7 minutes. You want it to begin to solidify around the edges but still be soft and pliable in the center. It should not be fully solid again.
- Whip the Mixture: Using a small whisk or fork, begin to whip the cooled oil and butter mixture. Gradually add the pure aloe vera gel, a teaspoon at a time, while continuously whisking.
- Achieve Creamy Consistency: Continue to whip until the mixture becomes light, fluffy, and resembles a cream or whipped butter. This may take a few minutes. If it becomes too liquid, you can chill it briefly and then whip again.
- Transfer: Carefully scoop your freshly made Nourishing Aloe Vera Cream into a clean, airtight container using a spatula or spoon.
How to Apply the Beauty Treatment
Applying your homemade cream is a soothing experience. Follow these steps for best results:
- Cleanse Your Skin: Start with clean, slightly damp skin. This helps the cream absorb better and lock in moisture.
- Scoop a Small Amount: Using clean fingertips or a small spatula, scoop a pea-sized to dime-sized amount of cream for your face, or a larger amount for body application.
- Warm Between Palms: Gently rub the cream between your palms for a few seconds to warm it up, making it easier to spread.
- Apply Gently: Lightly dab the cream onto your face, neck, and décolletage, or any dry areas of your body.
- Massage In: Using upward and outward motions, gently massage the cream into your skin until it is absorbed. Avoid pulling or tugging at your skin.
- Avoid Eyes: Be mindful to avoid direct contact with your eyes. If contact occurs, rinse thoroughly with water.
Ingredient Benefits
Each ingredient in this nourishing cream plays a vital role in promoting soft, hydrated skin:
- Pure Aloe Vera Gel: Known for its soothing and hydrating properties, aloe vera gel is packed with compounds that can help calm the skin and provide a burst of moisture. It feels refreshing and helps to improve the appearance of dry, flaky skin, leaving it looking supple.
- Shea Butter: A rich, emollient butter, shea butter is renowned for its excellent moisturizing capabilities. It’s high in fatty acids and vitamins, which help to soften the skin and support its natural barrier. It provides a protective layer that can reduce moisture loss, contributing to a smooth feel.
- Sweet Almond Oil: A lightweight yet deeply nourishing oil, sweet almond oil is easily absorbed by the skin. It helps to condition and soften the skin, making it feel smoother and more pliable. It’s often chosen for its gentle nature, making it suitable for various skin types.
- Vitamin E Oil (Optional): While primarily added for its skin-conditioning benefits, Vitamin E is also an antioxidant. It helps to nourish the skin, supporting its overall comfort and health. It contributes to a softer, more moisturized feel.
Recommended Frequency
You can use this Nourishing Aloe Vera Cream daily, both morning and night, or as often as your skin feels dry or in need of extra hydration. Its gentle formulation makes it suitable for regular use. For body care, apply it after showering or bathing to lock in moisture.
Expert Beauty Tips
- Achieve a Smooth Texture: Ensure your shea butter is fully melted and then cooled slightly before whipping. Adding the aloe vera gel slowly and whipping consistently will help create a smooth, creamy texture.
- Patch Test is Key: Always perform a patch test on a small, inconspicuous area of your skin (like behind your ear or on your inner forearm) 24 hours before full application, especially if you have sensitive skin or are trying a new ingredient.
- Cleanliness is Crucial: Use clean hands and sterilized equipment when preparing and applying your cream to prevent bacterial contamination, which can shorten its shelf life.
- Adjust for Climate: In very humid environments, you might use slightly less oil; in dry climates, a bit more. Listen to what your skin needs!
- Apply to Damp Skin: For maximum hydration, apply the cream to slightly damp skin after cleansing or showering. This helps to seal in moisture effectively.
- Don’t Rush the Cooling: Allowing the oil/butter mixture to cool properly before adding aloe is essential for achieving a whipped, creamy consistency rather than a separated or oily product.
Safe Recipe Variations
You can customize your Nourishing Aloe Vera Cream with a few safe substitutions:
- Different Carrier Oil: Instead of sweet almond oil, you can use jojoba oil, grapeseed oil, or apricot kernel oil. Each offers slightly different textures and nutrient profiles, but all are generally well-tolerated and nourishing for the skin.
- For Extra Soothe: For an extra soothing touch, you could consider adding 1/4 teaspoon of calendula oil or chamomile-infused oil to your melted shea butter and sweet almond oil blend. These oils are known for their calming properties.
Storage and Shelf Life
Homemade cosmetics, especially those containing water-based ingredients like aloe vera gel, have a much shorter shelf life than commercial products because they lack synthetic preservatives.
- Use Immediately: Ideally, this cream should be used fresh.
- Refrigeration: Store any leftovers in a clean, airtight container in the refrigerator. This helps to extend its freshness slightly.
- Shelf Life: Due to the water content from the aloe vera, this cream is best used within 5-7 days when stored in the refrigerator.
- Discard Leftovers: If you notice any changes in color, smell, or texture, or if any mold appears, discard the mixture immediately. It is always safer to make small, fresh batches rather than attempting to store larger quantities for extended periods.
Safety Precautions
Your safety is paramount when creating and using DIY beauty remedies. Please keep the following in mind:
- Patch Test: Always perform a patch test before applying the cream to larger areas of your skin, particularly if you have sensitive skin or known allergies.
- Ingredient Allergies: Be aware of any known allergies to specific ingredients (e.g., nut allergies for almond oil). If you have an allergy, substitute with a safe alternative.
- Avoid Broken or Irritated Skin: Do not apply the cream to open wounds, cuts, sunburned, or severely irritated skin.
- Eye Contact: Avoid direct contact with eyes. If the cream gets into your eyes, rinse thoroughly with cool water.
- Signs of Reaction: Discontinue use immediately if you experience any redness, itching, burning, rash, or persistent irritation.
- Consult a Professional: For persistent skin concerns or conditions, always consult a dermatologist or healthcare professional. Homemade remedies are not a substitute for medical advice or treatment.
- Pure Aloe Vera Gel: Use commercially prepared pure aloe vera gel (99% or higher) for consistency and to avoid potential skin irritation from aloin found in fresh aloe vera plant latex.
Common Mistakes to Avoid
To ensure a positive experience with your homemade cream, steer clear of these common pitfalls:
- Using Fresh Aloe Straight from the Plant: While tempting, the yellow latex from fresh aloe vera leaves can be a skin irritant. Always opt for commercially prepared, pure aloe vera gel, which has been processed to remove this latex.
- Expecting a Long Shelf Life: Homemade water-containing products without preservatives spoil quickly. Don’t expect this cream to last for weeks or months. Make small batches and store them properly.
- Skipping the Patch Test: Even natural ingredients can cause allergic reactions. Always perform a patch test, especially if you have sensitive skin or are trying a new ingredient.
- Not Cooling the Butters/Oils: If you add the aloe vera gel to a hot or warm oil mixture, it will likely separate and not whip into a creamy texture. Ensure the base is cooled and slightly solidified.
- Applying to Irritated Skin: While soothing, this cream is not a treatment for severely irritated or broken skin. It’s best used on healthy skin for moisturizing and softening benefits.
Frequently Asked Questions
Is this DIY face mask suitable for sensitive skin?
While the ingredients are generally gentle, sensitive skin can react to anything. Always perform a patch test first. If no irritation occurs after 24 hours, it should be suitable.
How often can I use this treatment?
You can use this nourishing cream daily, both morning and night, as a regular moisturizer for your face and body.
Can I prepare the mixture in advance?
You can prepare the oil and butter mixture in advance and store it in a cool, dark place. However, once you add the aloe vera gel, the shelf life is significantly reduced, so only combine the water-based ingredient right before you plan to use it within 5-7 days.
Should I refrigerate leftovers?
Yes, any leftover cream containing aloe vera gel should be stored in an airtight container in the refrigerator to maximize its freshness and reduce the risk of spoilage.
Can I replace one of the ingredients?
Yes, you can substitute sweet almond oil with other gentle carrier oils like jojoba oil or grapeseed oil. However, replacing shea butter with another butter might change the texture significantly.
What should I do if my skin becomes irritated?
If you experience any redness, itching, burning, or discomfort, stop using the cream immediately and gently rinse your skin with cool water. If irritation persists, consult a healthcare professional.
Can this recipe replace my regular skincare products?
This nourishing cream can be a wonderful addition to your routine for hydration and softening. However, it may not replace all your specialized skincare products (e.g., those for sun protection, anti-aging, or specific skin conditions). Consider it a complementary treatment.
Conclusion
Crafting your own Nourishing Aloe Vera Cream is a rewarding journey into natural beauty. This simple, effective recipe offers a gentle way to hydrate and soften your skin, bringing a touch of nature to your daily routine. By using accessible ingredients and following clear steps, you can create a personalized skincare treatment that truly caters to your skin’s needs.
Remember, the key to beautiful skin lies in consistent, gentle care and understanding what works best for you. Enjoy the process of creation and the wonderful feeling of naturally nourished skin!