Sparkle Back: Your DIY Silver Cleaning Guide with Pantry Staples
Is your once-radiant silver jewelry looking a little dull and drab? Don’t despair and definitely don’t rush out to buy expensive cleaning solutions! We’ve got a fantastic, budget-friendly home hack that uses simple pantry staples to bring back that brilliant shine to your favorite pieces. This method is surprisingly gentle, incredibly effective, and utterly satisfying to witness the transformation!
Tarnished silver is a common problem for anyone who owns treasured rings, necklaces, or silverware. That unsightly dark film isn’t dirt; it’s a chemical reaction called oxidation, where silver reacts with sulfur compounds in the air to form silver sulfide. But the good news is, reversing this process is easier than you think, using a little kitchen magic!
The Science Behind the Sparkle
This DIY silver cleaning method isn’t just a trick; it’s a clever chemical reaction! Here’s how it works:
- Aluminum Foil: Acts as an anode in an electrochemical reaction.
- Baking Soda (Sodium Bicarbonate): Helps create an alkaline environment and provides ions for the reaction.
- Salt (Sodium Chloride): Also provides ions, helping to conduct electricity within the solution.
- Hot Water: Dissolves the salts and increases the speed of the chemical reaction.
When these ingredients combine, they create an electrolytic cell. The sulfur atoms that have bonded with your silver (causing the tarnish) are attracted to the aluminum, effectively transferring the tarnish from your jewelry back to the foil. Your silver is left clean and sparkling!
What You’ll Need
Ingredients:
- 1 tablespoon baking soda
- 1 tablespoon salt
- 1 cup hot water (not boiling)
Equipment:
- A glass or ceramic bowl
- Aluminum foil
- Tongs or a non-metallic spoon (optional, for handling hot jewelry)
- Soft cloth for polishing
Step-by-Step Silver Cleaning Guide
Follow these simple steps to bring your tarnished silver back to life:
-
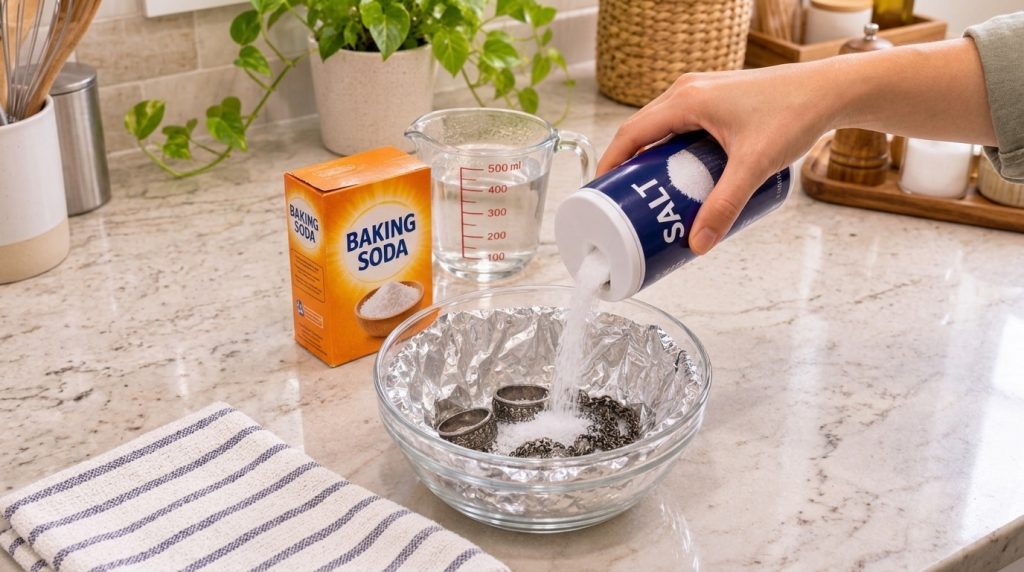
Prepare Your Bowl
Line the bottom and sides of your glass or ceramic bowl with aluminum foil, shiny side up. Make sure the foil makes good contact with the bowl.
-
Add Ingredients
Place your tarnished silver jewelry directly on the aluminum foil in the bowl. Sprinkle the baking soda and salt evenly over the jewelry.
-
Pour Hot Water
Carefully pour the hot water over the jewelry, baking soda, and salt. You should immediately see a fizzing reaction and a distinct sulfurous smell. Ensure the silver pieces are fully submerged and making contact with the foil.
-
Let it Soak
Allow the jewelry to soak for 5 to 10 minutes. For heavily tarnished items, you might let them sit for up to 15 minutes. You’ll often see the tarnish transferring to the aluminum foil, turning it darker.
-
Rinse and Dry
Carefully remove the silver pieces from the solution using tongs or a non-metallic spoon (the water will be hot). Rinse them thoroughly under cool running water to remove any residue.
-
Polish to Perfection
Dry your silver with a soft, clean cloth. For an extra shine, gently buff the pieces. You’ll be amazed at the difference!
Tips for Best Results
- Ensure Contact: Make sure every piece of silver touches the aluminum foil directly or another piece of silver that is touching the foil. This is crucial for the electrochemical reaction to occur.
- Use Hot Water: The hotter the water (without boiling), the faster and more effective the reaction will be.
- Don’t Over-Soak: While effective, leaving silver in the solution for too long is generally unnecessary and could potentially affect some finishes.
- Clean Small Batches: If you have a lot of silver, work in smaller batches to ensure effective contact and solution strength.
Important Safety Notes
- Avoid for Certain Items: This method is generally safe for solid sterling silver. However, it is NOT recommended for:
- Jewelry with gemstones (especially porous or soft stones like pearls, opals, turquoise, amber, or glued-in stones), as the hot water and chemicals can damage them.
- Antiqued or oxidized silver where the dark patina is an intentional design feature.
- Plated silver, as it might strip the plating.
- Ventilate: The reaction can produce a slight sulfurous smell, so ensure you have good ventilation in your work area.
- Handle with Care: The water will be hot. Use tongs or a spoon to retrieve items from the solution.
Beyond the Shine
This simple baking soda and salt hack is a testament to the power of everyday household items in tackling common home problems. Not only does it restore the beauty of your silver, but it also saves you money and avoids harsh chemicals.
What are your favorite home hacks for keeping things sparkling? Share your go-to tips in the comments below!