Remember those comforting carrot buns from childhood? Now you can recreate that magic at home with this recipe for Grandma’s Secret Carrot Buns! These delightful buns are super soft, subtly sweet, and packed with the goodness of fresh carrots, reminiscent of a cherished family recipe. Perfect for any meal, snack, or even a light breakfast, they bring a touch of warmth and nostalgia to your table.
Whether you’re serving them alongside a savory dinner, enjoying them with a cup of tea, or packing them in lunchboxes, these homemade carrot buns are sure to become a new family favorite. Their delicate sweetness comes from the natural sugars in the carrots and a hint of spice, creating a flavor profile that’s both comforting and unique. Get ready to fill your kitchen with the irresistible aroma of freshly baked bread!
Why You’ll Love This Grandma’s Carrot Buns Recipe
- Irresistibly Soft Texture: These buns are incredibly soft and fluffy, making every bite a delight.
- Subtly Sweet Flavor: The natural sweetness of carrots combined with a touch of sugar and warm spices creates a perfectly balanced taste.
- Comforting & Nostalgic: A true comfort food that evokes fond memories, perfect for sharing with loved ones.
- Simple Ingredients: Made with common pantry staples, so you likely have most ingredients on hand.
- Versatile Serving: Great as a side dish, a healthy snack, or even a light breakfast with butter or jam.
- Family-Friendly: A fantastic way to sneak some vegetables into a delicious treat that kids and adults alike will adore.
Ingredients for Grandma’s Secret Carrot Buns
To make a batch of approximately 12 delightful carrot buns, gather these simple ingredients:
Dough:
- 1 cup (240 ml) warm milk (around 105-115°F / 40-46°C)
- 2 ¼ teaspoons (7 g) active dry yeast (one standard packet)
- ¼ cup (50 g) granulated sugar, divided
- ½ teaspoon salt
- ¼ cup (57 g) unsalted butter, melted and slightly cooled
- 1 large egg, lightly beaten
- 3 to 3 ½ cups (360-420 g) all-purpose flour, plus more for dusting
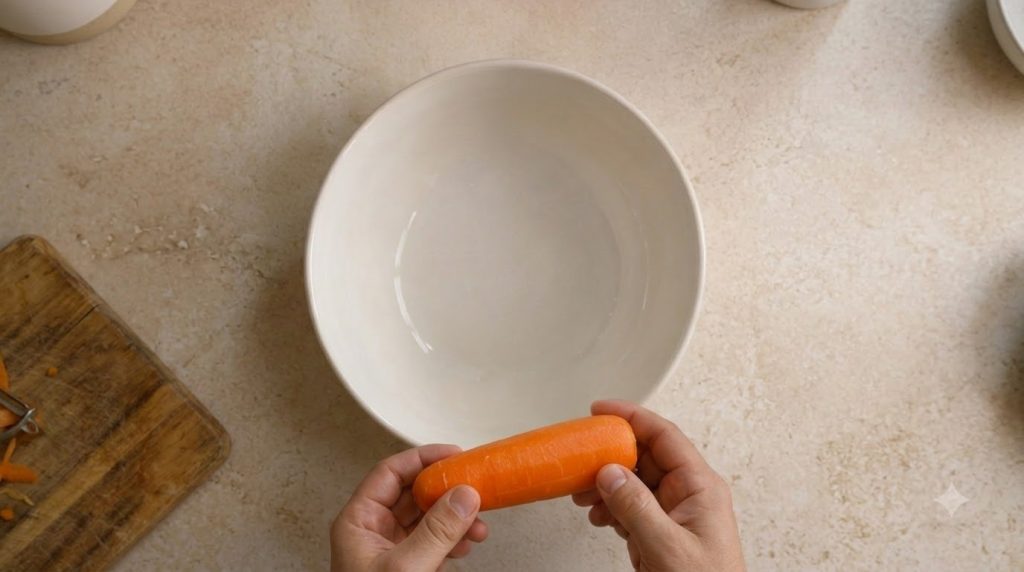
- 1 cup (approx. 2 medium carrots) finely grated carrots
- 1 teaspoon ground cinnamon
- ¼ teaspoon ground nutmeg (optional)
Egg Wash (Optional):
- 1 large egg
- 1 tablespoon water or milk
Ingredient Notes
- Yeast: Ensure your active dry yeast is fresh. If using instant yeast, you can mix it directly with the dry ingredients without proofing, but proofing is a good way to check its viability.
- Milk: Warm milk helps activate the yeast. Make sure it’s not too hot, or it will kill the yeast.
- Carrots: Finely grated carrots will incorporate smoothly into the dough, providing moisture and subtle sweetness without large chunks. You can use a box grater or a food processor.
- Butter: Unsalted butter is preferred to control the salt content. Melt it and let it cool slightly before adding to prevent cooking the egg.
- Flour: Start with 3 cups and add more gradually as needed during kneading until the dough is soft and manageable, but not overly sticky.
Equipment You’ll Need
- Large mixing bowl
- Measuring cups and spoons
- Whisk or spatula
- Grater (for carrots)
- Stand mixer with dough hook (optional, but highly recommended for kneading)
- Clean kitchen towel or plastic wrap
- Baking sheet (9×13 inch or similar)
- Parchment paper (optional, for easy cleanup)
- Pastry brush (for egg wash)
How to Make Grandma’s Secret Carrot Buns
Follow these steps to bake a batch of homemade carrot buns that taste just like Grandma used to make:
-
Activate the Yeast:
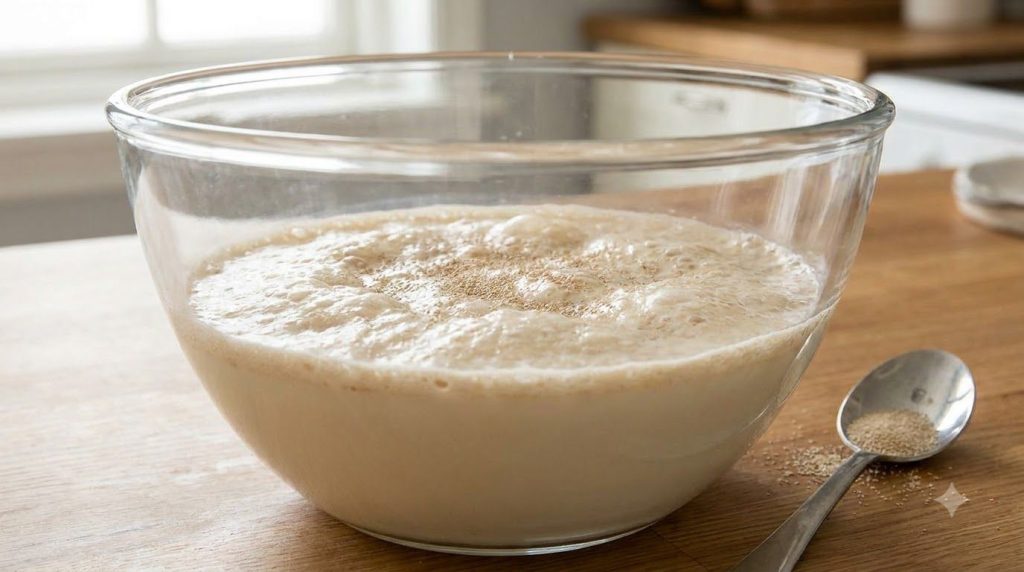
In a large mixing bowl, combine the warm milk and 1 teaspoon of the granulated sugar. Sprinkle the active dry yeast over the milk. Let it sit for 5-10 minutes until the mixture becomes foamy. This indicates your yeast is active and ready to go.
-
Combine Wet Ingredients:
Once the yeast is foamy, add the remaining granulated sugar, salt, melted butter, and lightly beaten egg to the bowl. Whisk everything together until well combined.
-
Add Dry Ingredients and Carrots:
Gradually add 3 cups of the all-purpose flour, ground cinnamon, and nutmeg (if using) to the wet mixture. Mix with a spoon or spatula until a shaggy dough forms. Then, fold in the finely grated carrots until evenly distributed. The dough will be thick.
-
Knead the Dough:
Turn the dough out onto a lightly floured surface. Knead for 8-10 minutes, adding small amounts of flour only if the dough is too sticky to handle. The dough should become smooth, elastic, and springy to the touch. If using a stand mixer, knead with the dough hook on medium-low speed for 6-8 minutes.
-
First Rise:
Lightly grease the mixing bowl. Place the kneaded dough in the bowl, turning it once to coat with oil. Cover the bowl with a clean kitchen towel or plastic wrap. Let the dough rise in a warm, draft-free place for 1 to 1.5 hours, or until it has doubled in size.
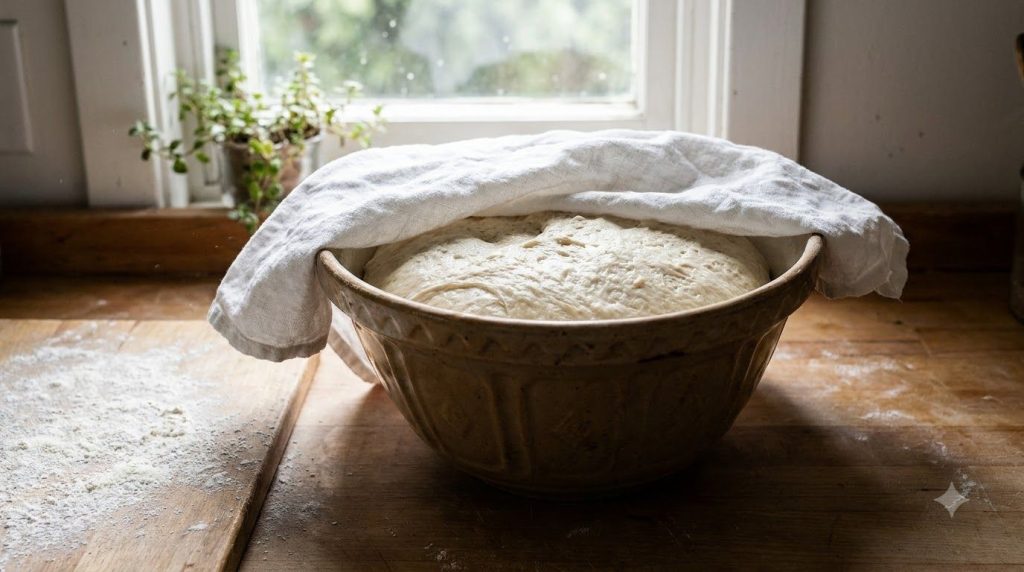
Allowing the dough to double in size ensures a light and fluffy texture. -
Shape the Buns:
Gently punch down the risen dough to release the air. Turn it out onto a lightly floured surface and divide it into 12 equal pieces. Shape each piece into a smooth, round bun. Arrange the buns on a baking sheet lined with parchment paper, leaving some space between them (a 9×13 inch pan works well, or a larger sheet if you prefer more space).
-
Second Rise:
Cover the baking sheet loosely with a kitchen towel or plastic wrap. Let the buns rise again in a warm place for another 30-45 minutes, or until they look visibly puffy.
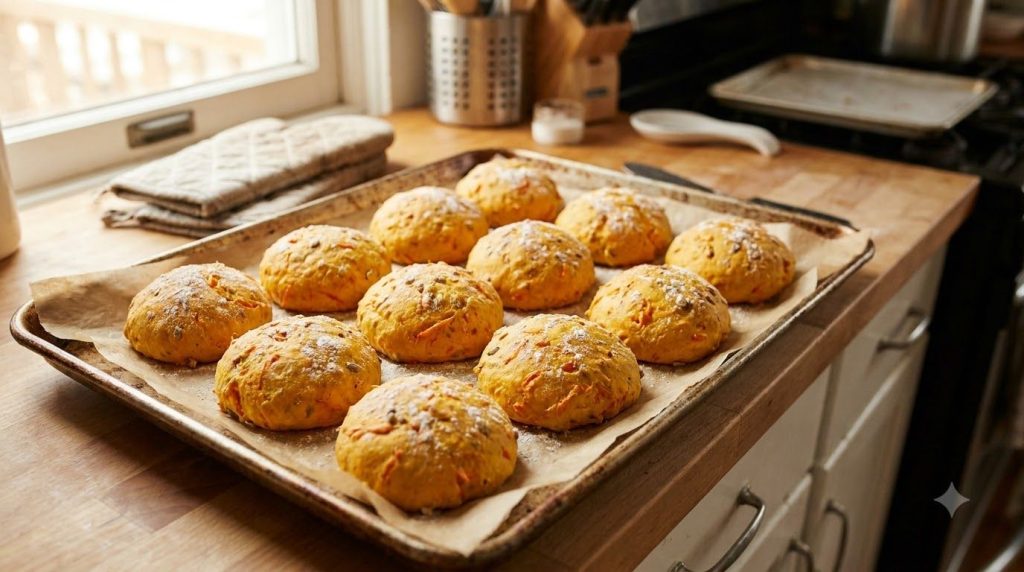
Puffy buns indicate a successful second rise, leading to a lighter crumb. -
Preheat Oven & Egg Wash:
While the buns are on their second rise, preheat your oven to 375°F (190°C). In a small bowl, whisk together the egg and water/milk for the egg wash, if using.
-
Bake the Buns:
Brush the tops of the risen buns with the egg wash for a golden-brown, shiny crust. Bake for 20-25 minutes, or until the buns are beautifully golden brown on top and cooked through. An instant-read thermometer inserted into the center of a bun should read around 200-210°F (93-99°C).
-
Cool:
Remove the buns from the oven and transfer them to a wire rack to cool slightly before serving. They are best enjoyed warm!
Pro Tips for the Best Results
- Proper Yeast Activation: Ensure your warm milk is not too hot (above 120°F/49°C) or too cold (below 100°F/38°C). The ideal range for active dry yeast is 105-115°F (40-46°C).
- Don’t Over-Flour: Resist the urge to add too much flour during kneading. A slightly tacky dough makes for softer buns.
- Fine Grate Carrots: Use the finest setting on your grater for the carrots. This helps them blend seamlessly into the dough and contributes to a smoother texture.
- Warm Rising Environment: Find a warm, draft-free spot for your dough to rise. A slightly warmed oven (turned off!) or a sunny spot can work wonders.
- Even Sizing: Divide the dough into equal pieces for uniform baking. A kitchen scale can help with this.
- Egg Wash for Shine: Don’t skip the egg wash! It gives the buns a beautiful golden color and a lovely sheen.
- Patience with Rising: Allow the dough to complete both rises fully. Rushing this process will result in denser buns.
Common Mistakes to Avoid
- Killing the Yeast: Using water that is too hot will kill the yeast, preventing the dough from rising. Use a thermometer to check the temperature.
- Under-Kneading: Insufficient kneading won’t develop the gluten structure enough, leading to dense, tough buns. Knead until the dough is smooth and elastic.
- Over-Flouring: Adding too much flour results in dry, heavy buns. The dough should be slightly tacky after kneading.
- Improper Rising Conditions: A cold or drafty environment will slow down or stop the rising process. Ensure a consistent, warm spot.
- Over-Baking: Baking for too long can dry out the buns. Keep an eye on them, and remove them once they are golden brown and cooked through.
Variations & Substitutions
- Spice It Up: Enhance the spice profile with a pinch of ginger or allspice.
- Add-Ins: Fold in ½ cup of raisins or chopped walnuts for extra texture and flavor.
- Sweet Glaze: For a sweeter bun, whisk together powdered sugar with a little milk or orange juice and drizzle over the cooled buns.
- Whole Wheat Option: Replace up to half of the all-purpose flour with whole wheat flour for a heartier, more nutritious bun. You may need a little extra liquid.
- Dairy-Free: Substitute dairy milk with a non-dairy alternative like almond or soy milk, and use a plant-based butter alternative.
Serving Suggestions
These Grandma’s Secret Carrot Buns are wonderfully versatile. Serve them:
- Warm with a pat of butter, cream cheese, or your favorite jam.
- Alongside a hearty soup or stew for a comforting meal.
- As a delicious breakfast roll with coffee or tea.
- Packed in lunchboxes as a satisfying and wholesome snack.
- With a light drizzle of honey or maple syrup for an extra touch of sweetness.
Storage & Reheating
- Refrigerator: Store cooled carrot buns in an airtight container at room temperature for up to 2-3 days. For longer freshness, refrigerate for up to 5 days.
- Freezer: For longer storage, once the buns are completely cooled, place them in a freezer-safe bag or airtight container. They can be frozen for up to 2-3 months. Thaw at room temperature before reheating.
- Reheating: To reheat, you can warm them in the microwave for 15-30 seconds, or wrap them in foil and heat in a preheated oven at 300°F (150°C) for 5-10 minutes until warmed through.
FAQ
Q: Can I use pre-shredded carrots?
A: Yes, you can use pre-shredded carrots, but try to find finely shredded ones. If they are thick, you might want to pulse them in a food processor a few times to get a finer consistency for better incorporation into the dough.
Q: Why didn’t my dough rise?
A: The most common reasons for dough not rising are inactive yeast (check the expiration date or ensure it foamed up in the warm milk) or the liquid being too hot, which kills the yeast. A cold environment can also significantly slow down or prevent rising.
Q: Can I make these buns sweeter?
A: Absolutely! You can increase the sugar in the dough by an additional ¼ cup, or for a sweeter finish, drizzle a simple powdered sugar glaze (powdered sugar mixed with a little milk or orange juice) over the cooled buns.
Q: How can I tell if the buns are fully baked?
A: The buns should be golden brown on top and sound hollow when tapped on the bottom. For a precise check, an instant-read thermometer inserted into the center of a bun should register between 200-210°F (93-99°C).
Q: Can I prepare the dough the night before?
A: Yes, you can. After the first rise, punch down the dough, shape the buns, and place them on the baking sheet. Cover loosely with plastic wrap and refrigerate overnight. The next morning, let them come to room temperature and proof for about an hour before baking as directed.
Q: What if I don’t have a stand mixer?
A: No problem! You can knead the dough by hand. It will take a bit more effort and time (around 10-12 minutes), but the results will be just as good. Simply follow the instructions for kneading on a lightly floured surface.
Recipe Card: Grandma’s Secret Carrot Buns
Recipe Name: Grandma’s Secret Carrot Buns
Short Description: Super soft, subtly sweet, and comforting homemade carrot buns that taste like a treasured family recipe.
Prep Time: 30 minutes
Cook Time: 20-25 minutes
Total Time: Approximately 2 hours 30 minutes (includes rising time)
Servings: 12 buns
Course: Bread, Snack, Side Dish
Cuisine: American
Cooking Method: Baking
Ingredients:
Dough:
- 1 cup (240 ml) warm milk (105-115°F / 40-46°C)
- 2 ¼ teaspoons (7 g) active dry yeast
- ¼ cup (50 g) granulated sugar, divided
- ½ teaspoon salt
- ¼ cup (57 g) unsalted butter, melted and slightly cooled
- 1 large egg, lightly beaten
- 3 to 3 ½ cups (360-420 g) all-purpose flour
- 1 cup (approx. 2 medium carrots) finely grated carrots
- 1 teaspoon ground cinnamon
- ¼ teaspoon ground nutmeg (optional)
Egg Wash (Optional):
- 1 large egg
- 1 tablespoon water or milk
Instructions:
- Activate Yeast: In a large bowl, combine warm milk and 1 tsp sugar. Sprinkle yeast over. Let sit 5-10 minutes until foamy.
- Combine Wet: Add remaining sugar, salt, melted butter, and beaten egg to the foamy yeast mixture. Whisk well.
- Add Dry & Carrots: Gradually add 3 cups flour, cinnamon, and nutmeg. Mix until a shaggy dough forms, then fold in grated carrots until evenly distributed.
- Knead: Turn dough onto a lightly floured surface. Knead for 8-10 minutes until smooth and elastic. Add more flour sparingly if too sticky.
- First Rise: Lightly grease bowl, place dough in, turn to coat. Cover and let rise in a warm, draft-free place for 1-1.5 hours, or until doubled.
- Shape Buns: Gently punch down dough. Divide into 12 equal pieces and shape into smooth rounds. Place on a parchment-lined baking sheet, spaced apart.
- Second Rise: Cover loosely and let rise for 30-45 minutes, or until visibly puffy.
- Preheat & Egg Wash: Preheat oven to 375°F (190°C). Whisk egg and water/milk for egg wash (if using).
- Bake: Brush buns with egg wash. Bake 20-25 minutes, or until golden brown and cooked through (internal temp 200-210°F/93-99°C).
- Cool: Transfer to a wire rack to cool slightly. Serve warm.
Notes:
For best results, ensure your yeast is active and avoid over-flouring the dough. Fine grating the carrots helps them integrate smoothly.
Storage:
Store in an airtight container at room temperature for 2-3 days, or refrigerate for up to 5 days. Freeze for up to 2-3 months; thaw and reheat gently.
Nutrition:
Nutrition information is an estimate and may vary depending on the ingredients and brands used.