Bring Your Dingy White Socks Back to Life with This DIY Soak
Are your once-brilliant white socks now sporting a tired, dingy, or even yellowish hue? You’re not alone! It’s a common struggle for many homeowners to keep their white socks looking pristine, especially after countless washes and daily wear. But before you banish those worn-out whites to the rag pile, know that there’s a powerful and cost-effective DIY solution right in your pantry that can make them shine again. This simple soak is your first step to bringing those beloved whites back to life, tackling everything from general grime to stubborn stains.
Why Your White Socks Lose Their Luster (and How to Get It Back)
Our white socks face a lot: dirt, sweat, oils from our skin, and even residue from detergents and hard water can build up over time. This combination leads to that disheartening dullness we all recognize. While bleaching might seem like the quick fix, it can often weaken fabric fibers and even leave a yellow tint over time. Our DIY soak offers a gentler yet highly effective alternative, using common household ingredients to restore brightness and freshness.
The Ultimate DIY Sock Whitening Soak: Ingredients You’ll Need
Gather these simple items, most of which you likely already have on hand, to create a powerful cleaning concoction:
- Hot Water: Enough to fully submerge your socks in a basin.
- 1/2 cup Baking Soda: A natural whitener and deodorizer.
- 1/4 cup Iodized Salt: Helps break down stains and refresh fabric.
- 1 tablespoon Blue Dish Soap: Excellent for cutting through grease and grime.
- 1/2 cup White Vinegar: A natural fabric softener, brightener, and odor neutralizer.
- A large basin or bucket: For soaking.
- Gloves (optional but recommended): To protect your hands from hot water and cleaning agents.
Ingredient Breakdown: Why Each Component Works Wonders
- Hot Water: Heat helps to loosen dirt and open up the fabric fibers, allowing the cleaning agents to penetrate more effectively.
- Baking Soda: This household hero acts as a mild abrasive to lift dirt particles, while its alkaline properties help to neutralize odors and brighten fabric.
- Iodized Salt: Salt helps to draw out stains and prevent re-deposition of dirt. It can also enhance the cleaning power of the other ingredients.
- Blue Dish Soap: Formulated to tackle grease and food stains, dish soap is a powerful degreaser that breaks down oily residue clinging to sock fibers.
- White Vinegar: As a natural acid, vinegar dissolves mineral deposits from hard water, eliminates lingering odors, and acts as a mild bleach alternative, leaving socks soft and bright without harsh chemicals.
Step-by-Step Guide: How to Revive Your Dingy White Socks
Follow these steps carefully to bring your socks back to their glorious white:
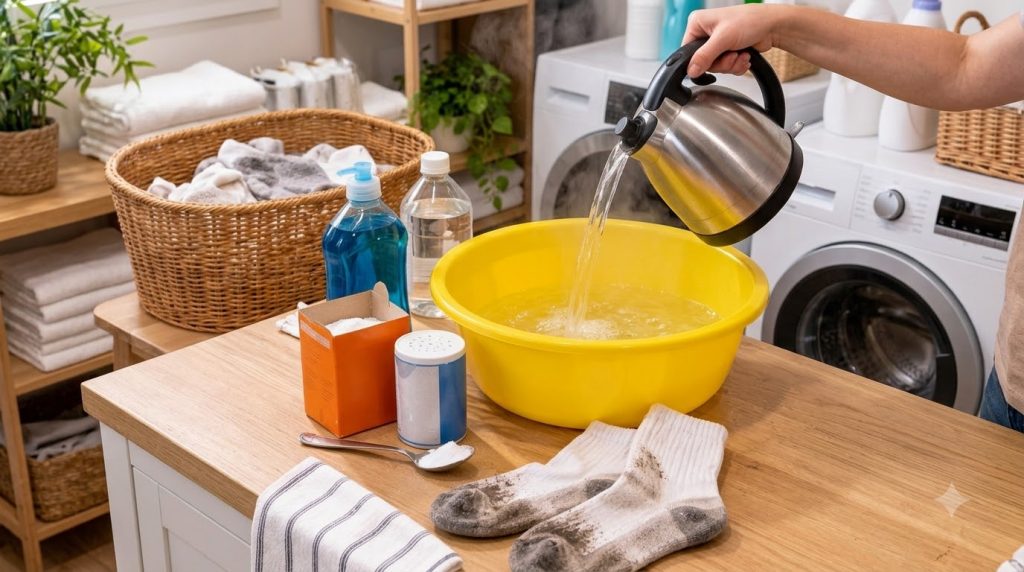
- Prepare Your Basin: Place your heavily soiled white socks into a large basin or bucket.
- Add Hot Water: Carefully pour enough hot water over the socks to completely submerge them. Be cautious not to scald yourself.
- Introduce the Cleaners: Sprinkle the baking soda and iodized salt into the hot water. Add the tablespoon of blue dish soap. Stir gently to help dissolve the powders and distribute the soap.
- Pour in Vinegar: Finally, add the white vinegar. You might notice a slight fizzing reaction when the vinegar (acid) mixes with the baking soda (base), which is normal and indicates the ingredients are activating.
- Soak It Out: Let the socks soak for at least 4-6 hours, or even better, overnight. The longer they soak, the more time the ingredients have to break down dirt and stains.
- Rinse and Wash: After soaking, drain the dirty water. Rinse the socks thoroughly under cold running water until all the cleaning solution is gone. Then, wash them as usual in your washing machine with your regular detergent. For extra brightness, you can add another 1/2 cup of white vinegar to the rinse cycle in your washing machine.
- Dry: Dry your socks as you normally would. You’ll be amazed at the difference!
The Science Behind the Sparkle
This powerful combination works on multiple fronts. The hot water and baking soda lift surface dirt and neutralize odors. The salt helps to draw out deeper grime. The dish soap acts as a surfactant, breaking down greasy stains. Finally, the white vinegar cuts through any remaining soap scum, mineral deposits, and acts as a natural whitener and deodorizer, ensuring your socks come out soft and brilliantly clean. It’s a synergistic effect where each ingredient amplifies the cleaning power of the others.
Tips for Maintaining Bright White Socks
- Wash Whites Separately: Always wash white socks with other white items to prevent color transfer.
- Pre-Treat Stains: For exceptionally stubborn spots, create a paste with baking soda and a little water and apply it directly to the stain before soaking.
- Don’t Overload the Washer: Give your socks room to move in the washing machine for a thorough clean.
- Avoid Excessive Bleach: While occasional bleach is fine, frequent use can yellow whites and degrade fabric. Opt for natural alternatives like this soak instead.
Important Safety Notes
Always handle hot water with care to avoid burns. If you have sensitive skin, consider wearing rubber gloves when mixing the solution. Ensure proper ventilation, especially when using vinegar, as its fumes can be strong. Keep all cleaning agents out of reach of children and pets.
Give this budget-friendly, effective DIY sock whitening soak a try and say goodbye to dingy socks for good! What are your favorite tips for keeping your whites looking their best? Share your wisdom in the comments below!