A Surprising Texture Hack for Everyday DIY Projects
Who knew that coffee grounds and school glue could create such a unique texture? This simple craft hack turns ordinary household items into a rustic, earthy finish that works well for budget-friendly home decor, upcycled projects and textured art. If you are looking for affordable DIY ideas that use materials you probably already have, this one is worth trying.
Why This Combination Works
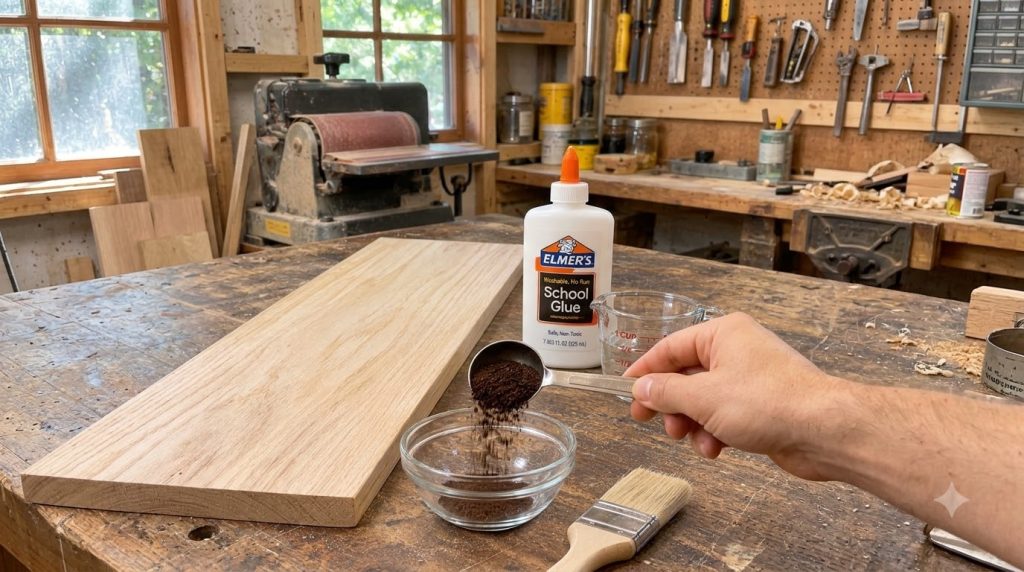
Coffee grounds are fine, dry and dark, so they add color and a gritty, natural look to a surface. White school glue, which is a polyvinyl acetate adhesive, binds the grounds together as it dries and gives the mixture enough body to hold a textured shape. The result is a matte, speckled finish that looks like aged stone, clay or weathered wood.
Materials You Will Need
- Used or dried coffee grounds, spread out to dry completely
- White school glue (a standard washable glue works well)
- A small glass or plastic mixing bowl
- A measuring spoon and a measuring cup
- A paintbrush or palette knife
- A wooden board, cardboard or other base for your project
- Optional: a few drops of clear rubbing alcohol to speed up drying and thin the mixture
Step-by-Step Instructions
- Dry the coffee grounds completely on a sheet of paper towel or a baking tray. Damp grounds will make the mixture soggy and slow to set.
- Pour about two spoonfuls of dry grounds into the bowl for every spoonful of school glue. The source did not give exact measurements, so start with this ratio and adjust until the mix looks like thick paste.
- Stir slowly with the paintbrush or a palette knife until the grounds are evenly coated. If the mixture is too stiff, add a few drops of water. If it is too runny, add a little more dry grounds.
- Apply the mixture to your prepared base with a brush or knife, pressing it on in thin, uneven layers for a natural look.
- Let the project dry for at least 24 hours in a warm, well-ventilated space. Thick layers may need longer.
- Once fully dry, seal the surface with a clear craft sealant if you plan to handle it often or display it outdoors.
Tips for Better Results
- Sift the grounds first if you want a finer, smoother texture.
- Test a small sample on scrap material before committing to a larger project.
- Use a palette knife for bold, sculptural texture and a brush for subtle speckling.
- Keep a damp cloth nearby to clean up glue before it dries.
Safety and Ventilation Notes
School glue is generally low-risk, but you should still keep it away from children and pets who might eat it. If you choose to use rubbing alcohol, work in a well-ventilated area, keep the bottle away from heat or open flames, and avoid inhaling fumes for long periods. Wash your hands after handling the mixture, and avoid getting it in your eyes.
Creative Ways to Use the Finish
This textured finish suits picture frames, small wooden trays, planters, candle holders and decorative wall panels. Because it is made from materials you may already have on hand, it is a practical way to upcycle old items while keeping your craft budget low.
Share Your Experience
What is the most unusual material you have used in a craft project? Share your favorite unexpected ingredient in the comments below and tell us how it turned out.