Tired of stubborn collar stains ruining your favorite shirts? Those dingy, yellowed rings along the neckline are one of the most common laundry frustrations, and they often show up even when the rest of the shirt looks fine. The good news is that you can tackle them with a simple combo fix using ingredients you probably already have at home.
This guide is for anyone who wants to rescue everyday shirts without buying a specialty stain remover. Whether you wear dress shirts to the office or polos on the weekend, this method works well as a pretreatment before your normal wash. You will learn what you need, how to apply the mixture, how long to let it sit, and how to avoid common mistakes so your shirts come out looking brilliantly clean.
Quick Summary
- Preparation Time: About 5 minutes
- Application Time: 15 minutes of rest, plus a gentle scrub
- Difficulty Level: Beginner
- Best Uses: Collar and cuff stains on cotton and cotton-blend shirts
- Suitable Surfaces: Washable cotton, cotton blends, and most white or light-colored fabrics (test first)
- Storage Time: Mix only what you need for each session
Why You’ll Love This DIY Solution
- Uses items most households already keep on hand
- Budget-friendly compared with many commercial stain sprays
- Quick to prepare, with no special equipment
- Beginner-friendly, with clear steps
- Works as a pretreatment before your regular laundry routine
- Gentle enough for everyday cotton shirts when used as directed
Ingredients and Materials
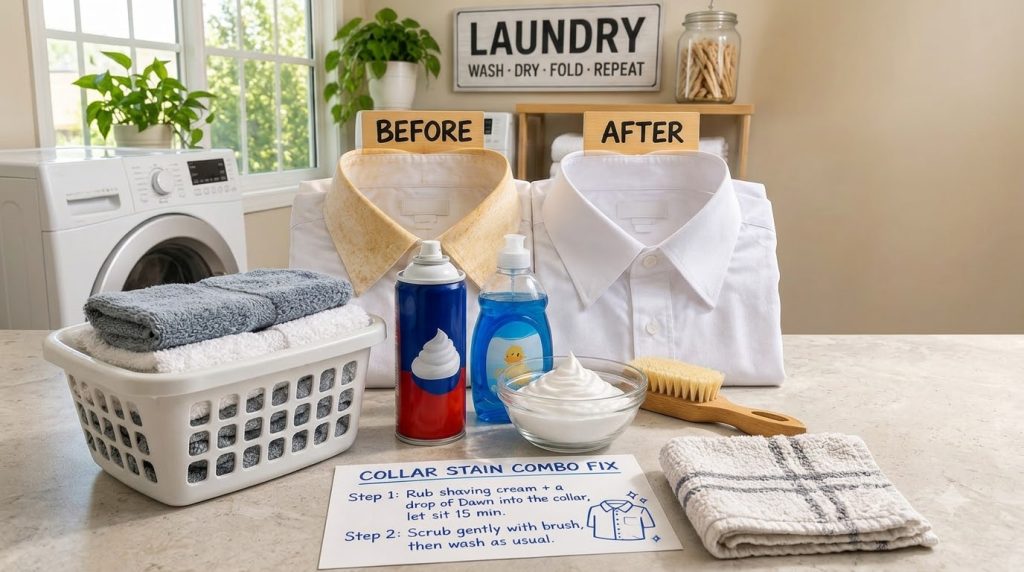
- 2 tablespoons plain shaving cream (foam or gel style, unscented if possible)
- 1 drop liquid dish soap, such as Dawn (use only a small drop)
- Water, as needed for light dampening (optional)
Equipment Needed
- Small glass or ceramic bowl
- Soft-bristled brush or an old, clean toothbrush
- Clean white cloth or paper towel
- Gloves (recommended)
- Laundry detergent and your normal washing machine
Step-by-Step Instructions
-
Check the shirt first. Look over the collar and check the care label. Make sure the fabric is washable and that you are not dealing with a delicate material like silk or wool. Hold the collar up to natural light to see exactly where the stains sit. Time: about 2 minutes.
-
Test a hidden spot. Dab a tiny amount of the mixture on the inside seam or under the collar. Wait a few minutes and rinse with water. If the color stays even, you can continue. Time: about 3 minutes.
-
Apply the shaving cream. Lay the shirt flat on a towel. Spread about 1 tablespoon of shaving cream over the stained areas of the collar, working it into the fabric with your fingers or a brush. Make sure the foam covers the entire stain. Time: about 2 minutes.
-
Add the dish soap. Place one small drop of dish soap onto the shaving cream and gently blend it in. The dish soap helps lift oily residue, which is often part of collar grime. Do not add more than one drop, since too much soap can leave residue that is hard to rinse. Time: about 1 minute.
-
Let it sit. Allow the mixture to rest on the collar for about 15 minutes. Do not let it dry completely. If the collar starts to look dry, mist it very lightly with water. Time: 15 minutes.
-
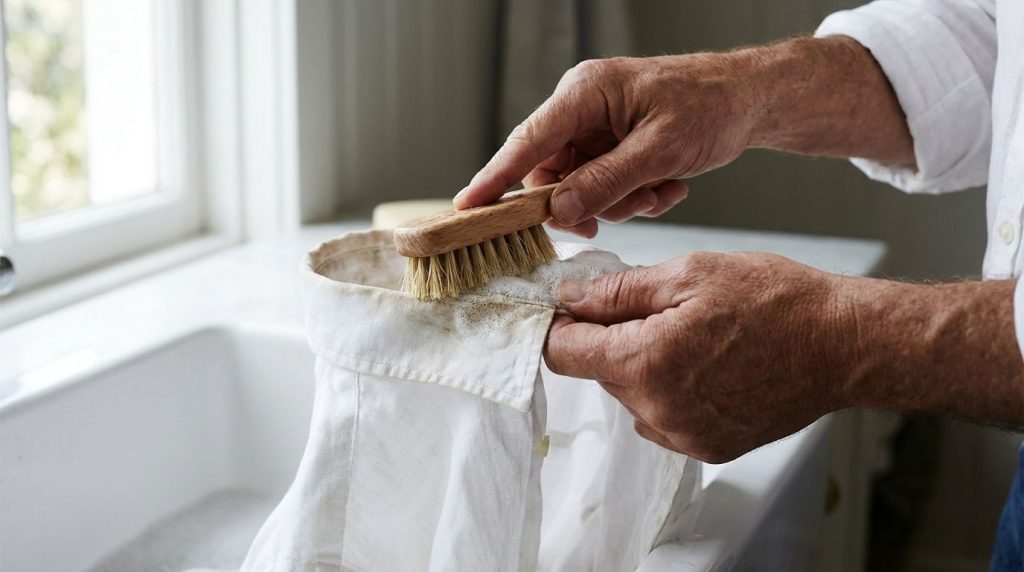
Scrub gently. Use a soft-bristled brush or old toothbrush to work the mixture into the fabric in small circles. Focus on the stained areas, and keep the scrubbing light to protect the fibers. You should start to see the discoloration loosen. Time: about 2 minutes.
-
Wash as usual. Rinse the collar briefly under cool water, then launder the shirt according to its care label. Use your normal detergent. Do not put the shirt in the dryer until you confirm the stain is gone, since heat can set remaining marks. Time: depends on your washer cycle.
-
Check the result. Once the shirt is out of the washer, inspect the collar in natural light. If a faint shadow remains, repeat steps 3 through 7 once more. Stubborn stains may need a second round. Time: about 1 minute.
Best Uses
This combo works best on collar and cuff stains that come from everyday wear, such as sweat, body oils, and dirt. It is also helpful for light grime on the neckline of cotton-blend shirts. Use it as a pretreatment, not a replacement for regular washing.
Suitable Surfaces
- Cotton and cotton-blend dress shirts
- White and light-colored everyday shirts
- Sturdy polo shirts and casual tops
Surfaces to Avoid
- Silk, wool, and other delicate fabrics
- Dark or brightly dyed fabrics that may fade (always test first)
- Leather, suede, and other non-washable materials
Safety Notes
- Wear gloves if your skin is sensitive to soap or fragrance.
- Test on a small hidden area first to check for color change.
- Keep shaving cream and dish soap away from children and pets.
- Never mix this combo with bleach, ammonia, or other cleaning products. Mixing chemicals can release harmful fumes.
- Work in a well-ventilated room, especially if you use a lot of product.
- Stop using the mixture if the fabric shows irritation, color change, or damage.
Expert Tips
- Pretreat right away when you can, since fresh stains are easier to lift.
- Use only a small amount of shaving cream. A little goes a long way on a collar.
- Avoid hot water until you are sure the stain has lifted, because heat can set some stains.
- Keep your soft brush clean and dry between uses so it does not spread grime.
- Lightly dampening the collar can help the foam spread evenly into the fibers.
- Pretreat collars on a regular schedule to prevent buildup, rather than waiting for visible stains.
- Wash dress shirts inside out, which can help protect the outside of the fabric.
Storage Instructions
This method is meant to be made and used on the spot, so there is no need to store a mixture. Keep your shaving cream sealed and out of direct sunlight, and store dish soap in its original bottle. Discard any shaving cream that has separated, smells sour, or has changed color. If you have any leftover soap-and-foam mixture, throw it away rather than saving it for later.
Frequently Asked Questions
Can I use gel shaving cream instead of foam?
Yes, a plain gel or foam shaving cream should work. Choose a basic formula without added colors or strong fragrances if possible.
How long does the stain removal take?
The soak takes about 15 minutes, and the full process including the wash usually takes under an hour. Some stains may need a second round.
Can I use this on colored shirts?
You can try it on colored shirts, but always test a hidden area first. Some dyes can react to soap, so check for fading before treating the whole collar.
Can I replace the dish soap with another soap?
Liquid dish soap is commonly used because it is designed to cut grease. If you do not have it, a small drop of a mild liquid laundry detergent may work, but results can vary, so test first.
Is this safe for sensitive skin?
Many people with sensitive skin use gloves for this task. If you notice redness, itching, or irritation, rinse your hands with water and stop using the mixture.
Can I use this on other stains?
This combo is designed mainly for collar and cuff grime. For other stains, such as ink, wine, or grease, use a method that is specific to that stain and always test first.
Will this remove yellowing from old shirts?
It may help lift some surface yellowing from body oils and dirt, but it cannot guarantee results for heavy or long-set discoloration.
Conclusion
A stained collar does not have to mean the end of a good shirt. With a bit of shaving cream, one small drop of dish soap, and a soft brush, you can pretreat everyday grime and get your shirts looking fresh again. Start with a hidden test, keep your scrubbing gentle, and always keep safety in mind. Give the Collar Stain Combo Fix a try on your next load, and enjoy shirts that look brilliantly clean once more!