Do you ever finish cleaning your windows only to notice streaks and hazy spots the moment the sun hits the glass? You are not alone. Streaky windows are one of the most common frustrations in home cleaning, and the good news is that a simple homemade solution can help you get clearer glass without spending much money.
This DIY window cleaner uses just three everyday ingredients: white vinegar, water and a few drops of dish soap. It is budget-friendly, quick to mix and easy to store, so it works well for busy households, renters and anyone who wants to cut back on harsh store-bought products.
This guide is for beginners and experienced cleaners alike. In the sections below, you will learn the exact ratio, the equipment you need, a step-by-step method for streak-free glass, safety notes, expert tips, storage advice and answers to common questions.
Quick Summary
- Preparation Time: About 5 minutes
- Application Time: About 5 to 10 minutes for a few windows
- Difficulty Level: Easy
- Best Uses: Windows, mirrors, glass tabletops and glass shower doors
- Suitable Surfaces: Sealed glass and glass mirrors. Avoid tinted films and car windows with tint.
- Storage Time: Make a fresh batch every few weeks and keep it labeled.
Why You’ll Love This DIY Solution
- Easy to make with a measuring cup and a spray bottle
- Budget-friendly, since it uses common household items
- Uses simple ingredients you may already have on hand
- Beginner-friendly with no special skills required
- Works well on many glass surfaces around the home
- Quick to prepare in just a few minutes
- Easy to refill whenever you need more
Ingredients and Materials
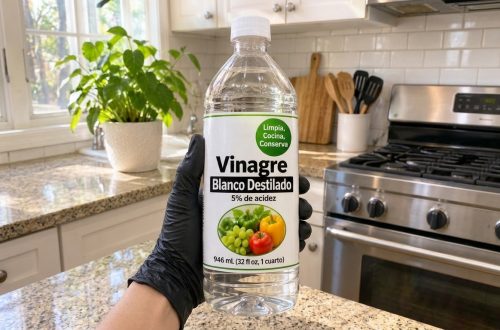
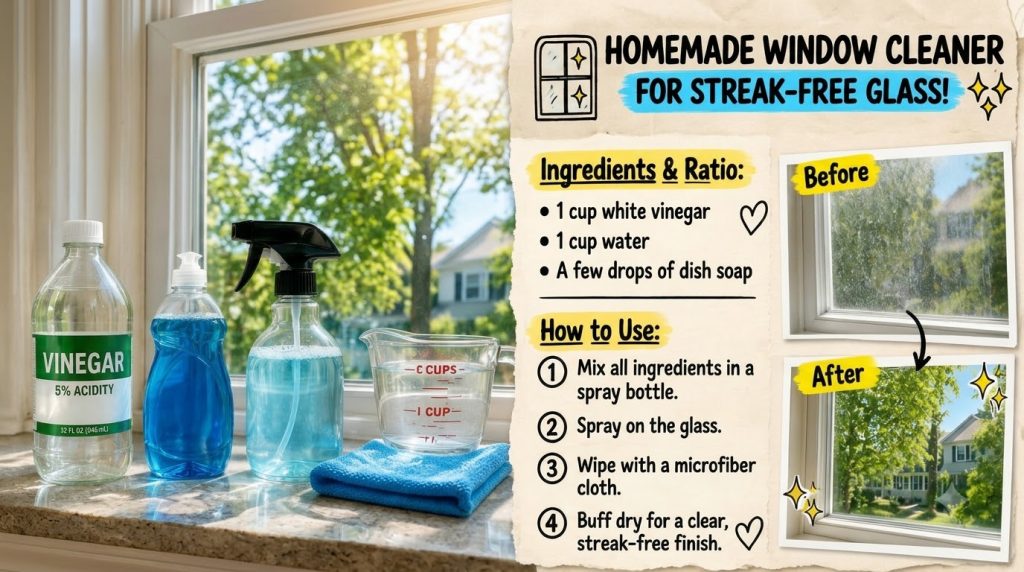
- 1 cup white distilled vinegar
- 1 cup water (warm or room temperature)
- A few drops of liquid dish soap (about 2 to 3 drops)
Optional substitution: If you prefer a milder scent, you can use a plain, unscented dish soap. Avoid soaps with added moisturizers or degreasing agents that can leave a film on glass.
Equipment Needed
- Clean glass spray bottle (about 16 to 32 fluid ounces)
- Measuring cup
- Funnel (optional, but helpful for filling the bottle)
- Clean microfiber cloth or two for wiping and buffing
- Gloves (optional, if you have sensitive skin)
Step-by-Step Instructions
Step 1: Measure the Ingredients
Pour 1 cup of white vinegar into your measuring cup, then add 1 cup of water. Measuring keeps the ratio balanced, so the cleaner works well without leaving too much residue. Expected result: A clear, evenly mixed liquid. Time: About 1 minute.
Step 2: Add the Dish Soap
Add 2 to 3 drops of dish soap to the measuring cup. Stir gently with a spoon. Too much soap can leave a film, so a little goes a long way. Expected result: Slightly soapy liquid that helps lift light dirt and fingerprints. Time: About 30 seconds.
Step 3: Fill the Spray Bottle
Use a funnel, if you have one, to pour the mixture into your clean spray bottle. Leave a little space at the top so the spray nozzle works properly. Secure the lid tightly and shake gently. Expected result: A ready-to-use window cleaner. Time: About 1 minute.
Step 4: Dust the Glass First
Before spraying, wipe away loose dust and cobwebs with a dry cloth. This prevents dust from turning into muddy streaks when the liquid hits the glass. Expected result: A cleaner surface ready for the solution. Time: About 1 to 2 minutes per window.
Step 5: Spray and Wipe
Lightly spray the glass, working from top to bottom in small sections. Wipe with a folded, clean microfiber cloth using firm, overlapping strokes. Replace or refold the cloth as it becomes damp. Expected result: Glass that looks clearer as you work. Time: About 2 to 3 minutes per window.
Step 6: Buff Dry
Use a second dry microfiber cloth to buff the glass in a gentle side-to-side or circular motion until no moisture remains. Buffing is the key to a streak-free finish. Expected result: Clear, sparkling glass. Time: About 1 minute per window.
Best Uses
This cleaner works well on interior and exterior windows without heavy grime, glass mirrors, glass tabletops and glass shower doors. Use it on sealed glass surfaces only.
Surface limitations: Avoid using it on tinted window films, car windows with tint, unsealed or natural stone surfaces, marble, granite and any surface that might be damaged by acid. Vinegar can dull some finishes over time, so always test first.
Safety Notes
- Test the solution on a small, hidden area of the glass or surface before cleaning the whole window.
- Keep the bottle away from children and pets, and store it out of reach.
- Never mix this cleaner with bleach or products containing ammonia. Doing so can create harmful fumes.
- Ensure good ventilation by opening a window or running a fan while you clean.
- Wear gloves if vinegar irritates your skin.
- Avoid cleaning glass that is hot to the touch or in direct, intense sunlight, since the solution can dry too quickly and leave streaks.
- Label the spray bottle clearly so no one mistakes it for a drinking beverage.
Expert Tips
- Use a microfiber cloth. Microfiber lifts dirt and absorbs moisture better than paper towels, which can leave lint.
- Work on a cloudy day or in shade. Cooler, shaded glass gives you more time to wipe before the solution dries.
- Clean from top to bottom. This way, any drips fall onto areas you have not cleaned yet.
- Use less soap than you think. Extra dish soap is the most common cause of smearing.
- Keep two cloths on hand. One for wiping and one for buffing makes a noticeable difference.
- Clean the edges and tracks. Dirt often builds up in window frames, so a dry brush or cloth can help before spraying.
- Fold your cloth into quarters. A clean side is always ready for the next section of glass.
Storage Instructions
Shelf life: Because this is a simple homemade mixture, it is best to make a fresh batch every few weeks rather than storing it for months.
Best storage container: Use a clean, labeled glass or sturdy plastic spray bottle with a tight-fitting lid.
Storage location: Keep it in a cool, dry cabinet away from direct sunlight, heat sources and children.
Signs to discard: Throw out the mixture if it develops an odd smell, becomes cloudy with particles, or if the spray nozzle becomes clogged and cannot be cleared.
Frequently Asked Questions
Can I store this window cleaner?
Yes, you can store it in a labeled spray bottle in a cool, dry place. For the best results, make a fresh batch every few weeks.
How long does it last?
Because it contains only simple household ingredients, it is best used within a few weeks. Check it before each use and discard it if it looks or smells unusual.
Can I use this on marble or granite?
No. Vinegar is acidic and can dull or etch natural stone. Stick to sealed glass surfaces.
Can I replace the white vinegar?
Plain white distilled vinegar works best for this recipe. Avoid colored or flavored vinegars, since they can leave residue or stains on glass.
Is this safe to use around pets?
Keep pets out of the room while cleaning and make sure the glass is dry before they return. Store the bottle out of their reach, and wipe away any spray that lands on pet-accessible surfaces.
Can I use this on tinted windows?
It is not recommended. Vinegar and soap can damage window tint over time, so check with the film manufacturer if you are unsure.
Why are my windows still streaky?
Streaks often come from using too much soap, cleaning in direct sun, or wiping with a damp or dirty cloth. Try less soap, clean in shade, and buff with a fresh dry microfiber cloth.
Can I add essential oils for scent?
You can add a few drops of essential oil for fragrance, but test first, since some oils can leave a faint film. Keep the amount very small.
Conclusion
With just white vinegar, water and a few drops of dish soap, you can make a simple window cleaner that helps you achieve clearer, more sparkling glass. The key steps are measuring carefully, using only a small amount of soap, cleaning in shade and buffing dry with microfiber. Always test on a hidden spot, keep the bottle out of reach, and never mix it with bleach or ammonia. Give this DIY recipe a try this week, and enjoy windows that shine with less effort. Happy cleaning!