Everyone wants skin that looks fresh, smooth, and a little more lifted. If you have been searching for an easy at-home idea, you have probably seen a homemade anti-aging gel making the rounds online. Here is a friendly, honest look at what this kind of DIY gel is all about, what to keep in mind before you try it, and how to fit it into a simple routine.
What Is a Homemade Flaxseed Anti-Aging Gel?
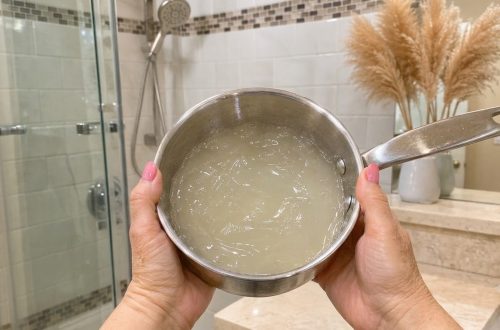
Flaxseed is a popular natural ingredient in beauty circles. When flaxseeds are soaked in water, they release a soft, slippery gel that many people like to use as a light, hydrating base for face masks and serums. The idea is simple: a gentle, plant-based gel that helps skin feel smoother and more comfortable while you build a healthy skincare habit.
Many DIY versions combine flaxseed gel with a few other everyday ingredients, such as a moisturizing oil or a touch of vitamin E. The goal is usually a soothing, lightweight layer that feels nourishing, not a miracle fix.
What the Gel Can and Cannot Do
It is important to set realistic expectations. A homemade gel can help your skin feel hydrated and soft, and a consistent routine can make your complexion look more even and refreshed. However, no home remedy can erase deep wrinkles or change the structure of your skin overnight.
- It may help skin feel softer and more hydrated.
- Gentle, regular care can support a brighter, more rested look.
- It is not a substitute for sunscreen, proper cleansing, or medical treatment.
- Results vary from person to person, so patience matters.
Simple Tips Before You Try It
Natural does not always mean gentle for everyone. Before applying any homemade mixture to your face, follow these easy steps to protect your skin:
- Always do a patch test on a small area, such as your inner arm or behind your ear, and wait 24 hours.
- Use clean bowls, spoons, and jars, and make only small batches so they stay fresh.
- Store any homemade gel in the refrigerator and discard it if it smells off or changes color.
- Stop using it right away if you notice redness, itching, stinging, or irritation.
How to Add It to Your Routine
For best results, keep your routine calm and consistent. A simple version might look like this:
- Morning: Gently cleanse, apply your homemade gel in a thin layer, then finish with your regular moisturizer and sunscreen.
- Evening: Cleanse, apply a small amount of gel, and follow with your usual night cream if you have one.
Sunscreen is one of the most effective anti-aging habits you can build, so do not skip it during the day.
Who Should Be Careful
If you have sensitive skin, rosacea, eczema, or active acne, talk with a dermatologist before trying new homemade products. Pregnant or breastfeeding women should also check with a healthcare professional before using new ingredients. When in doubt, choose a store-bought product with clear labeling and gentle formulas.
The Bottom Line
A homemade anti-aging gel can be a fun, budget-friendly addition to your self-care routine, especially if you enjoy DIY beauty. Keep your expectations realistic, test before you apply, and focus on the habits that make the biggest difference: gentle cleansing, daily sunscreen, good sleep, plenty of water, and a moisturizer that suits your skin. Your glow grows from consistency, and that is something you can start today.