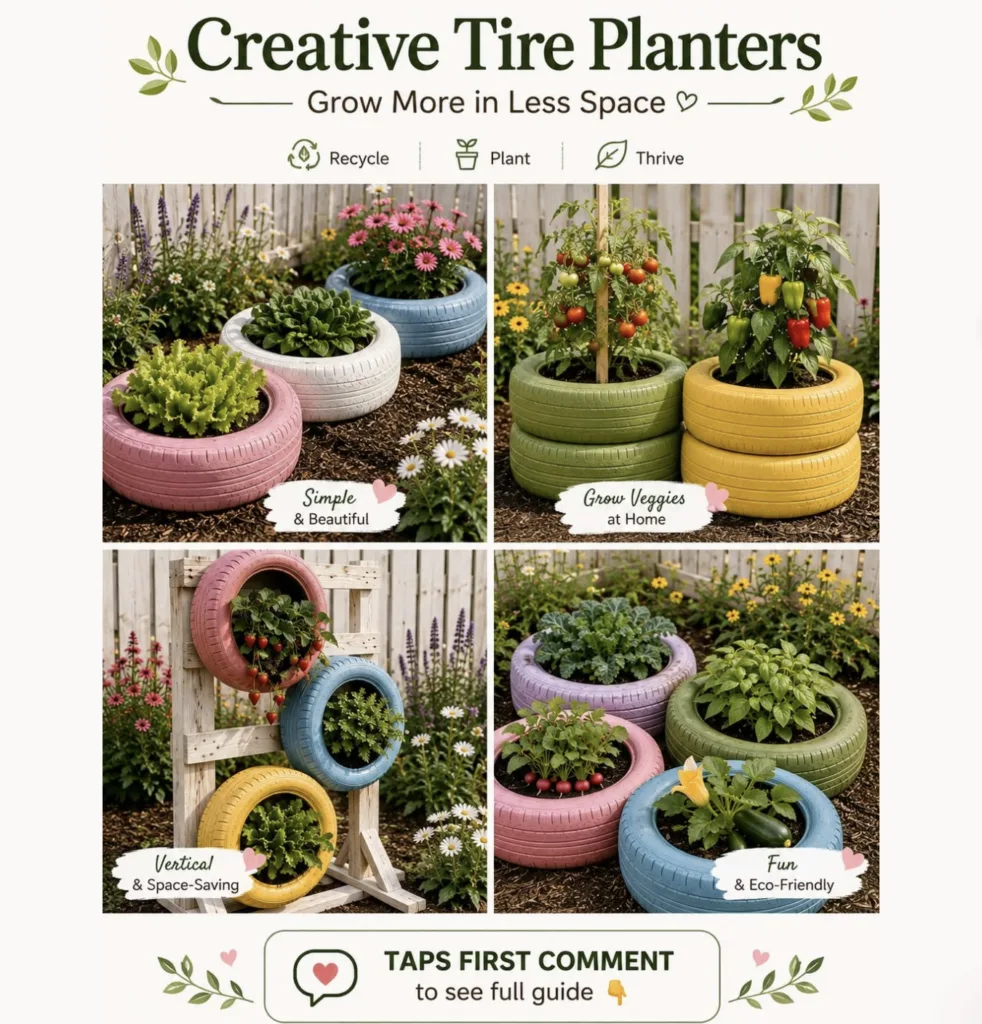
Old tires can be turned into compact planters for lettuce, herbs, strawberries, tomatoes, peppers, flowers, and other small-space crops. They’re especially useful when you want to experiment with vertical gardening or add colorful planters to a backyard.
One important note before starting: because tires weren’t manufactured as food-growing containers, there is uncertainty about long-term chemical leaching. If you want to be cautious, use tire planters primarily for ornamental plants, or place food crops in a separate food-safe container or liner inside the tire rather than planting directly against the rubber.
🛞 Step 1: Choose Your Tires
Pick tires that are structurally intact and can sit securely without wobbling.
Wash them thoroughly with soap and water, scrub away dirt and road residue, rinse well, and allow them to dry completely.
For a colorful garden, paint the outside surfaces with an exterior paint suitable for rubber. Let everything cure before planting.
💧 Step 2: Make Sure Water Can Drain
Good drainage is essential.
Place the tire on a surface where excess water can escape rather than allowing water to collect underneath it. If you’re using an inner container or liner, make sure it has plenty of drainage holes.
Avoid creating pockets where rainwater can remain trapped, since standing water can encourage mosquitoes.
🌿 Step 3: Choose the Right Growing Mix
Don’t simply fill the planter with heavy garden soil.
A practical container mix can include:
- Quality potting mix
- Finished compost
- A drainage/aeration ingredient such as perlite or fine pine bark
The finished mixture should retain moisture while still draining freely.
🥬 Step 4: Pick Plants That Match the Space
For single tire planters, compact plants are easiest.
Leafy greens: lettuce, spinach, arugula and similar greens.
Herbs: basil, parsley, cilantro, thyme and chives.
Fruiting plants: strawberries and compact peppers work well in appropriately sized containers.
Tomatoes can also be grown, but choose a sufficiently large soil volume and provide a stake or cage. Larger varieties need considerably more root space than herbs or lettuce.
🌱 Step 5: Plant Your Seedlings
Fill your growing container almost to the top, leaving a little space for watering.
Make a planting hole, gently remove the seedling from its nursery pot, place it at the appropriate depth, and firm the mix around the roots.
Most seedlings should remain at approximately their original soil level. Tomatoes are an exception—they can generally be planted deeper because buried stems can develop additional roots.
Water thoroughly after planting.
☀️ Step 6: Put the Planters in the Right Location
Most fruiting vegetables such as tomatoes and peppers perform best with plenty of direct sunlight.
Leafy greens and many herbs can tolerate somewhat less.
Remember that dark rubber can become very hot in strong summer sun. Monitor root-zone temperatures and moisture, particularly during hot weather.
💦 Step 7: Water Correctly
Container gardens usually dry faster than plants growing directly in the ground.
Check the soil with your finger. If the upper layer feels dry, water deeply until excess moisture drains away.
Avoid automatically watering every day—the goal is even moisture, not constantly waterlogged soil.
🌿 Step 8: Feed the Plants
Container plants have access to a limited amount of nutrients.
Start with compost-rich potting mix and supplement with an appropriate fertilizer according to its label directions.
Leafy vegetables generally need adequate nitrogen for foliage, while flowering and fruiting crops need balanced nutrition rather than excessive nitrogen.
🍅 Step 9: Support Tomatoes and Peppers
Install stakes or cages early, before the plants become large.
Tie stems loosely with soft garden ties rather than tight wire or string. As tomatoes grow, continue attaching the main stems to their support.
This keeps fruit away from the ground and improves airflow.
🪜 Step 10: Create a Vertical Tire Garden
If floor space is limited, the vertical arrangement shown in the image is another option.
However, a tire filled with wet growing medium can become extremely heavy. Don’t simply hang a filled tire from a lightweight fence.
Use a properly engineered, load-bearing frame and secure every planter independently. Keep the structure stable and away from areas where children could climb on it.
Trailing strawberries, flowers, and compact herbs are particularly attractive in vertical displays.
🌼 Step 11: Maintain the Garden
Spend a few minutes checking the planters every couple of days.
Remove yellow or diseased leaves, watch for pests, harvest herbs and greens regularly, support heavy stems, and replenish nutrients when necessary.
For tomatoes and peppers, harvesting ripe fruit regularly encourages the plant to continue producing.
🥗 Step 12: Harvest!
Leafy greens can often be harvested by taking the outer leaves first and leaving the center to continue growing.
Pick herbs frequently before they become overly woody or flower heavily.
Harvest tomatoes when they’ve developed their mature color, peppers at your preferred stage of ripeness, and strawberries when they’re fully colored and fragrant.
🌿 Simple Layout Idea
You could recreate the image with four zones: use low tire planters for lettuce and herbs, deeper/larger containers for tomatoes and peppers, a sturdy vertical structure for strawberries and herbs, and colorful planters around the garden for flowers and compact vegetables.
♻️ Instead of seeing an old tire as trash, turn it into inspiration for a creative garden—but for edible crops, consider the food-safe inner-container approach above.