Dreaming of naturally smoother, younger-looking skin? If you’re looking for an exciting natural ingredient to add to your DIY beauty routine, you’re in for a treat! People are discovering the amazing benefits of okra, a versatile vegetable that’s not just for cooking. It’s becoming a popular secret weapon in natural skincare, especially for those seeking a more youthful and radiant complexion.
Known for its unique mucilaginous texture, okra is being hailed by many in the natural beauty community as a ‘DIY Botox Gel’ alternative. While it won’t replicate the effects of cosmetic procedures, this homemade gel is celebrated for its hydrating and skin-smoothing properties that can help your skin look its best. Let’s dive into how you can harness the power of this incredible natural ingredient to create your own rejuvenating face gel at home!
The Wonders of Okra for Your Skin
Okra, often called ‘lady’s finger,’ is packed with nutrients that are beneficial for your overall health, and surprisingly, for your skin too! Here’s why this humble vegetable is gaining traction in the beauty world:
- Rich in Antioxidants: Okra contains vitamins A and C, along with other antioxidants, which help combat free radicals that can contribute to premature aging. These powerful compounds protect your skin from environmental damage, helping maintain a fresh, vibrant look.
- Hydrating Power: The famous ‘slime’ or mucilage in okra is a natural humectant. This means it attracts and locks moisture into your skin, providing intense hydration. Well-hydrated skin tends to look plumper, smoother, and more youthful.
- Potential for Skin Smoothing: Many people report that the natural compounds in okra, particularly its mucilage, can offer a temporary tightening and smoothing effect on the skin, contributing to a more even-toned and firmer appearance.
- Anti-inflammatory Properties: Okra has mild anti-inflammatory properties that can help soothe irritated skin, making it a gentle option for various skin types.
How to Make Your Own DIY Okra Gel
Making okra gel is simpler than you might think! Here’s a step-by-step guide to creating your very own ‘Okra Botox Gel’ for a radiant glow:
What You’ll Need:
- 5-7 fresh okra pods
- 1 cup filtered water
- A small saucepan
- A fine-mesh sieve or cheesecloth
- An airtight container (a small glass jar is perfect)
Step-by-Step Instructions:
- Wash and Slice: Thoroughly wash the okra pods to remove any dirt. Trim off the ends and slice the pods into small, thin rounds. The smaller the pieces, the more mucilage will be released.
- Simmer Gently: Place the sliced okra in a small saucepan and add 1 cup of filtered water. Bring the mixture to a gentle boil, then reduce the heat to a simmer.
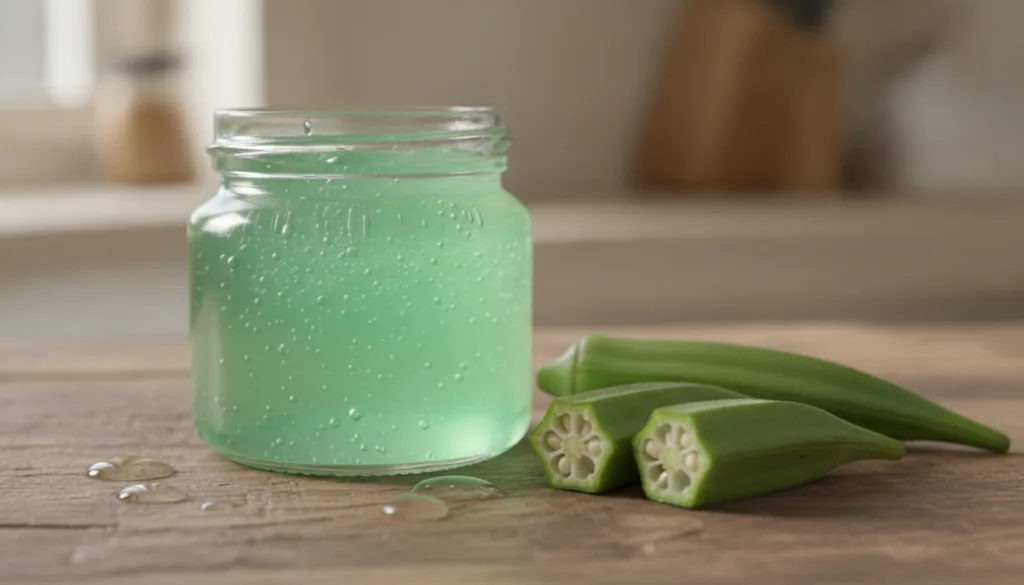
- Cook Until Soft: Let the okra simmer for about 10-15 minutes, or until the pods are very soft and the water has thickened into a viscous, gel-like consistency. You’ll notice the liquid becoming quite ‘slimy’ – that’s the good stuff!
- Cool Down: Remove the saucepan from the heat and let the mixture cool down completely. This is important before the next step.
- Strain the Gel: Once cool, carefully pour the okra mixture through a fine-mesh sieve or a piece of cheesecloth into your airtight container. Press down on the okra pieces to extract as much gel as possible. Discard the cooked okra solids.
- Store: Your DIY Okra Gel is ready! Transfer it to your clean, airtight container.
How to Incorporate Okra Gel into Your Routine
Once you have your homemade okra gel, incorporating it into your skincare routine is easy:
- As a Face Mask: Apply a generous layer of the okra gel to your clean face and neck. Leave it on for 15-20 minutes, then rinse off with lukewarm water. Your skin will feel incredibly soft and hydrated.
- As a Serum: For a lighter application, dab a small amount of the gel onto your face after cleansing and toning, before applying your moisturizer. It can provide an extra boost of hydration and a smoother-looking finish.
- Targeted Treatment: Focus on areas where you desire a smoother appearance, such as around the eyes or mouth, gently patting the gel into the skin.
Storage Tips:
Since this is a natural product without preservatives, it has a limited shelf life. Store your okra gel in the refrigerator for up to 3-5 days. If you notice any unusual smell or discoloration, it’s best to discard it and make a fresh batch.
Important Considerations Before You Try This:
- Patch Test: Always perform a patch test on a small, inconspicuous area of your skin (like behind your ear or on your inner arm) before applying any new DIY product to your face. Wait 24 hours to ensure you don’t have any adverse reactions.
- Consistency: The consistency of your gel might vary depending on the okra and cooking time. Don’t worry if it’s not perfectly thick – the beneficial properties are still there!
- Natural Alternative: Remember, while this DIY gel offers wonderful benefits for hydration and skin smoothness, it is a natural solution and should not be expected to replicate the dramatic effects of clinical procedures like Botox.
Embrace the Natural Glow!
Adding DIY Okra Gel to your beauty regimen is a fantastic way to nourish your skin with natural ingredients, offering a simple and affordable path to a more hydrated, smoother-looking, and glowing complexion. Give this natural hack a try and discover the potential of okra for yourself. Your skin will thank you for this refreshing, homemade treat!