Imagine waking up to skin that feels smoother, looks brighter, and glows naturally! ✨ We’re excited to share how you can make your very own DIY Overnight Skin Repair Cream using simple, natural ingredients you might already have at home. This ‘beauty bestie’ blend works its magic while you sleep, helping to rejuvenate your complexion and give you that fresh, youthful look. It’s time to tap into the power of natural remedies for visibly healthier skin, easily and affordably!
Why an Overnight DIY Cream is Your Skin’s New Best Friend
Our skin works hard all day, battling environmental stressors, makeup, and daily wear and tear. Nighttime is its golden opportunity to repair and regenerate. A dedicated overnight cream can supercharge this process. When you make it yourself, you get to choose exactly what goes into it, ensuring it’s free from harsh chemicals and full of nourishing goodness.
- Affordable & Accessible: Say goodbye to expensive store-bought creams. Most ingredients are budget-friendly and easy to find.
- Natural Goodness: You control the ingredients, opting for pure, skin-loving elements.
- Tailored to You: Customize the recipe to suit your skin type and concerns.
- Works While You Sleep: Maximizes your skin’s natural repair cycle for visible results by morning.
Simple Recipe: Your DIY Overnight Skin Repair Cream
Ready to whip up your own potion for youthful glow? Here’s a super easy recipe to get you started. This blend focuses on hydration, repair, and a touch of anti-aging magic.
What You’ll Need:
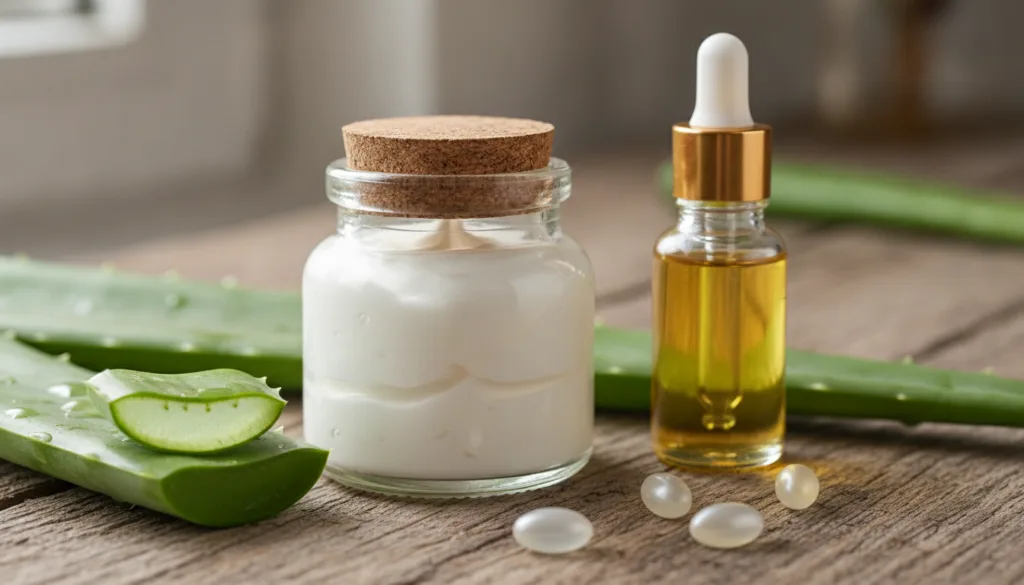
- 2 tablespoons Aloe Vera Gel (pure, 100% natural)
- 1 tablespoon Sweet Almond Oil (or Jojoba Oil for oily skin)
- 1 teaspoon Vitamin E Oil (from 2-3 capsules, just pierce and squeeze)
- 5-7 drops Lavender Essential Oil (optional, for soothing properties and a lovely scent)
- Small, clean, airtight container (glass jar recommended)
How to Make It:
- In your clean container, add the aloe vera gel.
- Pour in the sweet almond oil and vitamin E oil.
- If using, add the lavender essential oil.
- Stir all the ingredients thoroughly with a clean spoon or small spatula until well combined and you have a smooth, creamy consistency.
- Seal the container and your cream is ready!
How to Use Your DIY Overnight Cream for Best Results
Consistency is key when it comes to skincare, especially with an overnight repair cream. Here’s how to incorporate it into your nightly routine:
- Cleanse: Start with a clean face. Gently remove all makeup and impurities with your favorite cleanser.
- Tone (Optional): If you use a toner, apply it before your cream.
- Apply: Take a small pea-sized amount of your DIY cream. Warm it between your fingertips.
- Massage: Gently massage the cream onto your face and neck using upward, circular motions. Be extra gentle around the delicate eye area.
- Sweet Dreams: Let the cream absorb as you sleep, working its magic.
Pro Tip: Always do a patch test on a small area of your skin (like your inner arm) before applying any new product to your entire face, especially if you have sensitive skin or allergies.
Beyond the Cream: Maximizing Your Overnight Skin Repair
While this DIY cream is fantastic, a holistic approach will give you the best results for youthful, glowing skin:
- Hydrate from Within: Drink plenty of water throughout the day.
- Quality Sleep: Aim for 7-9 hours of restful sleep each night. Your skin repairs best when you’re well-rested.
- Clean Pillowcases: Change your pillowcase regularly to avoid transferring oils and bacteria to your skin.
- Healthy Diet: Fuel your body with antioxidant-rich fruits and vegetables.
Share Your Overnight Skin Love!
Making your own skincare is a beautiful journey towards healthier, more radiant skin. This DIY Overnight Skin Repair Cream is a simple, effective, and affordable way to give your complexion the love it deserves while you dream. Try it out and see the difference a little natural magic can make!
What’s your secret for overnight skin love? Share your tips below!