Imagine having a secret weapon in your kitchen, ready to transform any sweet craving into a gourmet delight. That’s exactly what our versatile mini tart shells offer! These perfectly golden, flaky shells are not just easy to make; they are the ultimate foundation for an endless array of desserts. Whether you’re dreaming of fresh fruit tarts or decadent chocolate mousse cups, mastering these mini tart shells will elevate your home baking game.
This guide will walk you through creating the perfect batch of these foundational shells and then inspire you with six delicious filling ideas. Get ready to impress your friends, delight your family, and satisfy your sweet tooth with these charming, bite-sized treats.
Quick Overview
- Main topic: Homemade mini tart shells and diverse filling ideas
- Best for: Dessert enthusiasts, home bakers, meal prep, entertaining
- Number of recipes: 7 (1 base shell + 6 filling ideas)
- Prep style: Baking, no-bake fillings
- Reader benefit: Versatile dessert solutions for any sweet craving
Recipe 1: Easy Versatile Mini Tart Shells

These mini tart shells are your canvas for countless dessert creations. Their crisp, buttery texture provides the perfect contrast to any creamy or fruity filling.
Servings: 12-16 mini tart shells
Prep time: 25 minutes + 30 minutes chill time
Cook / chill / rest time: 15-20 minutes bake time
Ingredients:
- 1 ¼ cups all-purpose flour
- ¼ teaspoon salt
- ½ cup (1 stick) very cold unsalted butter, cubed
- 3-5 tablespoons ice water (as needed)
Instructions:
- In a large bowl, whisk together the all-purpose flour and salt.
- Add the cubed cold butter to the flour mixture. Using a pastry blender, two knives, or your fingertips, cut the butter into the flour until the mixture resembles coarse crumbs with some pea-sized pieces of butter remaining.
- Gradually add the ice water, one tablespoon at a time, mixing gently until the dough just comes together. Be careful not to overmix; stop as soon as it forms a cohesive ball.
- Flatten the dough into a disk, wrap it tightly in plastic wrap, and refrigerate for at least 30 minutes. This helps the gluten relax and makes the dough easier to roll.
- Preheat your oven to 375°F (190°C). Lightly grease mini tart molds if they are not non-stick.
- On a lightly floured surface, roll out the chilled dough to about ⅛-inch thickness. Use a round cookie cutter slightly larger than your tart molds to cut out circles.
- Gently press each dough circle into a mini tart mold, molding it to the fluted edges. Prick the bottoms of the shells several times with a fork to prevent them from puffing up during baking.
- Bake for 15-20 minutes, or until the shells are golden brown and flaky.
- Remove from the oven and let cool completely in the molds before gently removing them.
Storage / Serving / Usage Note:
Store cooled, unfilled tart shells in an airtight container at room temperature for up to 3 days, or freeze for up to 1 month. Fill just before serving for best results.
Recipe 2: Fresh Berry Mini Tarts
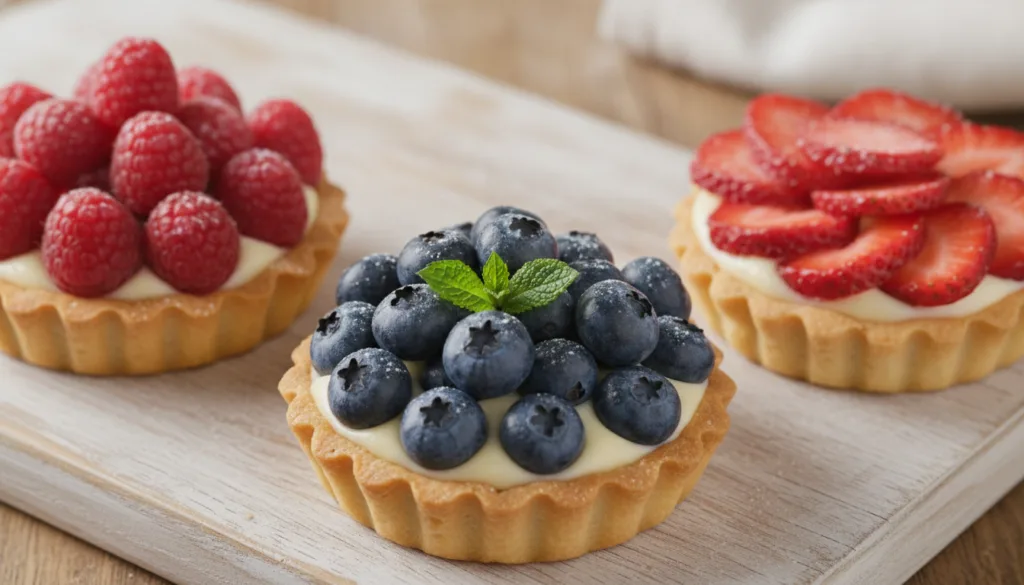
Embrace the simplicity and beauty of nature with these delightful fresh berry mini tarts. A simple vanilla cream base lets the vibrant flavors of seasonal berries shine.
Servings: Fills 12-16 mini tart shells
Prep time: 15 minutes
Cook / chill / rest time: 30 minutes chill time for cream (if homemade)
Ingredients:
- 1 batch Easy Versatile Mini Tart Shells, cooled
- 1 cup vanilla pastry cream (store-bought or homemade)
- 1 cup mixed fresh berries (strawberries, blueberries, raspberries)
- Optional: 1 tablespoon apricot jam, warmed (for glaze)
Instructions:
- If using homemade pastry cream, ensure it’s fully chilled and firm.
- Spoon or pipe about 1 tablespoon of vanilla pastry cream into each cooled mini tart shell, spreading it evenly.
- Arrange an assortment of fresh berries artfully on top of the pastry cream in each tart.
- Optional: Gently brush the berries with warmed apricot jam for a glossy finish.
Storage / Serving / Usage Note:
Serve immediately for the freshest taste. Leftovers can be refrigerated for up to 1 day, though shells may soften slightly.
Recipe 3: Decadent Chocolate Mousse Mini Tarts
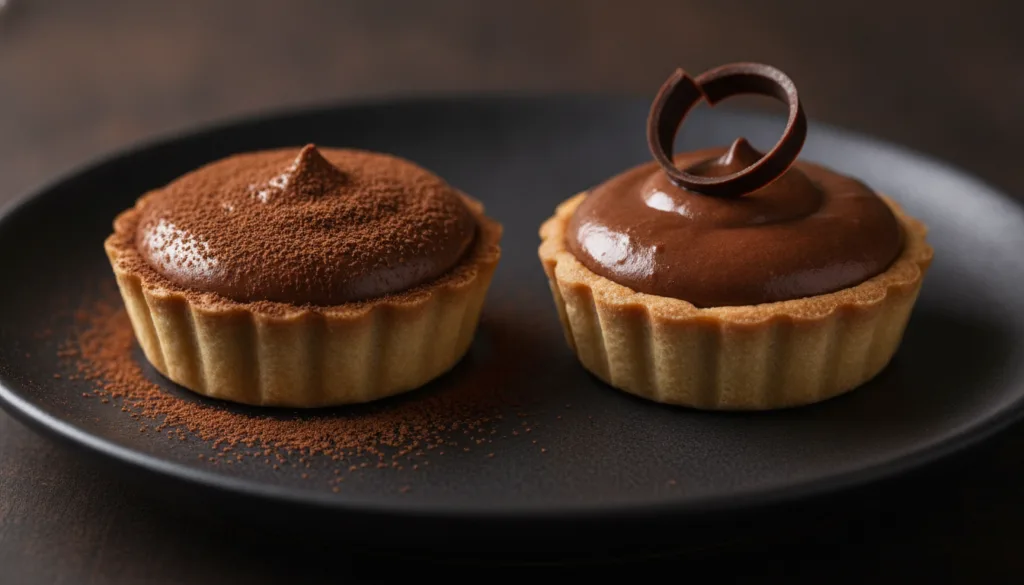
For the chocolate lovers, these decadent mini tarts feature a light yet rich chocolate mousse filling that melts in your mouth. A truly sophisticated bite-sized treat.
Servings: Fills 12-16 mini tart shells
Prep time: 20 minutes
Cook / chill / rest time: 1 hour chill time
Ingredients:
- 1 batch Easy Versatile Mini Tart Shells, cooled
- ½ cup heavy cream
- ¼ cup granulated sugar
- 2 tablespoons unsweetened cocoa powder
- ½ teaspoon vanilla extract
- Optional: Chocolate shavings or cocoa powder for garnish
Instructions:
- In a chilled mixing bowl, combine heavy cream, granulated sugar, unsweetened cocoa powder, and vanilla extract.
- Using an electric mixer, beat on medium-high speed until stiff peaks form. Be careful not to overbeat, or the cream may become grainy.
- Gently spoon or pipe the chocolate mousse into each cooled mini tart shell, filling it to the brim.
- Refrigerate the filled tarts for at least 1 hour to allow the mousse to set.
- Before serving, garnish with chocolate shavings or a light dusting of cocoa powder, if desired.
Storage / Serving / Usage Note:
Keep refrigerated until ready to serve. Best enjoyed within 1-2 days. The shells will start to soften after the first day.
Recipe 4: Classic Lemon Curd Mini Tarts
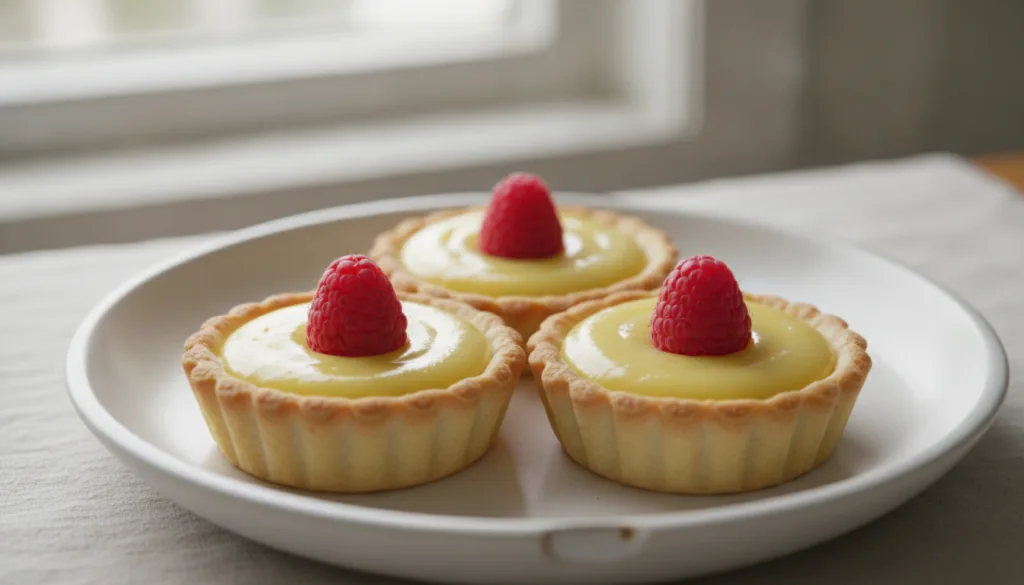
Bright, zesty, and incredibly refreshing, classic lemon curd mini tarts are a timeless dessert. The tangy lemon perfectly balances the buttery crust.
Servings: Fills 12-16 mini tart shells
Prep time: 10 minutes
Cook / chill / rest time: 1 hour chill time (if using homemade curd)
Ingredients:
- 1 batch Easy Versatile Mini Tart Shells, cooled
- 1 cup lemon curd (store-bought or homemade)
- Optional: Fresh mint leaves or candied lemon peel for garnish
Instructions:
- Ensure your lemon curd is thoroughly chilled and set.
- Spoon or pipe about 1 tablespoon of lemon curd into each cooled mini tart shell.
- Refrigerate for at least 30 minutes to ensure the curd is firm before serving.
- Garnish with a small fresh mint leaf or a sliver of candied lemon peel if desired.
Storage / Serving / Usage Note:
Store in an airtight container in the refrigerator for up to 3 days. Best served chilled.
Recipe 5: Rich Caramel Pecan Mini Tarts
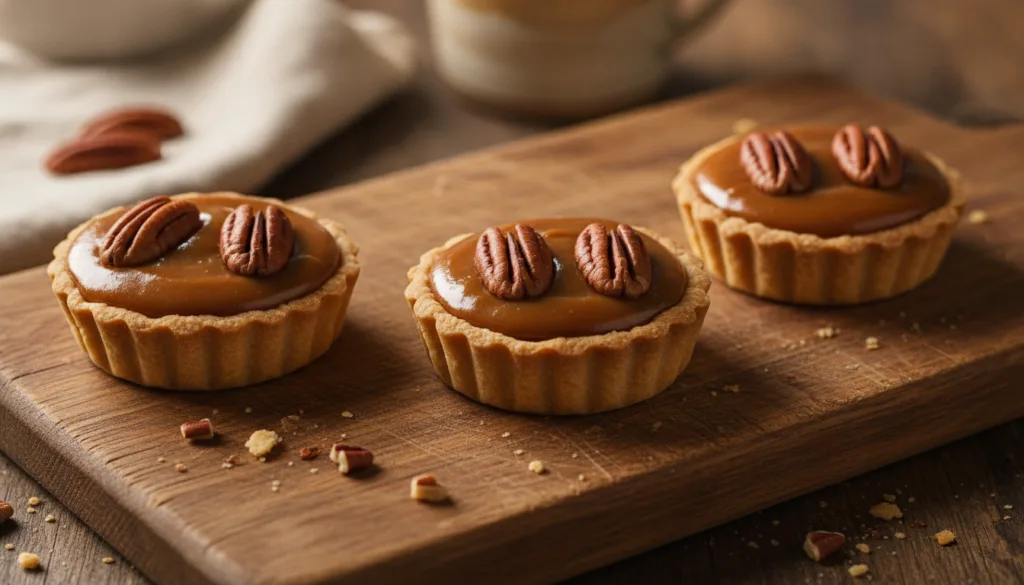
These mini caramel pecan tarts offer a delightful combination of sweet, chewy caramel and crunchy pecans, reminiscent of a classic pecan pie but in a charming bite-sized form.
Servings: Fills 12-16 mini tart shells
Prep time: 15 minutes
Cook / chill / rest time: 30 minutes chill time
Ingredients:
- 1 batch Easy Versatile Mini Tart Shells, cooled
- ½ cup pre-made caramel sauce (thick variety)
- ½ cup pecan halves, lightly toasted and chopped (reserve some for garnish)
- 1 tablespoon unsalted butter, melted (optional, for brushing)
Instructions:
- In a small bowl, gently warm the caramel sauce if it’s too thick to pour.
- Stir in most of the chopped toasted pecans into the caramel sauce, reserving some whole halves for garnish.
- Spoon approximately 1 tablespoon of the caramel pecan mixture into each cooled mini tart shell.
- Top each tart with a reserved pecan half for decoration.
- Refrigerate for at least 30 minutes to allow the caramel to set slightly before serving.
Storage / Serving / Usage Note:
Store at room temperature in an airtight container for up to 2 days. The shells stay crispier this way.
Recipe 6: Vanilla Pastry Cream & Fruit Mini Tarts
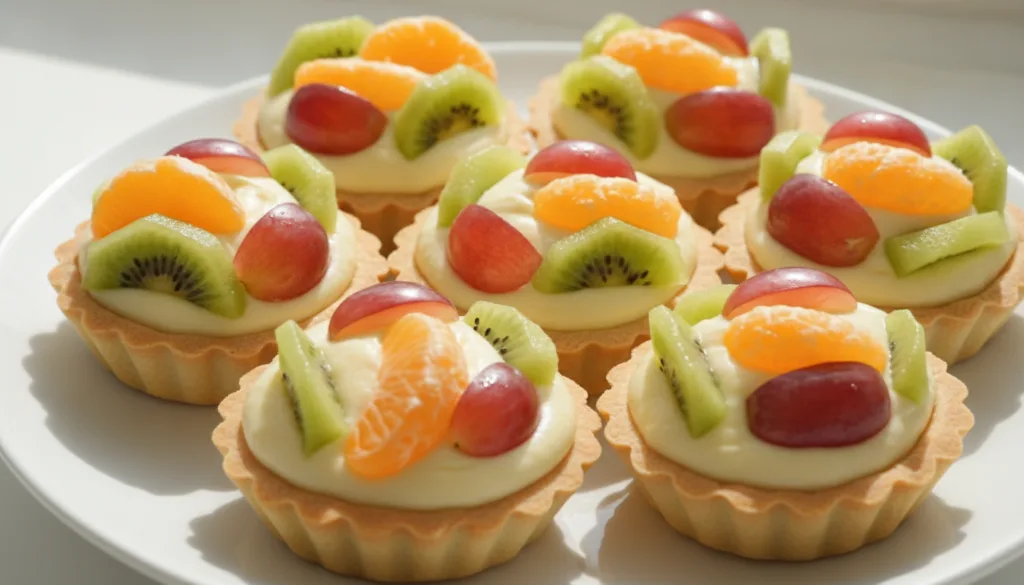
A timeless classic, these mini tarts combine silky vanilla pastry cream with a colorful array of fresh fruits, creating a dessert that’s as beautiful as it is delicious.
Servings: Fills 12-16 mini tart shells
Prep time: 20 minutes
Cook / chill / rest time: 1 hour chill time (for cream)
Ingredients:
- 1 batch Easy Versatile Mini Tart Shells, cooled
- 1 cup homemade or store-bought vanilla pastry cream, chilled
- 1 cup assorted fresh fruits, thinly sliced or small pieces (e.g., kiwi, mandarin oranges, grapes, blueberries)
- Optional: 1 tablespoon apricot glaze or warmed jelly for shine
Instructions:
- Ensure your vanilla pastry cream is thoroughly chilled and firm.
- Spoon or pipe about 1 tablespoon of vanilla pastry cream into each cooled mini tart shell, spreading it evenly.
- Artfully arrange the assorted fresh fruits on top of the pastry cream.
- Optional: Gently brush the fruit with a warmed apricot glaze for an attractive shine and to help preserve freshness.
Storage / Serving / Usage Note:
Serve immediately or refrigerate for up to 1 day. Best eaten fresh to enjoy the vibrant fruit.
Recipe 7: Tropical Coconut Cream Mini Tarts
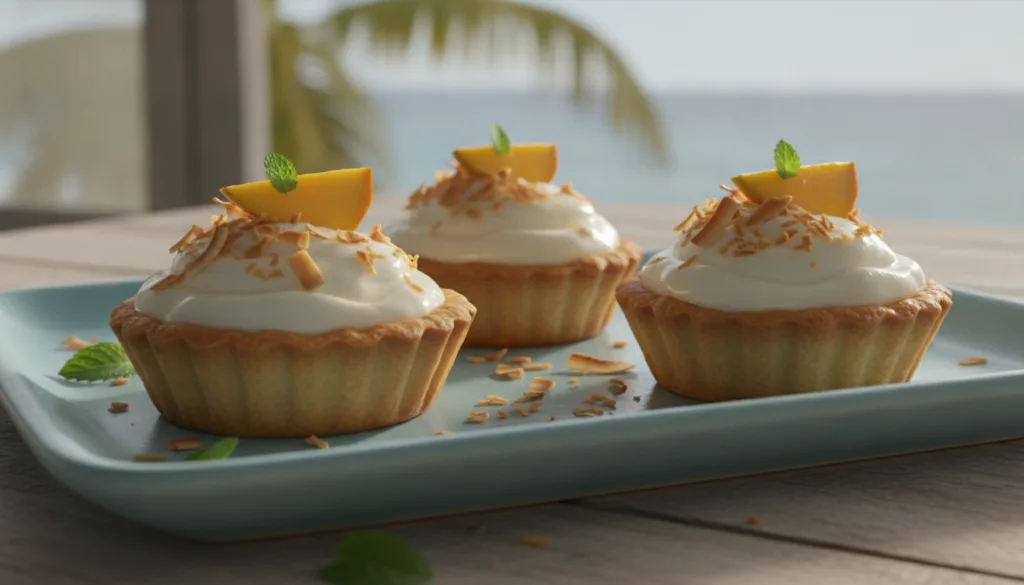
Transport your taste buds to a tropical paradise with these delightful coconut cream mini tarts. A light, dairy-free option that’s bursting with exotic flavor.
Servings: Fills 12-16 mini tart shells
Prep time: 20 minutes
Cook / chill / rest time: 2 hours chill time
Ingredients:
- 1 batch Easy Versatile Mini Tart Shells, cooled
- 1 (13.5 oz) can full-fat coconut milk, chilled overnight
- ¼ cup powdered sugar
- ½ teaspoon vanilla extract
- Optional: Toasted coconut flakes, fresh mango or passion fruit for garnish
Instructions:
- Chill the can of full-fat coconut milk in the refrigerator overnight. This allows the cream to separate and solidify at the top.
- Carefully open the can without shaking it. Scoop out the thick coconut cream from the top, leaving the liquid behind.
- In a mixing bowl, combine the thick coconut cream, powdered sugar, and vanilla extract.
- Using an electric mixer, beat on medium-high speed until light and fluffy, about 2-3 minutes.
- Spoon or pipe the coconut cream filling into each cooled mini tart shell.
- Refrigerate for at least 2 hours to allow the coconut cream to set firmly.
- Before serving, garnish with toasted coconut flakes or small pieces of fresh mango or passion fruit.
Storage / Serving / Usage Note:
Keep refrigerated. Best enjoyed within 2 days. The coconut cream may soften if left out at room temperature for too long.
Simple Tips for Best Results
- Keep Butter Cold: For the flakiest tart shells, ensure your butter is very cold. This creates pockets of steam in the oven, leading to a tender, flaky crust.
- Don’t Overmix: Overworking the dough can develop the gluten too much, resulting in tough shells. Mix just until the dough comes together.
- Chill the Dough: Don’t skip the chilling step! It makes the dough easier to handle and prevents shrinkage during baking.
- Prick the Shells: Always prick the bottom of the tart shells with a fork before baking to prevent air bubbles from forming and creating puffy crusts.
- Cool Completely: Allow your tart shells to cool entirely before filling. Warm shells can make fillings watery or cause them to curdle.
- Fill Just Before Serving: To maintain the crispness of the shells, fill them no more than a few hours before serving, especially with moist fillings like fruit or cream.
FAQ
How can I prevent my tart shells from shrinking?
To minimize shrinkage, ensure your butter is very cold, don’t overwork the dough, and allow ample chilling time (at least 30 minutes, or even an hour) before rolling and baking.
Can I make mini tart shells ahead of time?
Absolutely! Baked, unfilled tart shells can be stored in an airtight container at room temperature for 2-3 days, or frozen for up to a month. This makes them perfect for meal prep and spontaneous dessert needs.
What are other popular fillings for mini tart shells?
Beyond the recipes here, consider fillings like chocolate ganache, lemon meringue, peanut butter cream, pumpkin spice, or even a savory quiche filling for a different kind of treat.
Final Thoughts
Mastering these versatile mini tart shells opens up a world of delightful dessert possibilities. From the simplest fresh fruit tart to a more indulgent chocolate creation, these golden, flaky shells are your perfect starting point. Experiment with different flavors, seasonal fruits, and creative garnishes to make each tart uniquely yours. Happy baking!