There’s nothing quite like the satisfaction of harvesting fresh produce right from your own garden. And when it comes to versatile, flavorful, and incredibly healthy ingredients, ginger takes center stage! Imagine having a continuous supply of this zesty root for your cooking, teas, or even homemade remedies. Good news – growing ginger at home is much simpler than you might think!
Here at Garden – L. Quyên, we believe in making gardening accessible and enjoyable for everyone. That’s why we’ve put together a friendly, step-by-step guide to help you prepare fresh ginger for planting and get your very own ginger patch thriving.
Why Grow Your Own Ginger?
Beyond the undeniable freshness, homegrown ginger offers numerous benefits:
- Exceptional Flavor: Homegrown ginger often boasts a more potent and vibrant flavor compared to store-bought varieties.
- Organic Control: You control what goes into your soil, ensuring your ginger is free from unwanted chemicals.
- Cost-Effective: A single rhizome can yield many plants, saving you money in the long run.
- Therapeutic Hobby: Gardening is a wonderful stress-reliever and connects you with nature.
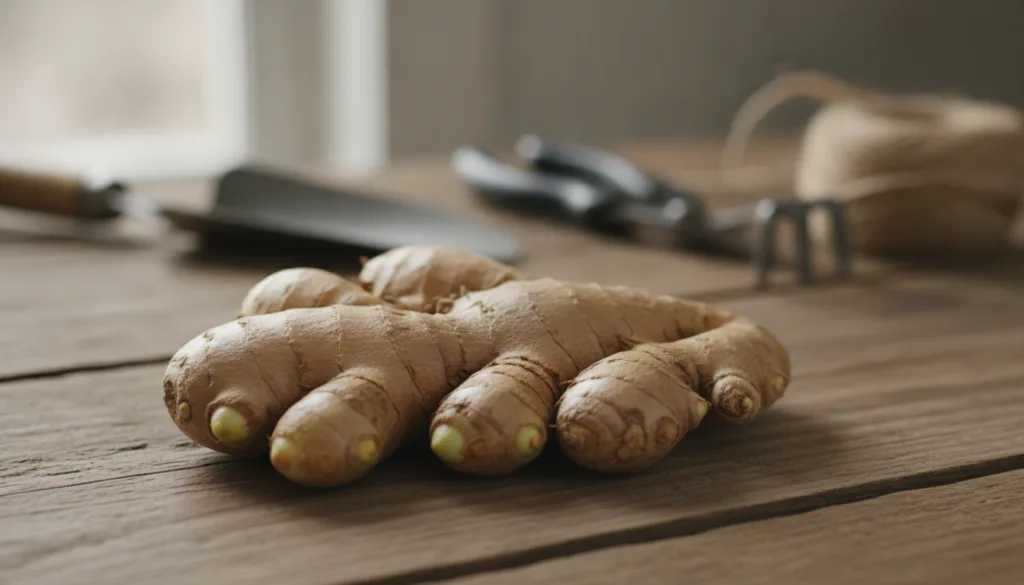
Step 1: Choosing Your Ginger Rhizome (The ‘Seed’ Ginger)
First things first, you need a good ‘seed’ to start with. You might be surprised to learn that you can often find suitable ginger right at your local grocery store!
What to Look For:
- Plump and Firm: Select a piece of ginger that feels heavy for its size and is firm to the touch. Avoid any that are soft, shriveled, or moldy.
- Visible ‘Eyes’ or Buds: Just like potatoes, ginger rhizomes have small bumps or ‘eyes’ from which new shoots will emerge. Look for pieces with at least a few prominent, green-tipped ‘eyes’.
- Avoid Sprayed Ginger: Some commercial ginger is treated with a growth inhibitor. If possible, opt for organic ginger, which is less likely to be treated. Your local garden center might also carry untreated ginger specifically for planting.
Step 2: Preparing Your Ginger for Planting
Once you have your ideal ginger rhizome, it’s time for a little prep work to encourage successful growth.
Cutting the Rhizome:
- If your ginger piece is large, you can cut it into smaller sections. Each section should be at least 1-2 inches long and have at least one or two ‘eyes’.
- Use a clean, sharp knife to make your cuts.
Curing the Cuts:
- After cutting, it’s crucial to let the cut surfaces dry and heal for a day or two. This process, called ‘curing,’ helps prevent rot once the ginger is planted.
- Simply leave the cut ginger pieces in a dry, airy spot away from direct sunlight.
Gardener’s Tip: Some gardeners like to soak their ginger in warm water overnight before planting to encourage the ‘eyes’ to sprout faster. While not strictly necessary if your ginger already has visible eyes, it can give them a head start!
Step 3: Sprouting Your Ginger (Optional, but Recommended)
While you can plant cured ginger directly, many gardeners prefer to sprout it first. This ensures you’re planting viable pieces and can speed up the initial growth.
How to Sprout:
- Place your cured ginger pieces in a shallow tray or on a plate with a slightly moist paper towel.
- Cover the ginger loosely with another moist paper towel or plastic wrap to create a humid environment.
- Keep the tray in a warm spot (around 70-75°F or 21-24°C). A sunny windowsill (but not direct harsh sun) or on top of a refrigerator can work well.
- Mist the paper towels regularly to keep them moist, but not soggy.
- Within a few weeks, you should start to see small green shoots emerging from the ‘eyes’.
Step 4: Getting Ready to Plant
Now that your ginger is prepped and possibly sprouting, let’s talk about its new home.
What You’ll Need:
- Container: Ginger roots grow horizontally, so choose a wide, shallow pot rather than a deep, narrow one. A pot at least 12-15 inches in diameter and 8-10 inches deep is ideal for one or two pieces. Ensure it has good drainage holes.
- Soil: Ginger thrives in rich, loose, well-draining soil. A good quality potting mix amended with compost or well-rotted manure will provide the necessary nutrients and drainage.
- Location: Ginger loves warmth and humidity but prefers partial shade. Direct, intense sunlight can scorch its leaves. A spot where it gets morning sun and afternoon shade is perfect. If growing indoors, place it near a window that gets bright, indirect light.
Ready to Plant!
Once your ginger has sprouted (or is simply cured and ready), plant each piece about 1 inch deep with the ‘eyes’ facing upwards. Cover lightly with soil and water thoroughly. Keep the soil consistently moist but never waterlogged. With warmth, humidity, and a little patience, you’ll soon have beautiful ginger plants flourishing in your garden or home!
We hope this guide inspires you to try growing your own ginger. It’s a rewarding experience that adds a touch of freshness to your life. Happy gardening!