Are you looking for a delightful dessert that looks impressive but is surprisingly simple to make? A layered creamy treat is the perfect solution for satisfying your sweet tooth or impressing guests without turning on the oven. This DIY guide will show you how to create a luscious, no-bake cream that forms the heart of any beautiful layered dessert, offering a customizable and truly satisfying experience.
What You’ll Need
For the Creamy Layer:
- 1 (8 oz) package cream cheese, softened
- 1/2 cup powdered sugar (confectioners’ sugar)
- 1 teaspoon vanilla extract
- 1 cup heavy cream, very cold
Tools:
- Large mixing bowl
- Electric mixer (hand mixer or stand mixer)
- Rubber spatula
- Measuring cups and spoons
- 2-4 clear dessert glasses or small bowls (depending on size)
- Spoon or small ladle for layering
For the Layers (Suggestions – choose 2-3 of these):
- Crushed cookies (e.g., graham crackers, vanilla wafers, chocolate cookies)
- Fresh berries or sliced fruit (strawberries, raspberries, blueberries, bananas)
- Cubed cake or brownies
- Granola
- Chocolate chips or shavings
- Caramel or chocolate sauce
Why This DIY Can Be Useful
Creating your own creamy layer allows for complete control over the ingredients and flavor, ensuring a fresh taste every time. This no-bake method means less time in the kitchen, making it ideal for busy schedules or when you want a quick yet elegant dessert. The rich texture of the cream cheese combined with the lightness of whipped heavy cream provides a delightful contrast to fruit or crunchy elements, elevating a simple dessert into something special.
How to Make It
- Prepare the Cream Cheese: In a large mixing bowl, add the softened cream cheese. Beat with an electric mixer on medium speed until smooth and creamy, about 1-2 minutes.
- Add Sweetener and Flavor: Gradually add the powdered sugar to the cream cheese, beating until well combined and smooth. Stir in the vanilla extract.
- Whip the Heavy Cream: In a separate, very cold bowl (if possible), pour in the cold heavy cream. Using clean beaters, whip the heavy cream on high speed until soft peaks form. Be careful not to overbeat, as it can turn lumpy.
- Combine: Gently fold the whipped cream into the cream cheese mixture using a rubber spatula. Mix until just combined and no streaks of cream cheese remain. The mixture should be smooth, thick, and pourable. If it seems too thick to pour smoothly, you can add a tablespoon or two of milk to reach your desired consistency.
- Chill: For best results, cover the cream mixture and refrigerate for at least 30 minutes to allow it to firm up slightly, making it easier to layer.
How to Use It
Layering is where your dessert truly comes to life!
- Start with a Base: Spoon a layer of your chosen base ingredient (like crushed cookies or cubed cake) into the bottom of your clear dessert glasses. This provides stability and a textural contrast.
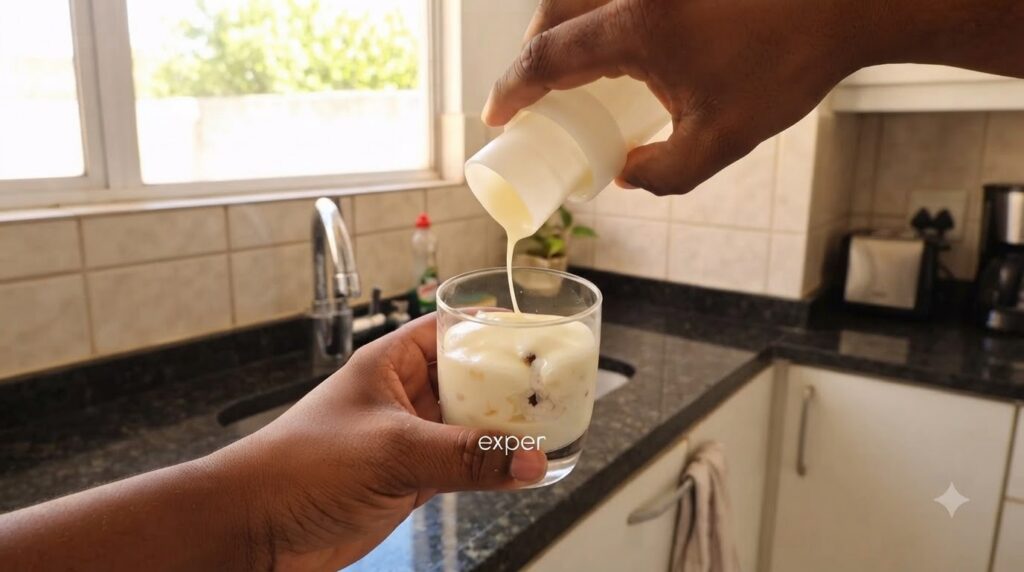
- Add the Cream: Carefully pour or spoon a layer of your prepared no-bake cream over the base layer. You can use a spoon or a small ladle for a neater pour, tilting the glass slightly if needed to spread the cream evenly.
- Introduce Mid-Layers: Add a layer of fresh fruit, granola, or another contrasting element on top of the cream.
- Repeat: Continue alternating layers of your base/mid-layers and the creamy mixture until your glass is almost full, finishing with a layer of cream or a decorative topping like a whole berry or chocolate shavings.
- Chill Before Serving: Refrigerate the assembled desserts for at least 1-2 hours before serving. This allows the layers to set and the flavors to meld beautifully.
What to Expect
You can expect a rich, creamy, and satisfying dessert with distinct layers of flavor and texture. The no-bake cream will be smooth and decadent, balancing the sweetness with a slight tang from the cream cheese. The overall result is a beautiful individual dessert that tastes incredibly fresh and homemade, providing a wonderful end to any meal or a delightful afternoon treat.
Helpful Tips
- Cold Ingredients are Key: Ensure your heavy cream is very cold before whipping; it whips up better and faster.
- Don’t Overbeat: Stop mixing the heavy cream as soon as soft peaks form to avoid a grainy texture.
- Experiment with Flavors: You can easily change the flavor profile of the cream by adding a different extract (like almond or peppermint), a bit of lemon zest, or cocoa powder.
- Presentation Matters: Use clear glasses to showcase the beautiful layers you’ve created. A garnish on top, like a sprig of mint or a dusting of cocoa, adds a professional touch.
- Make Ahead: These layered desserts are perfect for making a day in advance, as the flavors often improve with a little time in the refrigerator.
Important Notes / Safety
- Always keep cream-based desserts refrigerated. They should not be left at room temperature for extended periods.
- Adjust the amount of powdered sugar to your personal preference for sweetness.
- If using fresh fruit, add it closer to serving time if it tends to brown quickly (like sliced apples or bananas) or can make other layers soggy.
- Ensure your cream cheese is fully softened to avoid lumps in your cream mixture. You can soften it quickly by unwrapping it and microwaving it for 15-20 seconds.