Are you tired of your plants wilting between waterings, or simply looking for an ingenious way to garden more efficiently and sustainably? We’ve got a fantastic solution for you: DIY self-watering planters made from recycled plastic bottles! This project is not only incredibly easy and budget-friendly, but it also helps reduce waste and ensures your plants get a consistent supply of moisture. Imagine fresh cherry tomatoes, fragrant basil, or crisp green onions thriving right on your windowsill or patio with minimal effort!
Why Self-Watering Planters Are a Game-Changer
For many gardeners, especially those with busy schedules or a tendency to forget watering, self-watering planters are a true blessing. Here’s why they’re so effective:
- Consistent Moisture: Plants receive a steady supply of water from a reservoir below, preventing both over-watering and under-watering.
- Less Frequent Watering: The reservoir holds enough water to last several days, or even weeks, depending on the plant and climate, freeing you from daily watering duties.
- Healthy Roots: Roots grow towards the water source, encouraging strong, deep root systems.
- Reduced Pests & Diseases: Bottom-watering keeps foliage dry, which can help prevent fungal diseases and deter some pests.
- Sustainable & Eco-Friendly: By repurposing plastic bottles, you’re giving them a second life and diverting them from landfills.
What You’ll Need: Simple Supplies for a Thriving Garden
Gathering your materials is the first step to creating your sustainable garden. Most of these items you might already have around your home!
- Empty plastic bottles (1.5L or 2L soda bottles work great)
- Sharp scissors or a utility knife (adult supervision recommended)
- Cotton string, old shoelace, or strips of burlap (for the wick)
- Potting mix
- Seeds or small plant starts
- Water
Step-by-Step Guide: Crafting Your Planter
Let’s turn those plastic bottles into a productive mini-garden!
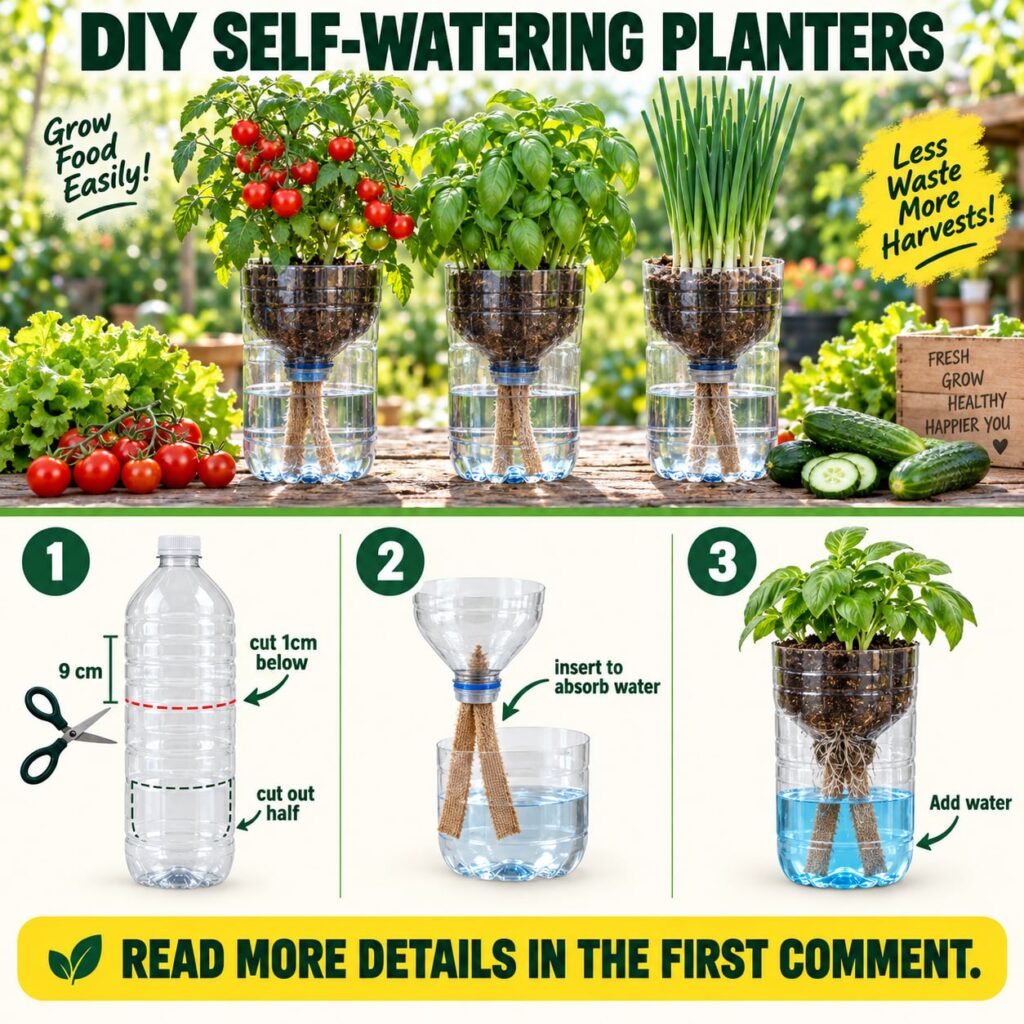
Step 1: Prepare Your Bottle
- Wash and Dry: Thoroughly clean your plastic bottle and remove any labels.
- Cut the Bottle: Using your scissors or utility knife, carefully cut the bottle about one-third of the way down from the top. The top section will become your planting pot, and the bottom section will be the water reservoir.
Step 2: Insert the Wick
- Prepare the Wick: Cut a piece of cotton string, an old shoelace, or a strip of burlap approximately 8-12 inches long.
- Thread the Wick: Flip the top section of the bottle (the ‘pot’ part) upside down. Thread your wick through the bottle’s opening (the bottleneck) so that a few inches extend into the top section and the rest hangs down.
Step 3: Assemble and Plant
- Add Potting Mix: Fill the top section of the bottle with your potting mix. Make sure the wick is centered and extends into the soil.
- Plant Your Seeds/Starts: Plant your desired seeds or small plant starts into the potting mix.
- Add Water to Reservoir: Fill the bottom section of the bottle (your reservoir) with water.
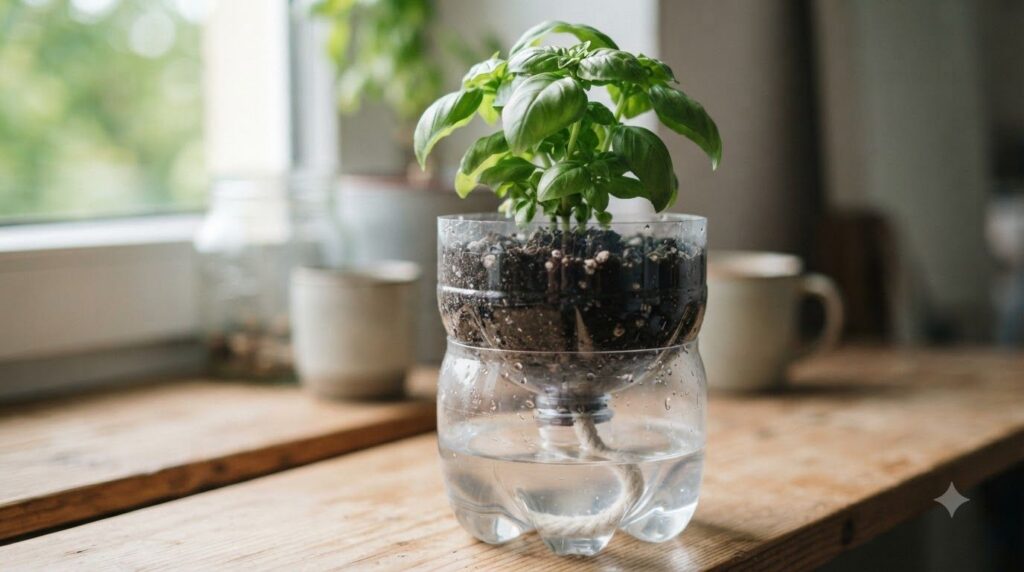
- Combine Sections: Invert the top section (with soil and plant) and place it into the bottom section (with water), ensuring the wick dangles into the water.
What to Plant in Your Self-Watering Bottles
These planters are perfect for a variety of small plants and herbs. Here are some excellent choices:
- Herbs: Basil, mint, parsley, cilantro, chives
- Leafy Greens: Lettuce, spinach, arugula, green onions
- Small Vegetables: Cherry tomatoes, small peppers (if kept compact)
- Flowers: Marigolds, impatiens, petunias (for a splash of color!)
Remember to choose plants that don’t grow too large, as the bottle size will restrict root growth.
Tips for Success with Your DIY Planters
- Choose the Right Spot: Place your planters in an area that gets adequate sunlight for your chosen plants.
- Monitor Water Levels: Check the reservoir every few days and refill as needed. The frequency will depend on the plant’s water needs and ambient temperature.
- Fertilize Sparingly: Since nutrients can leach out with constant watering, use a diluted liquid fertilizer every few weeks.
- Clean Regularly: Occasionally, you might want to rinse out the reservoir to prevent algae growth.
- Experiment: Don’t be afraid to try different wick materials or bottle sizes to find what works best for your specific needs and plants.
Grow More, Waste Less: The Sustainable Gardener’s Ethos
This simple DIY project embodies the spirit of sustainable gardening. By transforming plastic waste into a productive growing system, you’re making a positive impact on the environment while enjoying the bounty of your own efforts. It’s an empowering way to connect with nature, even if you have limited space or time.
Ready to start your own home harvest? Dive into this fun and rewarding project and watch your garden flourish with less fuss and more joy. Happy gardening!