Ready to unlock your natural glow, bestie? ✨ We’re spilling the secret to radiant skin with these amazing DIY baby oil serums! Infused with the goodness of turmeric, rice, and cloves, they’re like a little magic potion for a brighter, healthier you. The best part? They’re so simple to whip up right at home!
Natural beauty doesn’t have to be complicated or expensive. Sometimes, the most powerful ingredients are already in your pantry! Today, we’re going to show you how to transform simple baby oil into a personalized skincare elixir using ingredients known for their incredible skin benefits.

Why DIY Baby Oil Serums?
- Affordable & Accessible: You likely have most ingredients at home, saving you money on expensive store-bought serums.
- Customizable: Tailor your serum to your specific skin needs by choosing your favorite natural enhancers.
- Natural Goodness: Avoid harsh chemicals and embrace the power of nature.
- Gentle Base: Baby oil is known for its mildness, making it a great base for sensitive skin (always patch test first!).
Spotlight on Our Star Ingredients
Turmeric: The Golden Healer
This vibrant spice isn’t just for cooking! Turmeric is celebrated in traditional beauty practices for its:
- Anti-inflammatory properties: Helps calm irritated skin.
- Antioxidant power: Fights free radicals that can cause premature aging.
- Brightening effects: Can help reduce the appearance of dark spots and hyperpigmentation, giving you that coveted glow.
Rice: The Ancient Beauty Secret
Rice, especially in the form of rice water or ground rice, has been a staple in Asian beauty for centuries:
- Skin Softening: Helps to smooth and soften skin texture.
- Brightening: Contains compounds that can naturally brighten the complexion.
- Anti-aging: Rich in antioxidants that can protect skin cells.
Cloves: The Aromatic Powerhouse
More than just a fragrant spice, cloves offer some fantastic benefits for your skin:
- Antiseptic Properties: Can help cleanse the skin and keep breakouts at bay.
- Antioxidants: Protect the skin from environmental damage.
- Circulation Boost: Can gently stimulate blood flow for a healthy, rosy appearance.
How to Make Your DIY Baby Oil Serums
Making these serums is super easy! You’ll need a clean, empty bottle (like a small dropper bottle or an old serum bottle) for each recipe.
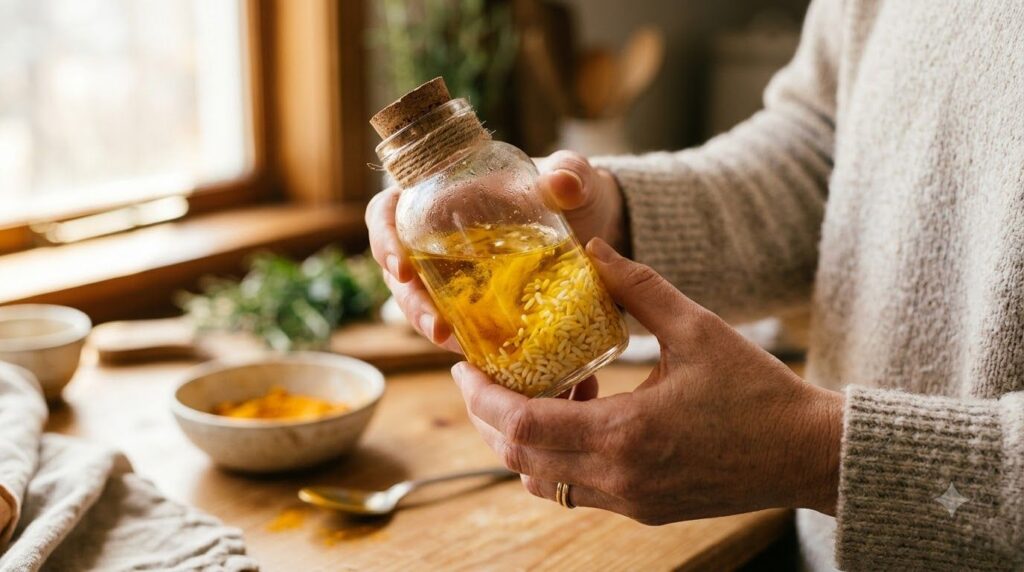
1. Turmeric & Rice Glow Serum
What You’ll Need:
- 1/4 cup baby oil
- 1 teaspoon organic turmeric powder or a few slices of fresh turmeric root
- 1 tablespoon uncooked rice (white or brown)
- Small, clean glass bottle with a dropper or lid
Instructions:
- Carefully pour the baby oil into your clean glass bottle.
- Add the turmeric powder (or fresh turmeric slices) and uncooked rice to the bottle.
- Close the bottle tightly and shake well to combine all ingredients.
- Store the bottle in a cool, dark place for at least 3-5 days, shaking it once a day. This allows the ingredients to infuse into the oil.
- After infusion, you can strain the oil through a fine mesh sieve or cheesecloth to remove the solids, or leave them in for a stronger infusion.
2. Clove & Rice Clarifying Serum
What You’ll Need:
- 1/4 cup baby oil
- 1 teaspoon whole cloves
- 1 tablespoon uncooked rice (white or brown)
- Small, clean glass bottle with a dropper or lid
Instructions:
- Pour the baby oil into your clean glass bottle.
- Add the whole cloves and uncooked rice to the bottle.
- Close the bottle tightly and shake well.
- Store in a cool, dark place for at least 3-5 days, shaking daily to help with infusion.
- Strain the oil to remove the cloves and rice, or leave them in if preferred.
How to Use Your DIY Serums for Best Results
After your serum has infused and is ready to use, here’s how to incorporate it into your routine:
- Patch Test First: Always apply a tiny amount to a small area of your skin (like behind your ear or on your inner arm) and wait 24 hours to ensure no irritation.
- Cleanse: Start with a clean face.
- Tone (Optional): Apply your favorite toner if you use one.
- Apply Serum: Take 2-3 drops of your DIY baby oil serum and gently massage it onto your face and neck. A little goes a long way!
- Moisturize: Follow with your regular moisturizer to lock in all the goodness.
- Nighttime Use: These serums are generally best used at night, allowing them to work their magic while you sleep.
Important Tips for Your DIY Journey
- Storage: Keep your serums in a cool, dark place away from direct sunlight to prolong their shelf life. They typically last a few weeks to a month. If you notice any change in smell or appearance, it’s best to discard them.
- Consistency is Key: For best results, incorporate these serums consistently into your skincare routine.
- Listen to Your Skin: Everyone’s skin is different. If you experience any redness or irritation, discontinue use.
There you have it, bestie! Two simple, natural, and affordable ways to boost your skin’s radiance right from your own kitchen. Giving your skin a little extra love with these homemade serums can make a big difference in achieving that healthy, natural glow.
Tell us, what natural ingredients do you love for your skin? Share your favorite DIY beauty hacks in the comments below!