Dreaming of smoother, more youthful-looking skin? You’re not alone! Many of us search for effective yet affordable ways to tackle common skin concerns like fine lines, wrinkles, and dullness. What if we told you that the secret to a radiant, healthy glow might be hiding in your medicine cabinet and nursery?
This simple DIY gel, crafted with common household ingredients like aspirin and baby oil, offers a gentle yet powerful way to rejuvenate your complexion right from the comfort of your home. Get ready to discover a natural approach to achieving that desired smooth, youthful look!
Why Aspirin and Baby Oil? The Magic Behind the Mix
Before we dive into the recipe, let’s understand why these two humble ingredients are a dynamic duo for your skin:
Aspirin: Your Skin’s Gentle Exfoliator
- Salicylic Acid Power: Aspirin contains acetylsalicylic acid, which is closely related to salicylic acid – a beta-hydroxy acid (BHA) widely used in professional skincare. Salicylic acid is renowned for its ability to penetrate oil, making it excellent for deep-cleaning pores.
- Exfoliation and Renewal: It gently exfoliates the skin, removing dead skin cells that can contribute to a dull complexion and clogged pores. This process reveals fresher, smoother skin underneath.
- Anti-Inflammatory Benefits: Aspirin also has anti-inflammatory properties, which can help calm redness and soothe irritated skin, making it beneficial for those struggling with breakouts or general skin inflammation.
- Targeting Wrinkles: By promoting cell turnover and keeping pores clear, aspirin helps to improve skin texture and can minimize the appearance of fine lines and wrinkles over time.
Baby Oil: The Ultimate Moisturizer
- Pure Hydration: Baby oil is primarily mineral oil, an occlusive ingredient. This means it creates a protective barrier on the skin’s surface, locking in moisture and preventing water loss.
- Soft and Supple Skin: By keeping the skin intensely hydrated, baby oil helps to maintain its elasticity and suppleness, reducing the prominence of dry patches and contributing to a smoother feel.
- Gentle and Hypoallergenic: Designed for delicate baby skin, it’s typically very gentle and non-comedogenic for most adults, making it suitable for sensitive skin types.
Your DIY Aspirin and Baby Oil Smoothing Gel Recipe
Ready to create your own skin-renewing elixir? Here’s how!
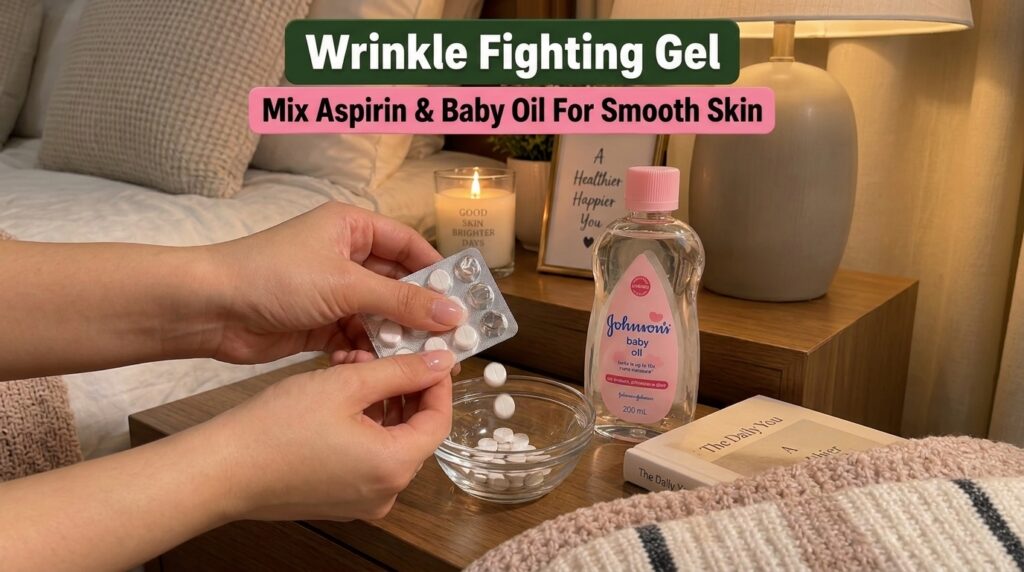
Ingredients You’ll Need:
- 5-6 uncoated aspirin tablets (regular strength)
- 1-2 tablespoons of Johnson’s baby oil (or any pure mineral oil)
- 1 teaspoon of water (filtered or distilled is best)
- A small, clean bowl (glass or ceramic)
- A spoon or spatula for mixing
Step-by-Step Instructions:
- Crush the Aspirin: Place the 5-6 aspirin tablets into your clean bowl. Use the back of your spoon to crush them into a fine powder. Make sure there are no large chunks left.
- Add Water: Add 1 teaspoon of water to the aspirin powder. Mix well until it forms a thick paste. If it’s too dry, add a few more drops of water, but aim for a thick consistency.
- Incorporate Baby Oil: Now, add 1 tablespoon of baby oil to the paste. Mix thoroughly until all ingredients are well combined and you have a smooth, gel-like consistency.
- Adjust Consistency (Optional): If you prefer a thinner gel, add a few more drops of baby oil. For a thicker mask, you can add a tiny bit more crushed aspirin (but always ensure it’s fully dissolved).
- Store: Transfer your DIY gel into a small, airtight container. It’s best to make small batches and use them within 3-5 days, storing any excess in the refrigerator.
How to Use Your DIY Smoothing Gel
For best results and to ensure your skin loves this new treatment, follow these application tips:
- Patch Test First: Always perform a patch test on a small, inconspicuous area of your skin (like behind your ear or on your inner arm) 24 hours before full application, especially if you have sensitive skin.
- Cleanse Your Face: Start with a clean, dry face. Remove all makeup and wash your face with a gentle cleanser.
- Apply the Gel: Using your fingertips or a soft brush, apply a thin, even layer of the aspirin and baby oil gel to your face, avoiding the delicate eye area and lips.
- Relax and Wait: Leave the gel on for 10-15 minutes. You might feel a slight tingling sensation, which is normal, but if you experience any burning or discomfort, rinse it off immediately.
- Rinse Thoroughly: Gently rinse your face with lukewarm water. You can use a soft cloth to help remove any residue.
- Moisturize: Follow up with your favorite lightweight moisturizer to lock in the hydration.
- Frequency: For most skin types, using this gel 1-2 times a week is sufficient. Over-exfoliation can irritate the skin.
Important Tips for Best Results and Safety
- Sun Protection is Key: Salicylic acid can increase your skin’s sensitivity to the sun. Always use a broad-spectrum sunscreen (SPF 30 or higher) daily, especially when using this treatment, and limit sun exposure.
- Avoid Broken Skin: Do not apply this gel to broken, irritated, or freshly waxed skin.
- Pregnancy and Medical Conditions: If you are pregnant, breastfeeding, or have any medical conditions (especially aspirin allergies or sensitivities), consult with your doctor before using this DIY treatment.
- Listen to Your Skin: Everyone’s skin is different. If you notice any prolonged redness, dryness, or irritation, discontinue use.
Embrace Your Natural Glow
This simple, natural aspirin and baby oil gel offers an accessible way to boost your skin’s smoothness and radiance. By harnessing the exfoliating power of aspirin and the moisturizing benefits of baby oil, you can work towards achieving that healthy, youthful glow you’ve been dreaming of, without breaking the bank.
Give it a try and share your glowing results with us!