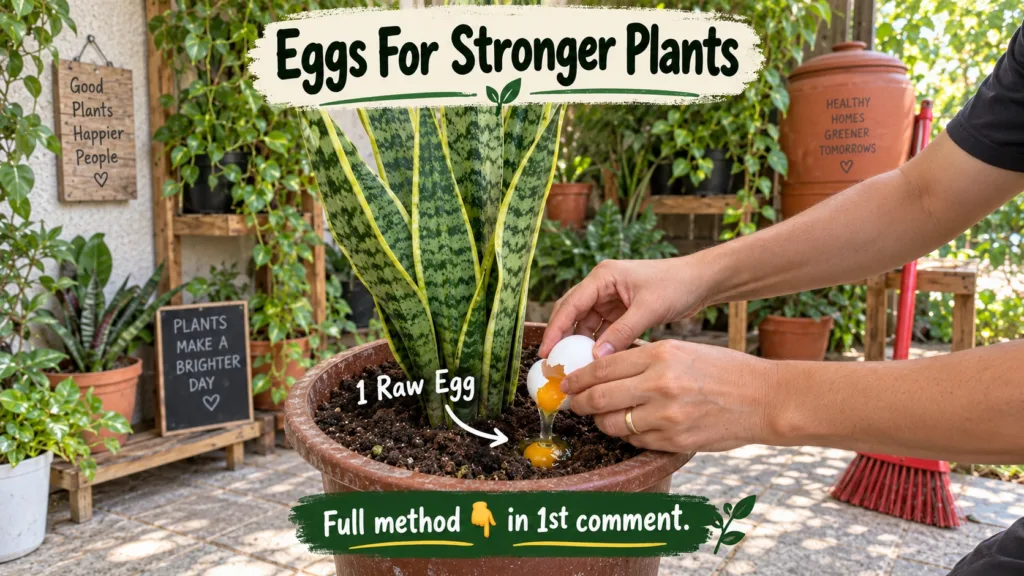
Are your beloved houseplants looking a little lackluster? Over time, the soil in potted plants can become depleted of essential nutrients, leading to slower growth and duller foliage. While commercial fertilizers are an option, there’s a simple, eco-friendly, and surprisingly effective way to give your green companions a gentle boost using something you likely already have in your kitchen: an egg.
This natural method helps replenish vital nutrients in the soil, encouraging healthier, more vibrant growth without harsh chemicals. It’s a small act of care that can make a big difference for your snake plant and many other indoor varieties.
What You’ll Need
- 1 raw egg (any size or color)
- A potted houseplant in need of nutrients (like a snake plant)
- Small trowel or spoon (optional, for digging a small hole)
- Watering can (for follow-up watering)
Why This DIY Can Be Useful
Eggs are packed with various nutrients that can benefit plant growth. As an egg decomposes in the soil, it slowly releases compounds like calcium, proteins, and a range of minerals. Calcium is crucial for cell wall development, helping plants grow stronger and more resilient. Proteins provide nitrogen, which is essential for lush, green foliage. This slow-release method ensures your plant receives a steady supply of these beneficial elements over time, mimicking natural decomposition processes.
How to Make It
There’s no complex preparation for this method, as you’ll be using the egg directly.
- Choose Your Spot: Select a spot in the pot’s soil, ideally away from the main stem and any delicate surface roots. You want to create a small pocket for the egg.
- Prepare the Soil (Optional but Recommended): If using a trowel or spoon, gently dig a small, shallow depression in the soil, about 1-2 inches deep. This will help you cover the egg effectively.
- Crack the Egg: Carefully crack one raw egg directly into the prepared spot in the soil. Allow the yolk and white to flow into the soil.
- Cover Thoroughly: Immediately cover the egg contents completely with at least an inch or two of potting soil. Ensure no part of the egg is exposed to the air.
How to Use It
- Placement: Always apply the egg directly into the soil, burying it fully. Do not crack it on top of the soil surface or directly onto the plant’s foliage.
- Frequency: This method provides a slow, steady release of nutrients, so it’s not something to do frequently. For most houseplants, applying one egg every 2-3 months is sufficient. Over-fertilizing, even with natural methods, can sometimes stress plants.
- Watering: After covering the egg, water your plant as you normally would. This helps the decomposition process begin and distributes nutrients throughout the soil.
What to Expect
Don’t expect overnight miracles; natural fertilization takes time. Over the next few weeks and months, you should observe gradual improvements in your plant’s health. Look for stronger, more robust growth, brighter green leaves, and an overall more vigorous appearance. The nutrients will slowly become available to your plant, contributing to its long-term vitality.
Helpful Tips
- Freshness Matters: Use a fresh egg to minimize any potential odors during decomposition.
- Consider the Shell: You can also crush and bury eggshells around your plants for an additional calcium boost. The shells decompose even slower than the egg contents, offering a very long-term nutrient source.
- Smaller Plants, Smaller Amounts: For very small pots or delicate plants, you might consider using only half an egg or even just the egg white to avoid overwhelming the soil.
Important Notes / Safety
- Pest Attraction: If the egg is not completely covered by soil, it can attract pests like flies or rodents. Ensure it is fully buried to avoid this.
- Odor: While less likely if buried properly, a faint odor may be noticeable for a day or two after application, especially if the soil is very dry initially.
- Avoid Overdoing It: As with any fertilizer, too much of a good thing can be detrimental. Stick to the recommended frequency to prevent nutrient imbalances or potential root burn.
- Patch Test: If you’re unsure how a particular plant will react, try this method on a less valuable plant first, or use a smaller amount.