There’s nothing quite as satisfying as enjoying fresh produce straight from your own garden. And when it comes to unique, rewarding crops, homegrown peanuts are a fantastic choice! Imagine digging into the soil and unearthing your very own delicious, earthy treasures. It’s a simple process, and with our guide, you’ll be enjoying your fresh peanut harvest in no time.
Why Grow Peanuts in Your Home Garden?
Beyond the sheer joy of growing your own food, peanuts offer several benefits:
- Freshness: Store-bought peanuts often travel long distances. Homegrown means peak freshness and flavor.
- Control: You decide what goes into your soil, ensuring organic practices if you wish.
- Unique Experience: Many gardeners haven’t tried growing peanuts, making it a fun and educational project for the whole family.
- Nutritional Value: Peanuts are packed with protein, healthy fats, and essential vitamins and minerals.
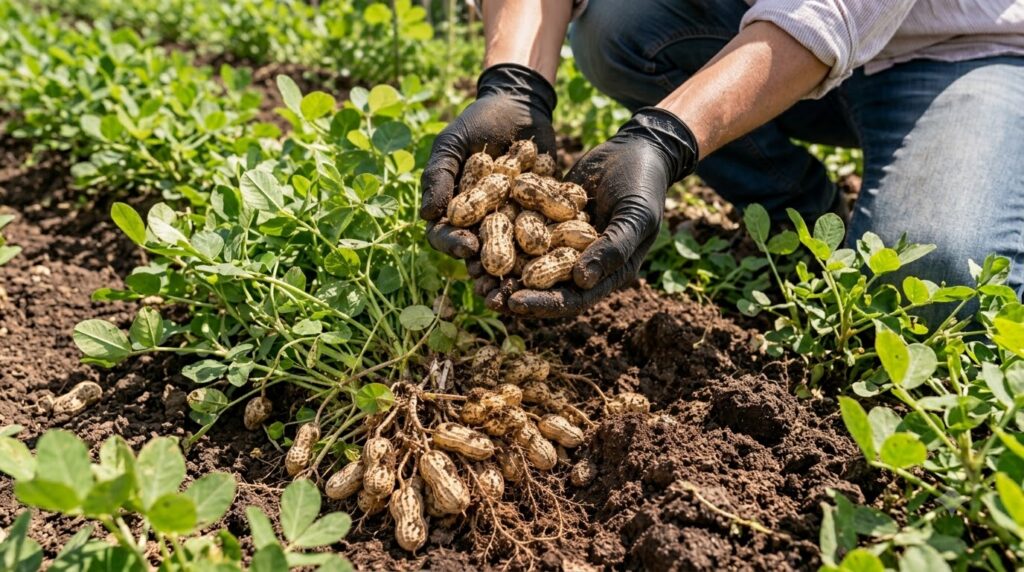
When to Harvest Your Peanuts
Timing is crucial for the best peanut harvest. Peanuts typically take about 120-150 days to mature, depending on the variety and your local climate. Here are the key indicators:
- Foliage Yellowing: The most reliable sign is when the leaves start turning yellow and the plant begins to look a bit tired and withered. This usually happens in late summer or early fall before the first frost.
- Cooler Temperatures: Cooler temperatures often trigger the plant to mature its underground pods.
- Test Dig: If you’re unsure, gently dig up a single plant and check the pods. Mature peanuts will have a well-defined shell and fully developed kernels inside. Immature pods will be soft and underdeveloped.
How to Harvest Peanuts: A Step-by-Step Guide
Harvesting peanuts is relatively straightforward, but it requires a bit of care to ensure you don’t damage the precious pods.
Step 1: Prepare for Harvest
Choose a dry, sunny day for harvesting. The soil should be relatively dry, as wet soil can make it harder to dig and cure the peanuts properly.
Step 2: Loosen the Soil
Using a garden fork or spade, carefully loosen the soil around the base of the peanut plant. Start a bit away from the main stem to avoid puncturing any pods.
Step 3: Lift the Plants
Once the soil is loosened, gently grasp the base of the plant and lift it out of the ground. Many peanut pods will be clinging to the roots. Shake off excess soil, but don’t try to remove every speck; some soil helps protect the pods during curing.
Step 4: Inspect and Collect
Carefully pick the peanut pods from the roots. You might find some pods that have detached and are still in the soil, so do a quick check of the disturbed area.
Curing and Drying Your Fresh Peanuts
Harvesting is just the first step! Freshly dug peanuts are high in moisture and need to be cured to develop their full flavor and to prevent spoilage. Curing also prepares them for long-term storage.
Step 1: Initial Air Drying
After harvesting, leave the entire plants (with pods still attached) in a warm, dry, well-ventilventilated area for a few days. You can hang them upside down or spread them out on a screen. Avoid direct sunlight at this stage, as it can dry them too quickly and unevenly.
Step 2: Separate the Pods
Once the plants have dried for about a week, you can separate the pods from the stems. At this point, the shells should feel harder, and the kernels inside will be more distinct.
Step 3: Final Curing
Spread the separated pods in a single layer on a screen or mesh tray in a cool, dry, well-ventilated space (like a shed or garage). This process can take 2-4 weeks, depending on humidity levels. The goal is to reduce the moisture content to about 10%.
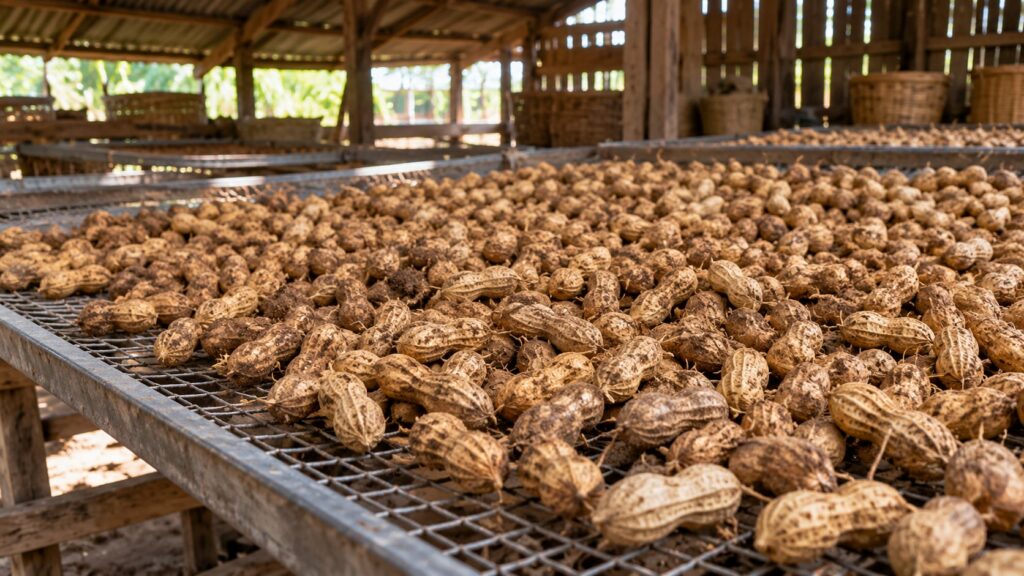
How to Tell if Peanuts are Cured
A good test is to shell a few peanuts. The kernels should be firm, crunchy, and have a distinct peanut flavor. They shouldn’t feel rubbery or taste bland.
Storing Your Homegrown Peanuts
Once properly cured, peanuts can be stored in their shells for several months in a cool, dry place. For longer storage or to use them in recipes, you can shell them and store the kernels in an airtight container in the refrigerator for up to a year, or freeze them for even longer.
Growing and harvesting your own peanuts is a truly rewarding endeavor, connecting you directly to the earth’s bounty. With a little patience and these simple steps, you’ll be enjoying fresh, delicious peanuts from your garden!
Happy gardening!