Say goodbye to those store-bought tubs and hello to the most incredible homemade strawberry ice cream you’ll ever taste! Imagine a scoop of pure, creamy bliss, bursting with the sweet and slightly tart flavor of fresh strawberries, all made right in your own kitchen. This recipe is surprisingly easy, requiring just a few simple ingredients and a little patience, making it the perfect refreshing treat for any day, especially those warm summer afternoons.
You’re not just making ice cream; you’re crafting a dessert that’s free from artificial flavors and preservatives, allowing the natural goodness of strawberries to shine through. It’s a fantastic way to enjoy a healthier sweet treat that satisfies your cravings without any guilt. This recipe is perfect for home cooks of all skill levels, from beginners looking for a fun kitchen project to experienced dessert makers wanting to perfect a classic.
In this article, you’ll learn how to whip up a dreamy strawberry ice cream that rivals any gourmet shop, discover the health benefits of its star ingredient, and find expert tips and variations to customize it to your heart’s desire. Get ready to impress your family and friends with a dessert that tastes like sunshine in a bowl!
Recipe Summary
- Prep Time: 20 minutes
- Cook Time: 0 minutes (plus chilling & churning time)
- Total Time: 4 hours (including chilling) + 20-30 minutes (churning)
- Servings: 6-8
- Difficulty Level: Easy
- Course: Dessert
- Cuisine: American
- Diet Type: Vegetarian (can be made dairy-free/vegan with substitutions)
Why You’ll Love This Recipe
- Incredibly Creamy: Achieves a rich, smooth texture every time.
- Bursting with Flavor: Uses real strawberries for an authentic, fresh taste.
- Beginner-Friendly: Simple steps make it accessible for any home cook.
- Naturally Sweetened: Control the sugar content to your preference.
- No Artificial Additives: Enjoy a wholesome dessert free from preservatives.
- Customizable: Easily adapt with different fruits or flavorings.
- Kid-Approved: A delightful treat that even the pickiest eaters will love.
- Perfect for Summer: A refreshing way to cool down on a hot day.
Ingredients
For the Strawberry Puree:
- 3 cups fresh or frozen strawberries, hulled and quartered
- ¼ cup granulated sugar (adjust to taste, depending on sweetness of strawberries)
- 1 tablespoon fresh lemon juice
For the Ice Cream Base:
- 2 cups heavy cream
- 1 cup whole milk (or half-and-half for extra richness)
- ⅔ cup granulated sugar
- 1 teaspoon pure vanilla extract
- Pinch of salt
Equipment Needed
- Blender or food processor
- Large mixing bowl
- Whisk
- Measuring cups and spoons
- Airtight freezer-safe container (e.g., loaf pan or plastic container with lid)
- Ice cream maker (with a frozen bowl, if applicable)
Step-by-Step Instructions
Step 1: Prepare the Strawberry Puree
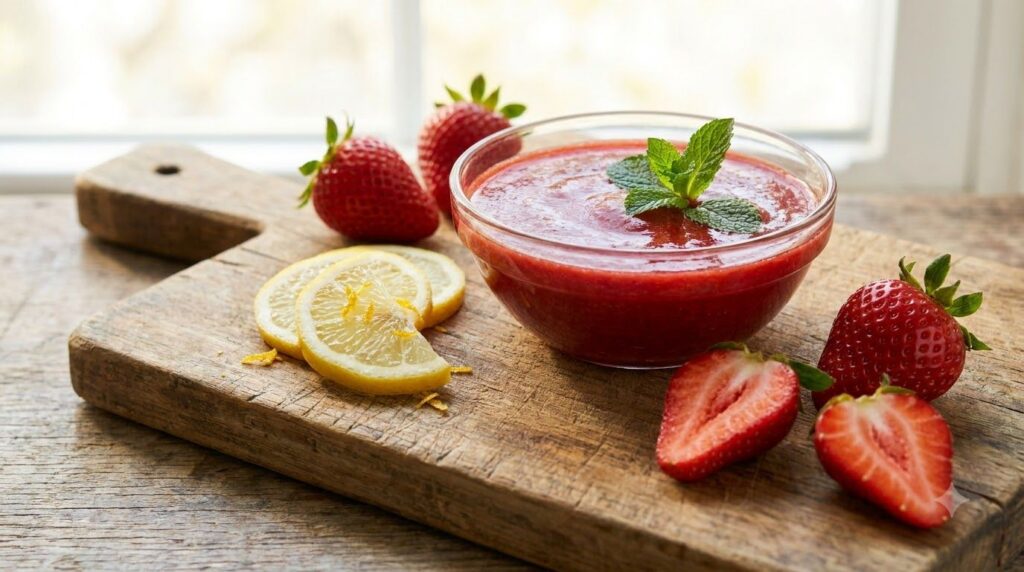
Begin by making your vibrant strawberry puree. In a blender or food processor, combine the hulled and quartered strawberries, ¼ cup granulated sugar, and 1 tablespoon of fresh lemon juice. Blend until completely smooth. You want a consistent, lump-free puree. Taste and adjust sugar if needed; if your strawberries are very sweet, you might need less sugar. If you prefer a smoother texture without seeds, you can push the puree through a fine-mesh sieve, though this is optional. Set aside.
Step 2: Whisk the Ice Cream Base
In a large mixing bowl, combine the heavy cream, whole milk, ⅔ cup granulated sugar, pure vanilla extract, and a pinch of salt. Whisk vigorously until the sugar is fully dissolved. You can test this by rubbing a small amount of the mixture between your fingers; if it feels gritty, continue whisking. The mixture should be smooth and slightly thickened, but not whipped. This step ensures a smooth texture in the final ice cream.
Step 3: Combine Puree and Base
Pour the strawberry puree into the cream mixture. Whisk them together until thoroughly combined and the color is a uniform pink. Make sure there are no streaks of unmixed cream or puree. The mixture should look like a beautiful, pale pink liquid, ready for chilling.
Step 4: Chill the Mixture
This is a crucial step for creamy ice cream! Cover the bowl with plastic wrap and refrigerate the mixture for at least 2-4 hours, or preferably overnight. A well-chilled base will churn more efficiently and result in a smoother, creamier ice cream, preventing icy crystals from forming.
Step 5: Churn the Ice Cream
Once your ice cream base is thoroughly chilled and your ice cream maker bowl is frozen solid (ensure it’s been in the freezer for at least 24 hours), pour the cold mixture into your ice cream maker. Churn according to the manufacturer’s instructions, which typically takes about 20-30 minutes. The ice cream will gradually thicken to the consistency of soft-serve frozen yogurt. It will be soft but firm enough to scoop.
Step 6: Freeze to Firm
Transfer the freshly churned soft-serve ice cream into a clean, airtight freezer-safe container. Press a piece of parchment paper or plastic wrap directly onto the surface of the ice cream to prevent ice crystals from forming. Cover the container with a lid and freeze for at least 4-6 hours, or until it reaches your desired firm scooping consistency. For best results, freeze overnight.
Step 7: Serve and Enjoy!
When ready to serve, let the ice cream sit at room temperature for 5-10 minutes to soften slightly, making it easier to scoop. Serve in bowls or cones, perhaps garnished with fresh strawberries or a sprig of mint. Enjoy your incredibly creamy homemade treat!
Nutrition Highlights
This homemade strawberry ice cream is a delightful dessert that, while a treat, offers some nutritional benefits thanks to its natural ingredients. It provides a good source of calcium from the dairy, which is essential for bone health. Strawberries are rich in Vitamin C and antioxidants, supporting immune function and offering protective benefits for your cells. Made with real fruit and without artificial additives, it’s a more wholesome alternative to many store-bought options, allowing you to control the sugar content for a balanced indulgence.
Ingredient Benefits
- Strawberries: The star of the show, strawberries provide the sweet, slightly tangy flavor and a beautiful pink hue. They are packed with Vitamin C, manganese, folate, and powerful antioxidants, contributing to overall health and giving the ice cream its signature taste.
- Heavy Cream & Milk: These dairy components form the rich, creamy base of the ice cream. Heavy cream provides the fat content necessary for a luxurious, smooth texture, while milk balances the richness and contributes to the liquid volume. They are good sources of calcium and Vitamin D (if fortified).
- Granulated Sugar: Essential for sweetness, sugar also plays a vital role in the texture of ice cream. It lowers the freezing point, preventing the ice cream from becoming rock-hard and ensuring a scoopable consistency.
- Lemon Juice: A small amount of lemon juice brightens the strawberry flavor, adding a touch of acidity that enhances the fruit’s natural sweetness and prevents the ice cream from tasting overly flat.
- Vanilla Extract: Vanilla adds a warm, aromatic depth that complements the strawberries beautifully, enhancing the overall flavor profile without overpowering the fruit.
Expert Tips
- Use Ripe Strawberries: The flavor of your ice cream heavily depends on the quality of your strawberries. Choose ripe, fragrant berries for the best taste.
- Chill Thoroughly: Do not skip or rush the chilling step for the ice cream base. A colder base churns more efficiently and creates a much smoother, creamier ice cream.
- Don’t Overfill the Churner: Always follow your ice cream maker’s capacity guidelines. The mixture expands as it churns, and overfilling can lead to spills and inefficient churning.
- Achieve the Perfect Scoop: If your ice cream is too hard straight from the freezer, let it sit on the counter for 5-10 minutes before scooping. This allows it to soften to the ideal consistency.
- Prevent Ice Crystals: Press plastic wrap or parchment paper directly onto the surface of the ice cream before freezing to minimize air exposure and prevent the formation of icy crystals.
- Adjust Sweetness: Taste your strawberry puree and the ice cream base before chilling. Adjust the sugar level according to your personal preference and the sweetness of your strawberries.
- Clean Your Machine: Ensure your ice cream maker bowl is completely clean and dry before freezing it. Any residual water can cause ice to form and hinder the freezing process.
Recipe Variations
- No-Churn Strawberry Ice Cream: Don’t have an ice cream maker? Whip 2 cups of cold heavy cream to stiff peaks. Gently fold in the chilled strawberry puree and a can of sweetened condensed milk (14 oz). Freeze in an airtight container until firm.
- Dairy-Free/Vegan Version: Substitute heavy cream with full-fat coconut cream (chilled, scoop out the thick cream from the top of the can) and whole milk with a plant-based milk like almond or oat milk. Use a plant-based condensed milk for the no-churn version.
- Strawberry Swirl Ice Cream: Instead of fully mixing the puree into the base, add about two-thirds of the puree to the base and churn. During the last few minutes of churning, drizzle in the remaining puree for beautiful swirls of strawberry flavor.
- Strawberry Basil Ice Cream: For an elevated flavor, add 1-2 tablespoons of finely chopped fresh basil to the strawberry puree before blending. It offers a surprising and delicious herbaceous note.
- Strawberry Cheesecake Ice Cream: Fold in small pieces of graham cracker crumbs and softened cream cheese (about 4 oz, beaten smooth) into the churned ice cream before the final freeze.
- High-Protein Version: Replace some of the milk with unflavored or vanilla protein powder mixed thoroughly into a small amount of milk before adding to the base. You can also swirl in plain Greek yogurt into the finished churned ice cream.
Storage Instructions
Homemade strawberry ice cream is best enjoyed within 1-2 weeks for optimal flavor and texture. Store it in a clean, airtight freezer-safe container. A shallow, wide container helps it freeze more evenly. To prevent freezer burn and ice crystals, always press a layer of plastic wrap or parchment paper directly onto the surface of the ice cream before putting on the lid. Ensure the lid is tightly sealed. While it can last longer, the texture may become icier over time. Avoid storing it in the freezer door, as temperature fluctuations there can degrade quality.
Frequently Asked Questions
Can I use frozen strawberries?
Absolutely! Frozen strawberries work wonderfully and are often more convenient. There’s no need to thaw them before blending for the puree.
Do I need an ice cream maker?
For the absolute best, creamiest texture, an ice cream maker is recommended. However, you can make a delicious no-churn version using sweetened condensed milk and whipped cream, as detailed in the ‘Recipe Variations’ section.
How long does it take to churn?
Churning typically takes 20-30 minutes in most home ice cream makers, but always refer to your specific machine’s instructions.
My ice cream is too icy. What went wrong?
Icy ice cream often results from not chilling the base sufficiently before churning, or not having a cold enough freezer bowl. Ensure your base is very cold and your freezer bowl has been frozen for at least 24 hours. Too little sugar can also contribute to iciness.
Can I reduce the sugar?
Yes, you can certainly adjust the sugar to your taste. Keep in mind that sugar is not just for sweetness; it also helps prevent ice crystals and contributes to the creamy texture. Reducing it significantly might result in a harder, icier ice cream.
Can children eat this?
Yes, this is a wonderful and healthier treat for children! It’s made with natural ingredients and provides a good way to get some fruit into their diet. Just be mindful of serving sizes.
Can I add other fruits?
Of course! You can experiment with other berries like raspberries or blueberries, or even a mix of fruits. Just make sure to adjust the sweetness as needed for different fruit types.
Conclusion
There’s something truly special and incredibly satisfying about creating your own homemade strawberry ice cream. The vibrant flavor, the luxurious creaminess, and the joy of knowing exactly what goes into your treat make it an unparalleled dessert experience. It’s an easy recipe that brings so much delight, whether you’re enjoying a quiet evening at home or sharing it with loved ones on a sunny afternoon.
So, don’t hesitate! Gather your ingredients, dust off that ice cream maker, and embark on this delicious journey. You’ll be rewarded with a scoop of pure bliss that tastes like summer in every bite. Happy churning!