Ever notice that subtle hum from your desk fan as it pushes air, and then catch a glimpse of the accumulated grime on its blades? It’s easy to overlook, but that forgotten fan hiding in the corner of your office or bedroom is likely a silent dust magnet. Not only does a layer of dust diminish your fan’s efficiency, forcing it to work harder and potentially shortening its lifespan, but it also circulates microscopic particles and allergens right back into your breathing space. This can significantly impact your home’s air quality, contributing to allergies, stuffiness, and a generally less fresh environment.
Many of us grab a quick wipe or a vacuum nozzle, but for a truly effective clean that revitalizes your fan and your indoor air, a deeper dive is often necessary. The good news? It’s simpler than you might think, and you probably already have most of the supplies on hand. This guide is for anyone who wants to reclaim their home’s air quality, extend the life of their appliances, and enjoy a cleaner, more efficient cooling breeze without resorting to harsh chemicals or costly professional services.
By following our easy, step-by-step instructions, you’ll learn how to thoroughly clean your desk fan, from tackling superficial dust to getting into those hard-to-reach nooks and crannies. We’ll cover everything from essential safety precautions to expert tips that make the process a breeze (pun intended!). Get ready to transform your dusty, inefficient fan into a sparkling, air-purifying powerhouse, all while boosting your overall home wellness.
Why You’ll Love This Guide
- Easy to Follow: Clear, step-by-step instructions make fan cleaning accessible for everyone.
- Uses Common Household Items: No need for special tools or expensive cleaning solutions.
- Budget-Friendly: Save money on new fans and expensive air purifiers by maintaining what you have.
- Improves Air Quality: Reduce allergens and dust circulating in your home.
- Extends Appliance Lifespan: A clean fan runs more efficiently and lasts longer.
- Beginner-Friendly: Perfect for first-timers tackling appliance maintenance.
- Eco-Friendly: Utilize natural cleaning methods and reduce waste.
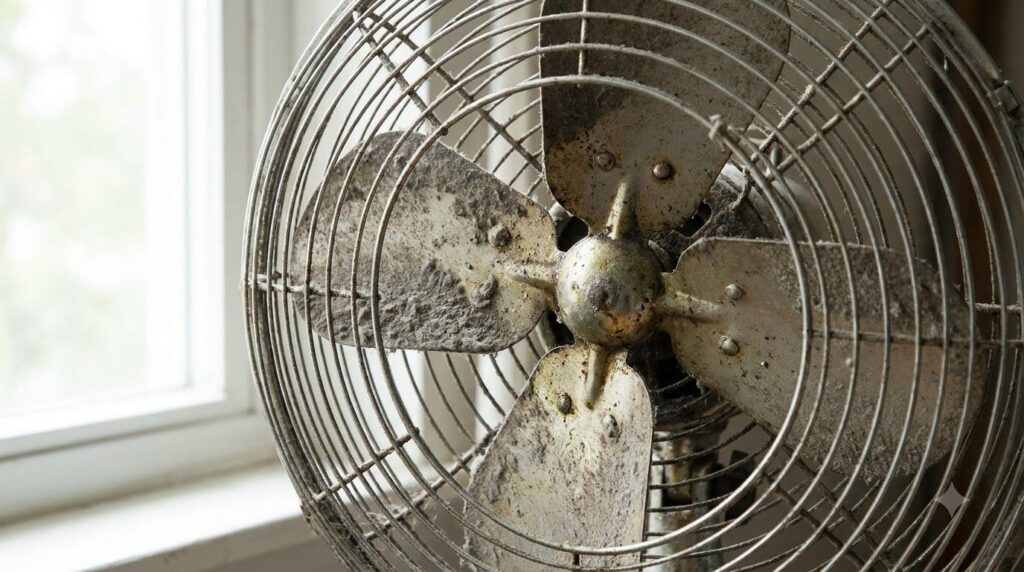 Don’t let dust accumulate like this – a clean fan works better and improves your air quality.
Ingredients / Materials
Gathering your materials before you start will make the cleaning process much smoother and faster. Most of these items you likely already have around the house!
- Warm water
- Mild dish soap or all-purpose cleaner (natural and gentle options are best)
- White vinegar (optional, for stubborn grime or odor)
- Microfiber cloths (2-3, for wiping and drying)
- Cotton swabs or small brushes (e.g., an old toothbrush, paintbrush, or dedicated cleaning brush)
- Vacuum cleaner with brush attachment
Equipment Needed
Depending on your fan model, you might need a few simple tools to get to those deeper areas.
- Screwdriver set (Phillips or flathead, if your fan requires disassembly)
- Small container or bowl (for soapy water)
Step-by-Step Instructions: Deep Cleaning Your Desk Fan
Ready to give your fan the spa treatment it deserves? Let’s get started!
Step 1: Unplug and Disassemble Safely (5-10 minutes)
What to do: The absolute first and most crucial step is to unplug your fan from the power outlet. Never attempt to clean an electrical appliance while it’s still plugged in. Once unplugged, assess your fan’s construction. Most desk fans have a grille (cage) that can be removed. Look for screws, clips, or latches holding the front grille in place. Carefully remove the grille, and if possible, unscrew or unclip the blade assembly as well. This will give you full access to the blades and the motor housing.
Why it matters: Safety first! Unplugging prevents accidental starts and electric shock. Disassembly allows for a thorough cleaning of all dusty surfaces, especially the blades, which are often the primary dust collectors.
Helpful tips: Take a picture with your phone before you start disassembling. This can be a lifesaver when it comes time to put everything back together! Keep all screws or clips in a small, safe bowl so they don’t get lost.
Expected result: Your fan should be safely disconnected from power, and the outer grille and blades should be accessible or removed.
Step 2: Vacuum the Loose Dust (5 minutes)
What to do: Use your vacuum cleaner with a brush attachment to gently suck up as much loose dust as possible from the fan blades, grilles, and the motor housing. Be thorough but gentle, especially around delicate wires or components.
Why it matters: This preliminary step removes the bulk of the dust, making the wet cleaning much more effective and less messy. It also prevents caked-on dust from turning into mud during washing.
Helpful tips: For very thick layers of dust, you might want to do this step outside or over a trash can to prevent dust from spreading in your home.
Expected result: Visible clumps of dust are removed, leaving a lighter layer of grime.
Step 3: Wash Grilles and Blades (10-15 minutes)
What to do: Fill a sink or a small bucket with warm water and a few drops of mild dish soap. Submerge the removable grilles and blades (if they are washable and not electrical) into the soapy water. Let them soak for a few minutes to loosen stubborn grime. Then, use a microfiber cloth or a soft brush to scrub away any remaining dust and dirt. For intricate grilles or tight spots, cotton swabs or an old toothbrush can be incredibly effective.
Why it matters: Soaking helps break down sticky residues and caked-on dust, making it easier to wipe clean. Manual scrubbing ensures all surfaces are thoroughly cleaned.
Helpful tips: For extra stubborn grease or dust buildup, add a splash of white vinegar to your soapy water. If any plastic parts are discolored, a paste of baking soda and water can sometimes help brighten them.
Expected result: Grilles and blades are sparkling clean and free from dust and residue.
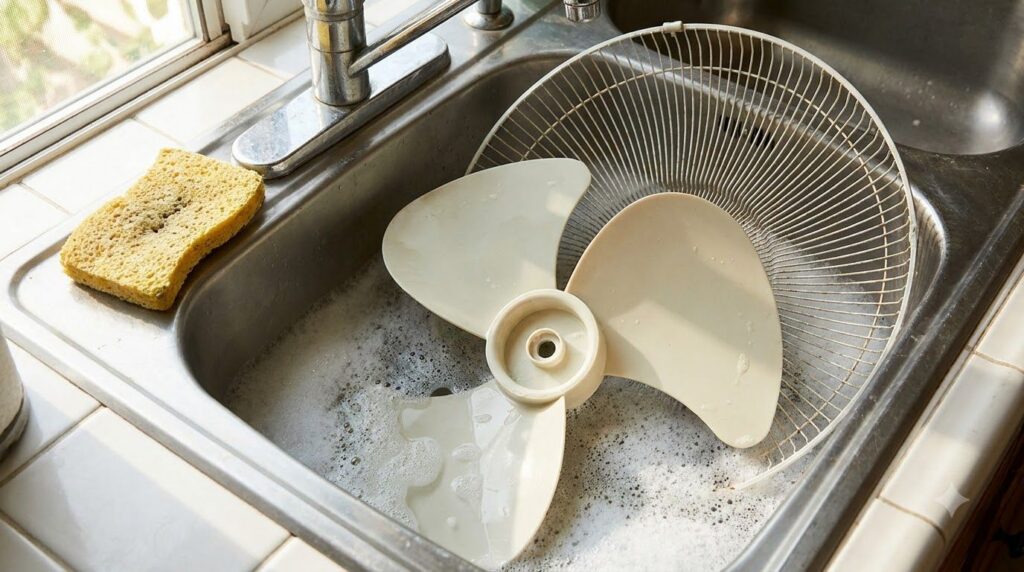 Soaking the removable parts in warm, soapy water helps loosen stubborn dust and grime.
Step 4: Clean the Motor Housing (5-10 minutes)
What to do: This part is crucial to do carefully! Do NOT submerge the motor housing or spray it directly with water. Instead, dampen a microfiber cloth with your soapy water (make sure it’s just damp, not dripping wet) and carefully wipe down the exterior of the motor housing and any non-electrical parts that couldn’t be removed. Use cotton swabs for tight crevices around the motor or control panel. You can also use canned air to blow out dust from small vents, holding the can upright to prevent propellant discharge.
Why it matters: The motor housing can also accumulate dust, which can affect its performance and potentially lead to overheating. Careful cleaning ensures no moisture gets into electrical components.
Helpful tips: Always wring out your cloth thoroughly to avoid excess moisture. If using canned air, do it in a well-ventilated area.
Expected result: The motor housing is clean and free of dust, without any water damage.
Step 5: Rinse and Dry Thoroughly (10-20 minutes)
What to do: Rinse the washed grilles and blades under clean running water until all soap residue is gone. Then, it’s absolutely critical to dry all parts completely. You can air-dry them by placing them on a clean towel in a well-ventilated area, or carefully hand-dry each piece with a clean, dry microfiber cloth. Ensure there is no moisture left, especially on any metal components to prevent rust.
Why it matters: Soap residue can attract dust, and any remaining moisture can cause rust or electrical hazards. Complete drying is essential for safety and optimal performance.
Helpful tips: Giving the parts a gentle shake can help dislodge excess water before drying. If you’re air-drying, placing them in direct sunlight (if safe for the material) can speed up the process.
Expected result: All fan parts are completely dry and ready for reassembly.
Step 6: Reassemble Your Fan (5-10 minutes)
What to do: Once every single component is bone dry, carefully reassemble your fan. Refer to the photo you took in Step 1 if you need a reminder. Fasten all screws, clips, and latches securely. Ensure the blades are firmly attached and the grilles are correctly aligned before moving on.
Why it matters: Correct reassembly ensures the fan operates safely and efficiently, without wobbling or making unusual noises.
Helpful tips: Don’t overtighten screws, especially on plastic parts, as this can cause cracking. Give the blades a gentle spin by hand to ensure they move freely without obstruction.
Expected result: Your fan is fully reassembled and looks as good as new.
Step 7: Test Your Clean Fan (1 minute)
What to do: Plug your freshly cleaned and reassembled fan back into the power outlet. Turn it on at its lowest setting first, then gradually increase the speed. Listen for any unusual noises or wobbling. Enjoy the cleaner, stronger breeze!
Why it matters: This final test ensures everything is working correctly and safely after cleaning.
Helpful tips: If you notice any issues, immediately unplug the fan and recheck your assembly. Sometimes a blade might be slightly off balance or a grille not properly secured.
Expected result: Your fan runs smoothly, quietly, and effectively, circulating clean air.
Expert Tips
- Regular Maintenance is Key: Don’t wait until your fan is caked in dust. A quick wipe-down of the grilles every few weeks and a deeper clean every 2-3 months (or more often if you live in a dusty environment or have pets) will keep it running optimally.
- Use a Dry Brush First: Before any wet cleaning, a dry paintbrush or stiff-bristled brush can dislodge a lot of dust from grilles and blades without making a wet mess.
- Canned Air for Hard-to-Reach Spots: For delicate electronics within the motor housing (if you have experience with such components and feel comfortable), canned air can gently remove dust without moisture. Always hold the can upright to prevent propellant discharge.
- Check the Base and Controls: Don’t forget to wipe down the fan’s base, control panel, and power cord with a damp cloth. Dust often settles there too!
- Consider a Fan Cover: If storing your fan for the off-season, cover it with a breathable cloth bag or a plastic cover to prevent dust accumulation.
- Eco-Friendly Cleaning: For an all-natural cleaning solution, mix equal parts white vinegar and water with a few drops of essential oil (like lemon or tea tree) for a pleasant scent and added cleaning power.
Variations
While the core method remains the same, different fan types might require slight adjustments:
- Box Fans: Often have simpler grilles that pop off, making blade access easier. Some may not fully disassemble.
- Tower Fans: These are trickier. Their slim design means blades are often housed within narrow grilles. You’ll likely need to rely more on a vacuum with a crevice tool, canned air, and long, thin brushes or micro-dusters. Some higher-end models may have removable filters or back panels for easier access.
- Standing Fans: Similar to desk fans but larger. The disassembly and cleaning process will be largely the same, just on a bigger scale. Ensure stability when disassembling and reassembling larger components.
- Ceiling Fans: While not a ‘desk fan,’ cleaning ceiling fan blades frequently with a damp cloth or a dedicated fan duster can significantly improve air quality and prevent dust from raining down. Always turn off the power at the switch and be cautious when working on a ladder.
- Stronger Cleaning Version: For extremely greasy or sticky fans (e.g., in a kitchen), a slightly stronger concentration of dish soap or a dedicated degreaser designed for household use can be applied carefully. Always spot-test first.
Maintenance Schedule & Off-Season Storage
To keep your fan running smoothly and efficiently all year long, consider these tips:
- Regular Dusting: Give the exterior grilles a quick wipe with a damp microfiber cloth weekly or bi-weekly, especially if using the fan frequently. This prevents heavy buildup.
- Monthly Light Cleaning: Every month, use a vacuum cleaner with a brush attachment to remove dust from the grilles without disassembly. This reduces the need for frequent deep cleans.
- Seasonal Deep Clean: Perform a full deep clean (following the steps above) at least once every 2-3 months during periods of heavy use, or at the beginning and end of cooling seasons.
- Off-Season Storage: When you’re ready to put your fan away for the winter, give it a thorough deep clean first. Ensure it’s completely dry. Then, cover it with a large plastic bag, a dedicated fan cover, or a sheet to protect it from dust accumulation. Store it in a dry, cool place, away from extreme temperatures or humidity, to prevent dust buildup and prolong its life until next season.
Safety Notes
Your safety is paramount during this cleaning process. Please adhere to the following:
- ALWAYS Unplug First: This is non-negotiable. Never clean any electrical appliance while it is connected to a power source.
- Avoid Water Near Electrical Components: Be extremely careful not to get water or cleaning solutions into the motor, wiring, or control panel. A damp (not wet) cloth is key for these areas.
- Ensure Complete Dryness: All parts, especially metal and electrical connections, must be completely dry before reassembly and plugging the fan back in. Moisture can lead to short circuits, electric shock, or rust.
- Careful with Screws and Small Parts: Keep track of all screws and small components to ensure proper reassembly and avoid any loose parts during operation.
- Surface Compatibility: While most fan parts are plastic or metal, if you use a stronger cleaner, always test a small, inconspicuous area first to ensure it doesn’t cause discoloration or damage.
- Children and Pets: Keep cleaning supplies and disassembled fan parts out of reach of children and pets. Ensure the fan is fully and securely reassembled before allowing them near it again.
Frequently Asked Questions
How often should I clean my desk fan?
For optimal performance and air quality, aim for a light dusting of the grilles every 1-2 weeks, a quick vacuum clean monthly, and a deep clean (with disassembly) every 2-3 months, or more frequently if you have pets or live in a dusty environment.
Can I put fan blades in the dishwasher?
Generally, it’s not recommended. While some sturdy plastic blades might survive, the high heat can warp plastic, and the harsh detergents can damage finishes or delicate components. Handwashing with mild soap and water is safer.
What if my fan doesn’t come apart easily?
Some fans, especially tower fans or older models, may be difficult or impossible to disassemble. In such cases, rely on a vacuum cleaner with a crevice tool, canned air, and long, flexible brushes or micro-dusters to clean as much as possible through the grilles. Never force parts apart.
Is white vinegar safe for cleaning fan parts?
Yes, white vinegar is generally safe for cleaning plastic and metal fan components. It’s excellent for cutting through grime and can act as a mild disinfectant. However, avoid letting it sit for too long on metal to prevent potential etching, and always rinse thoroughly.
Can I use a strong chemical cleaner?
It’s best to stick to mild dish soap or natural all-purpose cleaners. Strong chemicals can damage plastic, strip paint, or leave residues that attract more dust. Always test in an inconspicuous area if you choose to use something stronger.
Why does my fan still smell after cleaning?
A persistent smell might indicate that mold or mildew has grown in areas you couldn’t reach, or that the motor itself has an issue. Ensure all parts were dried completely, and for lingering odors, a vinegar rinse or a spray with a natural odor eliminator (after drying) might help. If the smell persists and seems electrical, discontinue use.
How long should I let the parts air dry?
Allow at least 1-2 hours for air drying, or until all parts are completely dry to the touch. Placing them in a well-ventilated area or using a dry cloth to speed up the process is advisable. Err on the side of longer drying times for safety.
Will cleaning my fan improve its performance?
Absolutely! Dust buildup on blades and grilles creates drag and obstructs airflow, making the fan work harder to move less air. A clean fan will operate more efficiently, provide a stronger breeze, and consume less energy.
Conclusion
Cleaning your desk fan might seem like a small task, but its impact on your home’s air quality and the longevity of your appliance is significant. By taking the time to follow these simple, effective steps, you’re not just getting rid of dust; you’re actively improving the air you breathe and ensuring your fan provides a refreshing, clean breeze for years to come. It’s an easy, budget-friendly DIY project that yields noticeable results, contributing to a healthier and more comfortable living space.
So, don’t let that silent dust magnet lurk in the corner any longer. Grab your supplies, unplug your fan, and give it the deep clean it deserves. You’ll be amazed at the difference a little elbow grease can make, transforming a dusty appliance into a beacon of fresh air. Happy cleaning!