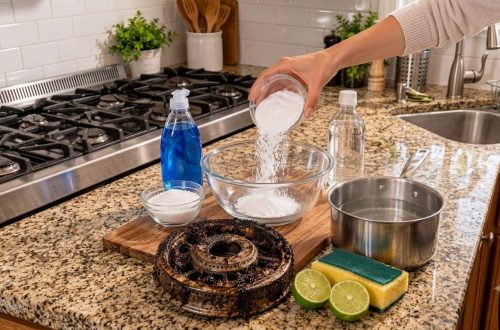
Tackling tough kitchen grime, especially on heavily carbonized stove burner grates, can feel like an insurmountable chore. However, achieving a sparkling clean kitchen doesn’t require harsh chemicals or endless scrubbing. With a few common household ingredients, you can restore your stove grates to their former glory, making your entire kitchen feel refreshed.
This guide will walk you through a powerful, all-natural cleaning method that leverages the synergistic properties of everyday items to melt away stubborn grease, baked-on food, and carbon deposits. Get ready to transform your stovetop and enjoy the satisfaction of a truly deep clean!
The Problem: Stubborn Stove Grime
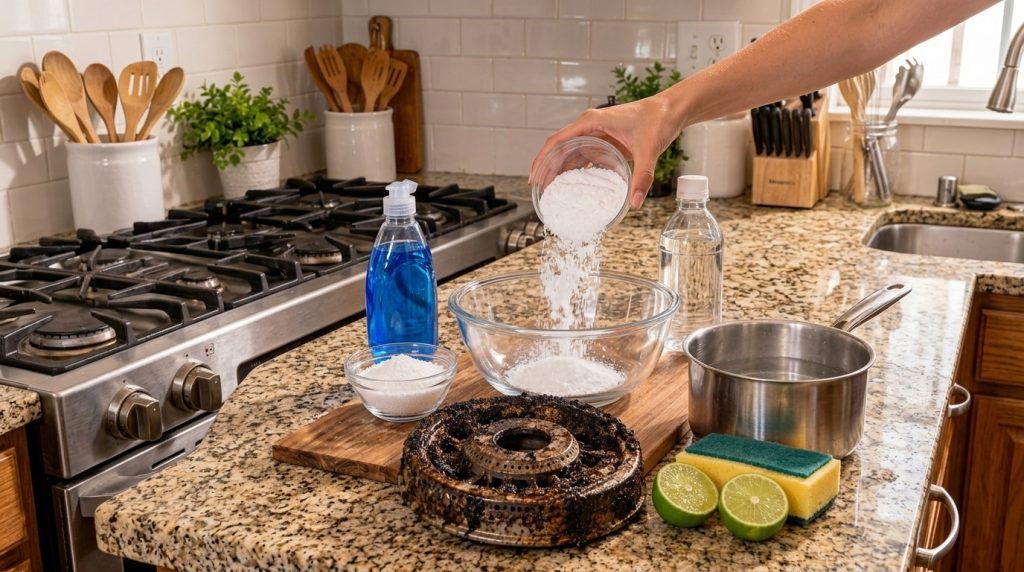
Stove burner grates are often the unsung heroes of our kitchens, enduring daily spills, splatters, and intense heat. Over time, these accumulate into tough, black carbon deposits and greasy residue that can seem impossible to remove. Not only do they look unsightly, but excessive buildup can also affect burner efficiency and even become a fire hazard. Regular wiping simply isn’t enough to penetrate this kind of persistent grime.
Your All-Natural Grime-Fighting Arsenal
The good news is that you don’t need industrial-strength cleaners to combat this challenge. Your pantry and fridge likely hold all the ingredients for a potent, eco-friendly cleaning solution. Here’s a look at what we’ll be using and why they’re so effective:
Baking Soda: The Gentle Abrasive & Deodorizer
- What it does: Sodium bicarbonate acts as a mild abrasive, helping to scrub away baked-on food without scratching surfaces. It’s also fantastic at absorbing odors and breaking down acidic grime.
Salt: The Scrubber Booster
- What it does: Coarse salt adds extra scrubbing power to the baking soda, enhancing its ability to lift stubborn residues. It’s a natural, inexpensive abrasive.
Blue Dish Soap: The Grease Buster
- What it does: Dish soap is specifically designed to cut through grease and oil. Its surfactants help to loosen and lift greasy films from surfaces, allowing them to be rinsed away easily.
White Vinegar: The Acidic Powerhouse
- What it does: Acetic acid in white vinegar dissolves mineral deposits, breaks down tough grease, and can help disinfect surfaces. It’s excellent for tackling hard water stains and leaving a streak-free shine.
Hot Water: The Activation Agent
- What it does: Hot water helps dissolve the dry ingredients more effectively and softens stubborn, baked-on grime, making it easier to remove.
Lime: The Fresh Degreaser
- What it does: The citric acid in lime provides additional degreasing power and leaves a fresh, clean scent. Its natural abrasiveness can also assist in scrubbing.
Step-by-Step: Deep Cleaning Your Stove Grates
Follow these steps to transform your greasy, grimy stove grates into shining examples of cleanliness. This method is surprisingly effective and requires minimal effort once the soaking begins.
-
Remove and Prepare the Grates
Carefully remove all burner grates from your stovetop. If there are any loose crumbs or large pieces of food, brush them off into a trash can.
-
Create the Soaking Solution
Find a large container, basin, or even your kitchen sink (plugged) that can comfortably hold all your grates. Fill it with enough very hot water to submerge the grates. Add 1 cup of baking soda, 1/2 cup of salt, and a generous squirt (about 1/4 to 1/2 cup) of blue dish soap to the hot water. Stir gently to dissolve the powders and mix the soap.
-
Add the Vinegar and Lime
Pour in 1/2 cup of white vinegar. You’ll likely see some fizzing as the baking soda reacts with the vinegar; this is normal and part of the cleaning process. Squeeze the juice from two halved limes into the solution, then drop the lime halves themselves into the water.
-
Soak the Grates
Carefully place your dirty stove grates into the solution, ensuring they are fully submerged. For best results, let them soak for at least 4-6 hours, or even better, overnight. The longer they soak, the more the grime will soften and loosen.
-
Scrub Away the Grime
Once the soaking time is complete, put on a pair of gloves. Remove one grate at a time and, using a stiff brush (like a dish brush or even an old toothbrush for crevices) or a heavy-duty sponge, scrub away the softened grime. You’ll be amazed at how easily the carbon and grease lift away. For particularly stubborn spots, you can dip the lime halves from the soaking solution directly onto the grate and use them to scrub, leveraging their natural acidity and texture.
-
Rinse and Dry
Thoroughly rinse each grate under warm running water until all soap residue and loosened grime are gone. Ensure they are completely dry before placing them back on your stovetop to prevent rust.
Why This DIY Solution Works Wonders
This method works by combining the best properties of several natural cleaners. The hot water and dish soap begin to break down grease. Baking soda and salt provide a gentle abrasive action to physically lift tough deposits, while the vinegar and lime’s acidity chemically dissolve mineral buildup and further cut through grease. Together, these ingredients create a powerful, non-toxic cleaning solution that tackles even the most challenging stove grate grime.
Tips for Maintenance & Prevention
- Wipe Down Regularly: After cooking, give your grates a quick wipe with a soapy sponge to prevent significant buildup.
- Deep Clean Monthly: Aim to give your grates a deeper clean using this method at least once a month, or more frequently if you cook often.
- Use a Splatter Guard: Minimize spills and splatters by using a splatter guard when frying or cooking saucy dishes.
Safety First!
- Always wear protective gloves when handling cleaning solutions, even natural ones, to protect your skin.
- Ensure good ventilation in your kitchen by opening a window or turning on your range hood.
- While these ingredients are generally safe, avoid direct contact with eyes.
- Always test any new cleaning method on an inconspicuous area first, though this recipe is safe for most common grate materials.
With this handy home hack, you can wave goodbye to stubborn stove grime and welcome a cleaner, brighter kitchen. Enjoy the satisfaction of a job well done, achieved with simple, natural ingredients!