When the craving for a decadent dessert strikes but you’d rather skip the oven, a no-bake pie is your delicious answer! These easy no-bake pies are the perfect solution for busy schedules, warm weather, or simply when you want a hassle-free treat that delivers big on flavor and texture. Forget preheating; these chilled delights come together with minimal effort, making them ideal for beginners and seasoned bakers alike.
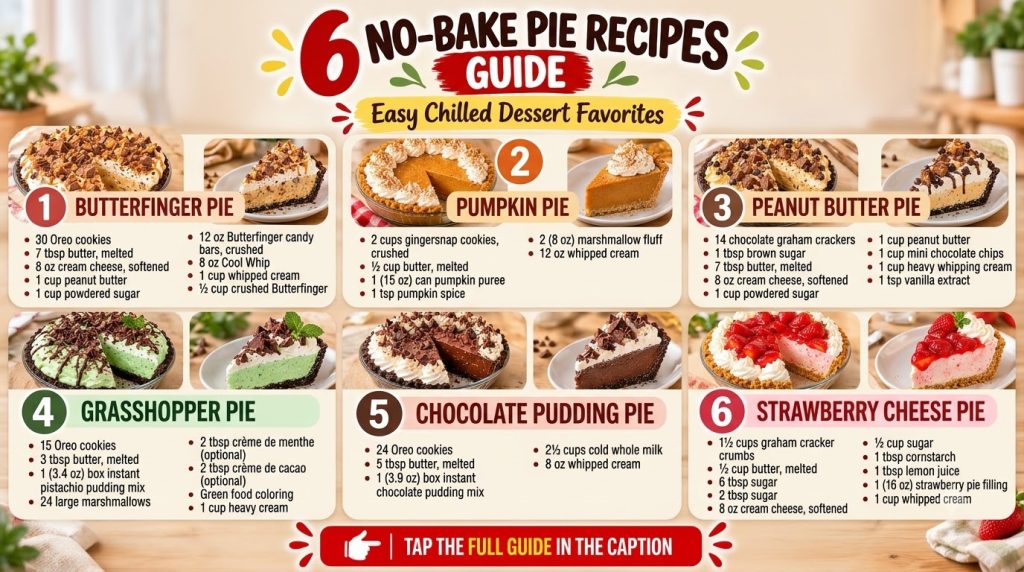
This guide dives into the wonderful world of no-bake pies, focusing on six incredible varieties: Butterfinger, Pumpkin, Peanut Butter, Grasshopper, Chocolate Pudding, and Strawberry Cheesecake. Each offers a unique blend of creamy, crunchy, and delightful flavors, ensuring there’s a perfect pie for every palate and occasion. Get ready to discover your new favorite stress-free dessert!
Why You’ll Love This No-Bake Pie Guide
- Effortlessly Easy: No oven required, meaning less fuss and more time to enjoy.
- Quick to Prepare: Most come together in under 30 minutes of active prep time.
- Cool & Refreshing: Perfect for hot summer days or when you need a chilled dessert.
- Customizable: Easily adapt the base recipe to countless flavor combinations.
- Crowd-Pleaser: Everyone loves a creamy, decadent pie, especially one that’s so easy!
- Perfect for Any Occasion: From casual weeknights to festive gatherings, these pies fit right in.
Ingredients for Your No-Bake Pie Base
While each of the six pies has its unique flair, most no-bake pies share a common foundation. Here’s a general list of ingredients you’ll typically need, which can be adapted for any of the flavors we’ll explore.
For the Crust:
- Cookie Crumbs: 1 ½ cups (about 150g) of graham cracker crumbs, chocolate cookie crumbs, vanilla wafer crumbs, or even crushed shortbread cookies.
- Melted Butter: ¼ cup (60g) unsalted butter, melted.
- Granulated Sugar: 2 tablespoons (25g) (optional, adjust based on crumb sweetness).
For the Filling Base:
- Cream Cheese: 8 ounces (226g) full-fat cream cheese, softened.
- Powdered Sugar: ½ to ¾ cup (60-90g), sifted, to taste.
- Heavy Cream: 1 to 1 ½ cups (240-360ml), very cold, or 1 tub (8 oz / 226g) frozen whipped topping, thawed.
- Flavoring Extracts: 1 teaspoon (5ml) vanilla extract or other complementary flavors.
For Flavoring & Add-ins (Choose based on desired pie):
- Nut Butters: ½ to ¾ cup (120-180g) creamy peanut butter, almond butter.
- Canned Pumpkin Puree: ½ to ¾ cup (120-180g), not pumpkin pie filling.
- Pudding Mix: 1 package (3.9 oz / 110g) instant pudding mix (chocolate, vanilla, pistachio, butterscotch, etc.).
- Crushed Candy Bars: 1 cup (150g) crushed Butterfinger, chocolate bars, etc.
- Chocolate: ½ cup (90g) melted chocolate or cocoa powder.
- Fruit Purees/Jellies: ½ cup (120g) strawberry puree or strawberry jam.
- Mint Extract/Creme de Menthe: For a minty flavor.
- Food Coloring: Green for Grasshopper pie, or other colors as desired.
For Toppings:
- Whipped Cream: Additional heavy cream (for fresh whipped cream) or whipped topping.
- Chocolate Shavings/Chips: For decoration.
- Crushed Nuts/Candy: For texture and flavor.
- Fresh Fruit: Berries, sliced bananas.
- Caramel or Chocolate Sauce: Drizzle for extra indulgence.
Ingredient Notes
- Cream Cheese: Use full-fat cream cheese for the creamiest, most stable filling. Ensure it’s softened to room temperature to prevent lumps.
- Heavy Cream: Always use very cold heavy cream for whipping to achieve stiff peaks. If using frozen whipped topping, make sure it’s completely thawed but still cold.
- Crust Crumbs: Graham cracker crumbs are classic, but experiment! Chocolate cookie crumbs for chocolate or peanut butter pies, or vanilla wafers for fruit-based pies work wonderfully.
- Pudding Mix: Instant pudding mix (not cook-and-serve) is key for thickening many no-bake pie fillings quickly and easily.
- Candy Bars: For Butterfinger or similar pies, finely crush the candy bars to ensure they distribute well and don’t make the pie too difficult to slice.
Equipment You’ll Need
- 9-inch (23 cm) pie plate
- Mixing bowls (at least 2, one large)
- Electric mixer (handheld or stand mixer) or whisk
- Rubber spatula
- Measuring cups and spoons
- Small saucepan (for melting butter)
- Plastic wrap or aluminum foil
How to Make a Classic No-Bake Pie Base
This general method provides the foundation for most no-bake pies. You’ll adapt the filling steps based on the specific flavor you choose.
-
Prepare the Crust:
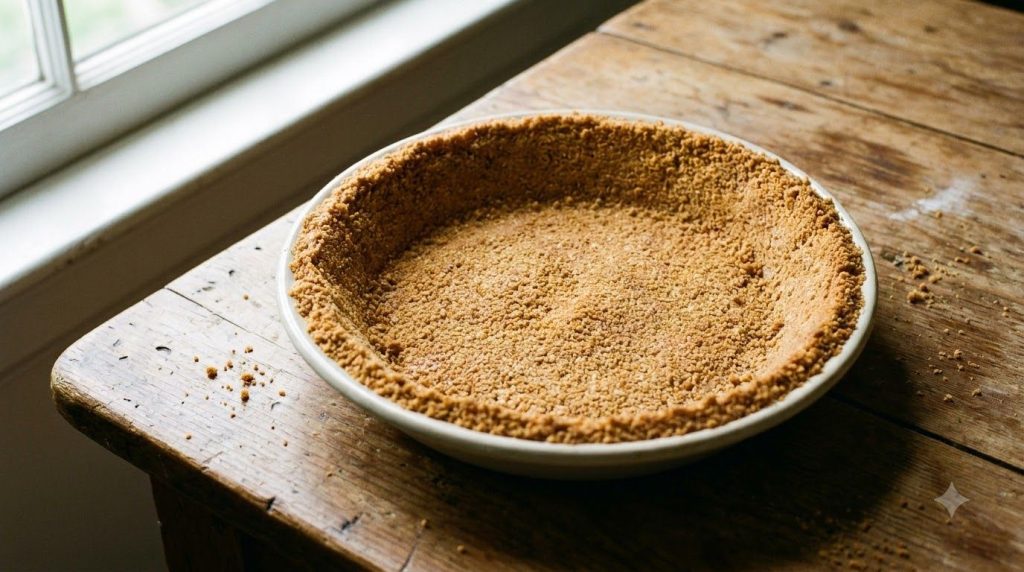
In a medium bowl, combine the cookie crumbs, melted butter, and optional granulated sugar. Mix until the crumbs are evenly moistened and resemble wet sand. Press the mixture firmly and evenly into the bottom and up the sides of a 9-inch pie plate. You can use the bottom of a glass or your knuckles to achieve a compact crust. Place the pie crust in the freezer for at least 15 minutes while you prepare the filling to help it set.
-
Whip the Cream Cheese:
In a large mixing bowl, beat the softened cream cheese with an electric mixer on medium speed until smooth and creamy, about 2-3 minutes. Scrape down the sides of the bowl as needed. Gradually add the powdered sugar and vanilla extract, beating until well combined and fluffy.
-
Prepare Your Flavoring (if applicable):
Depending on your chosen pie flavor (e.g., mixing in peanut butter, pumpkin puree, or instant pudding powder), you would incorporate it into the cream cheese mixture at this stage. (See ‘Variations & Substitutions’ for specific flavor ideas).
-
Whip the Heavy Cream:
In a separate, clean, cold bowl (if not using thawed whipped topping), whip the cold heavy cream on high speed until stiff peaks form. Be careful not to over-whip, or it will become grainy.
-
Combine Filling & Chill:
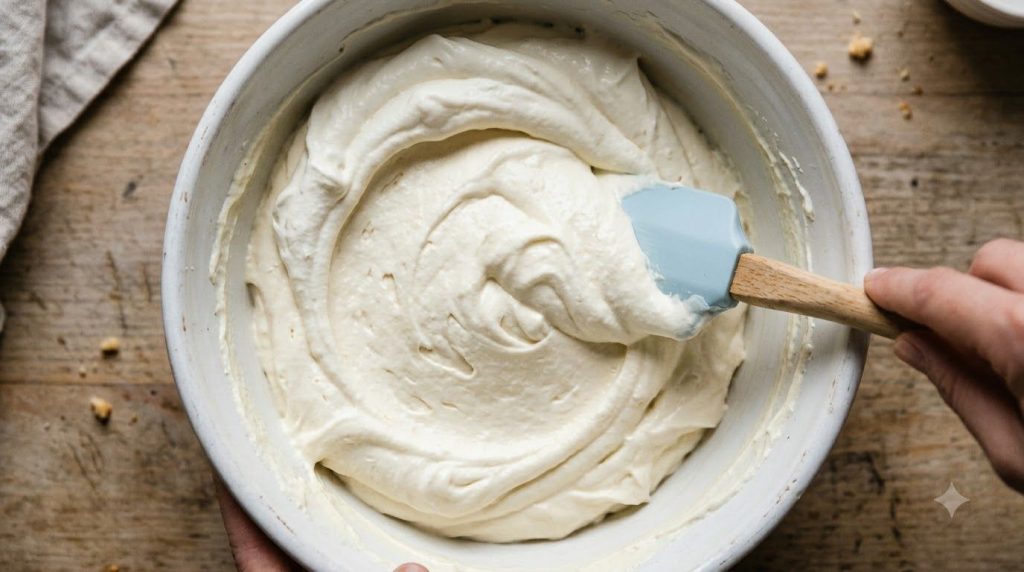
Gently fold the whipped cream (or thawed whipped topping) into the cream cheese mixture until just combined. Be careful not to overmix, which can deflate the whipped cream. Pour the filling into the prepared chilled crust, spreading it evenly with a spatula. Cover the pie loosely with plastic wrap.
-
Chill Thoroughly:
Refrigerate the pie for at least 4 hours, or preferably overnight, to allow the filling to set completely. A well-chilled pie will slice cleanly and hold its shape.
-
Garnish and Serve:
Before serving, remove the pie from the refrigerator. Garnish with your desired toppings (whipped cream, chocolate shavings, fresh fruit, crushed candy, etc.). Slice and enjoy!
Pro Tips for the Best Results
- Soften Cream Cheese Properly: For a lump-free filling, always ensure your cream cheese is at true room temperature. You can cut it into smaller cubes to speed up the process.
- Chill Your Bowl and Whisk: For whipping heavy cream, chill your mixing bowl and whisk attachment in the freezer for 10-15 minutes beforehand. This helps the cream whip faster and achieve stiffer peaks.
- Don’t Skimp on Chilling Time: This is crucial! A minimum of 4 hours is essential, but overnight chilling is best for a firm, easy-to-slice pie.
- Press Crust Firmly: A well-packed crust will hold its shape better and prevent crumbling when sliced.
- Use Quality Ingredients: Since there’s no baking, the flavors of your ingredients really shine. Opt for good quality chocolate, fresh cream, and flavorful extracts.
- Garnish Just Before Serving: Add whipped cream, fresh fruit, or other delicate toppings right before you plan to serve the pie to keep them looking fresh and vibrant.
- Clean Slices: For perfectly clean slices, dip your knife in hot water and wipe it clean between each cut.
Common Mistakes to Avoid
- Not Softening Cream Cheese: This leads to a lumpy filling that won’t be smooth and creamy.
- Under-Chilling the Pie: The most common mistake! If the pie isn’t chilled long enough, the filling will be too soft and runny, making it difficult to slice and serve.
- Over-Whipping Heavy Cream: Whipped cream can quickly turn into butter if over-whipped. Watch it closely and stop as soon as stiff peaks form.
- Overmixing After Adding Whipped Cream: Once the whipped cream is folded in, mix just until combined. Overmixing will deflate the air and make the pie less airy.
- Soggy Crust: Not pressing the crust firmly enough or adding a very wet filling to a crust that hasn’t been chilled can lead to a soggy bottom.
Variations & Substitutions
Here’s how you can transform the basic no-bake pie into the six delightful flavors from our guide:
- Butterfinger No-Bake Pie: After combining the cream cheese mixture and whipped cream, gently fold in about 1 cup (150g) of crushed Butterfinger candy bars. Reserve some for topping.
- Pumpkin No-Bake Pie: Reduce vanilla to ½ teaspoon. To the cream cheese mixture, add ½ to ¾ cup (120-180g) canned pumpkin puree, 1 teaspoon pumpkin pie spice, and an extra ¼ cup (30g) powdered sugar to taste. You can also mix in a packet of instant vanilla pudding mix for extra stability. Top with whipped cream and a sprinkle of cinnamon.
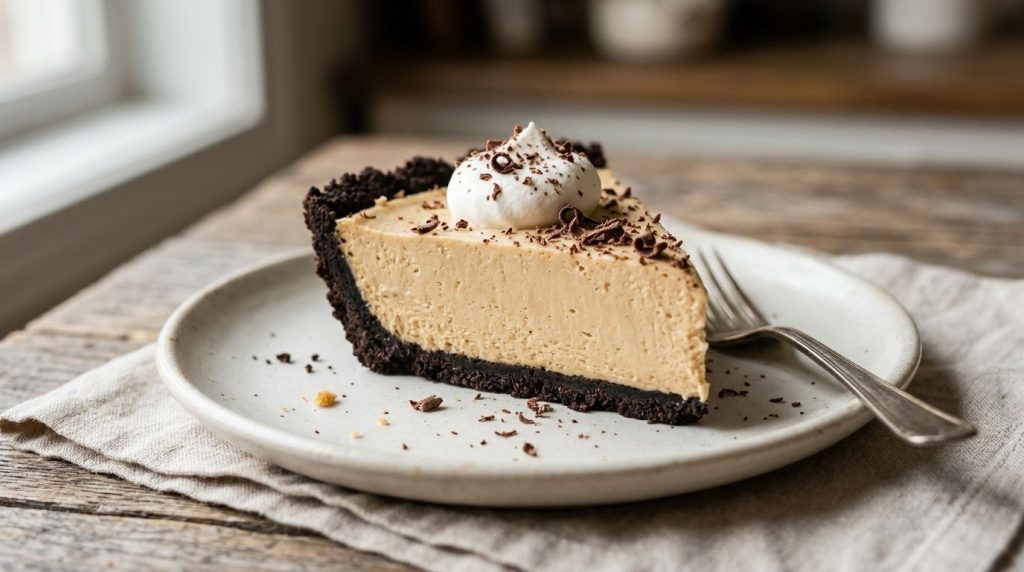
- Peanut Butter No-Bake Pie: To the cream cheese mixture, add ½ to ¾ cup (120-180g) creamy peanut butter. You may want to slightly increase the powdered sugar to balance the peanut butter’s richness. Top with chocolate shavings, chopped peanuts, or a drizzle of chocolate sauce.
- Grasshopper No-Bake Pie: For the filling, in addition to vanilla, add 1-2 teaspoons of mint extract (or 2-3 tablespoons of crème de menthe for an adult version). Add a few drops of green food coloring for a vibrant hue. You can also fold in ½ cup (90g) crushed chocolate cream cookies or chocolate chips. Top with chocolate shavings.
- Chocolate Pudding No-Bake Pie: After whipping the cream cheese, beat in 1 package (3.9 oz / 110g) instant chocolate pudding mix (the powder, not prepared pudding) and about ½ cup (60g) extra powdered sugar. Fold in the whipped cream. Top with chocolate curls or chocolate syrup.
- Strawberry Cheesecake No-Bake Pie: Reduce vanilla to ½ teaspoon. Fold in ½ cup (120g) strawberry puree (from fresh or frozen strawberries, blended) or strawberry jam into the cream cheese mixture. Top with fresh sliced strawberries and a dollop of whipped cream.
Serving Suggestions
No-bake pies are often a dessert all on their own, but a few additions can elevate the experience:
- Coffee or Tea: A warm cup of coffee, espresso, or a soothing herbal tea makes a perfect companion for a rich, chilled pie.
- Fresh Berries: Even with non-fruit pies, a side of fresh raspberries or blueberries adds a bright contrast.
- Ice Cream: A small scoop of vanilla bean ice cream can be a delicious addition, especially with a chocolate or peanut butter pie.
- Sauces: A drizzle of warm chocolate fudge, caramel sauce, or a berry coulis can add another layer of flavor and visual appeal.
Storage & Reheating
- Refrigerator: Store any leftover no-bake pie loosely covered with plastic wrap or in an airtight container in the refrigerator for up to 3-4 days. The crust may soften slightly over time.
- Freezer: Most no-bake pies freeze wonderfully. For best results, freeze the pie uncovered until firm (about 2 hours), then wrap it tightly in several layers of plastic wrap and then aluminum foil. It can be stored in the freezer for up to 1 month.
- Thawing: To thaw, unwrap the frozen pie and transfer it to the refrigerator for several hours or overnight until defrosted.
- Reheating: No-bake pies are served chilled, so no reheating is needed!
FAQ
Can I make no-bake pies ahead of time?
Absolutely! In fact, most no-bake pies benefit from being made a day in advance to allow ample chilling time for the filling to fully set and for flavors to meld. This makes them perfect for entertaining.
Why is my no-bake pie runny?
The most common reasons for a runny no-bake pie are insufficient chilling time, not softening the cream cheese enough (leading to poor emulsification), or over-folding the whipped cream, which deflates it and reduces stability.
Can I use a store-bought crust?
Yes, you can definitely use a pre-made graham cracker or cookie crust from the store. This saves a step and makes the process even quicker!
What can I substitute for heavy cream?
You can use a thawed frozen whipped topping (like Cool Whip) as a convenient substitute for fresh whipped cream. For a dairy-free option, look for plant-based whipping creams that perform similarly.
How do I prevent a soggy crust?
Ensure your crust is well-compacted. Chilling the crust in the freezer for 15-30 minutes before adding the filling can also help create a barrier. If your filling is particularly wet, you might brush the inside of the crust with a thin layer of melted chocolate or white chocolate and let it set before adding the filling.
Are these pies suitable for summer?
Yes! No-bake pies are a fantastic choice for summer because they don’t require turning on your oven, keeping your kitchen cool. They are also wonderfully refreshing when served chilled.
Can I make this recipe dairy-free?
Yes, with a few substitutions. Use dairy-free cream cheese alternatives, plant-based whipping cream (like coconut cream or almond-based), and check your cookie crumbs and other add-ins to ensure they are dairy-free.
Recipe Card: Classic No-Bake Pie Base
This recipe card provides a foundation for creating many types of no-bake pies. Adjust flavorings and toppings as desired.
- Recipe Name: Classic No-Bake Pie Base
- Short Description: A simple and versatile base recipe for creating a wide variety of creamy, chilled no-bake pies with minimal effort.
- Prep Time: 20 minutes
- Cook Time: 0 minutes
- Total Time: 4 hours 20 minutes (including chilling)
- Servings: 8-10 slices
- Course: Dessert
- Cuisine: American
- Cooking Method: No-Bake, Chilling
Ingredients:
For the Crust:
- 1 ½ cups (150g) graham cracker crumbs (or other cookie crumbs)
- ¼ cup (60g) unsalted butter, melted
- 2 tbsp (25g) granulated sugar (optional)
For the Filling:
- 8 ounces (226g) full-fat cream cheese, softened
- ½ cup (60g) powdered sugar, sifted
- 1 tsp (5ml) vanilla extract
- 1 cup (240ml) cold heavy cream (or 8 oz / 226g thawed frozen whipped topping)
Instructions:
- Prepare the Crust: In a medium bowl, combine cookie crumbs, melted butter, and optional granulated sugar. Mix until moistened. Press firmly into a 9-inch pie plate. Chill in the freezer for 15 minutes.
- Whip Cream Cheese Mixture: In a large bowl, beat softened cream cheese until smooth. Add powdered sugar and vanilla; beat until fluffy.
- Whip Heavy Cream: In a separate, cold bowl, whip cold heavy cream until stiff peaks form.
- Combine Filling: Gently fold the whipped cream into the cream cheese mixture until just combined.
- Assemble & Chill: Pour filling into the chilled crust, spreading evenly. Cover loosely with plastic wrap. Refrigerate for at least 4 hours, or overnight, until set.
- Garnish & Serve: Garnish with desired toppings just before serving.
Notes:
This is a foundational recipe. To create specific flavors like Butterfinger, Pumpkin, Peanut Butter, Grasshopper, Chocolate Pudding, or Strawberry Cheesecake, incorporate additional flavorings and add-ins into Step 2 or 4 of the filling process. For example, add peanut butter with the cream cheese, or fold in crushed candy bars before chilling. See the ‘Variations & Substitutions’ section of the article for detailed ideas. Ensure proper chilling time for best results.
Storage:
Store leftover pie in an airtight container in the refrigerator for up to 3-4 days. Can be frozen for up to 1 month; thaw in the refrigerator.
Nutrition:
Nutrition information is an estimate and may vary depending on the ingredients and brands used.